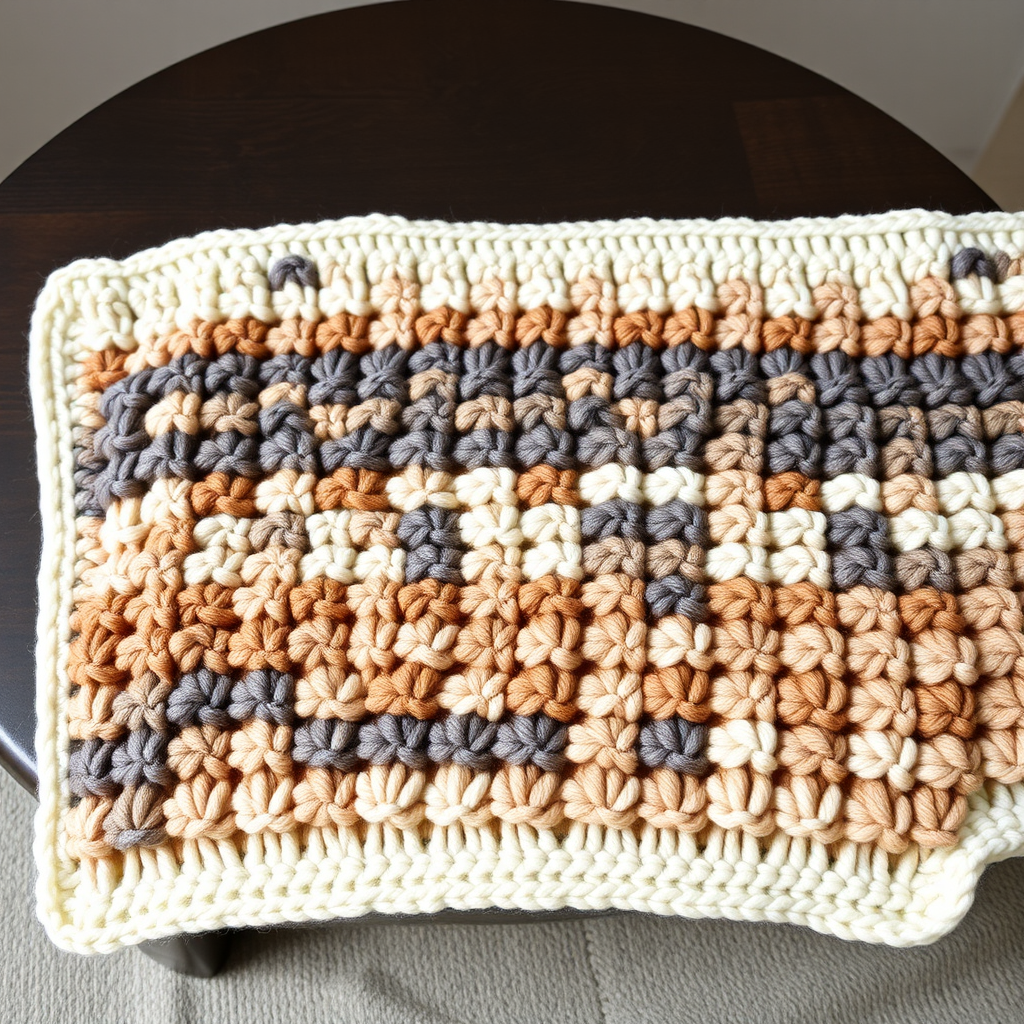
Verdant Canopy C2C Blanket Free Pattern – A Knitted Forest Floor Throw

Verdant Canopy C2C Blanket Free Pattern – A Knitted Forest Floor Throw
Wrap yourself in the dappled light of an ancient woodland with this corner-to-corner knitted blanket, where mossy greens and earthy browns create a lush, textured landscape. This cozy throw is a meditative project that brings the serene beauty of a forest floor into your home. The corner-to-corner (C2C) technique is surprisingly simple—perfect for beginners who want to create something truly spectacular—and the result is a thick, warm, and wonderfully textured blanket that looks like a pixelated forest scene.
This pattern uses basic knit stitches (knit, knit front and back, knit two together) and simple color changes to build a diagonal square. The garter stitch ridges create a bumpy, cozy fabric that feels like a warm woolen hug. Whether you're an experienced knitter looking for a relaxing project or a beginner ready to tackle your first blanket, this pattern will guide you through every step with clarity and ease.
Materials Needed
Before you begin, gather the following supplies. This project is all about the yarn—choose soft, worsted-weight yarns in forest-inspired shades for the best effect.
Yarn
- Color A – Deep Forest Green: Approximately 500-600 yards (used for the main body and border)
- Color B – Moss: Approximately 300-400 yards
- Color C – Fern: Approximately 300-400 yards
- Color D – Bark Brown: Approximately 300-400 yards
- Color E – Cream: Approximately 200-300 yards
Total yarn needed: 1800-2200 yards of worsted weight yarn. Feel free to substitute colors to match your own forest vision—any earthy, natural tones will work beautifully.
Needles & Notions
- Knitting Needles: US 8 (5.0 mm) straight or circular needles (circular is recommended for larger projects, but straight works fine for this size). Use the size needed to obtain gauge.
- Crochet Hook: US 8 (5.0 mm) or similar size, for picking up stitches and adding the optional border.
- Stitch Markers: Optional but helpful for keeping track of color changes.
- Tapestry Needle: For weaving in ends.
- Scissors
Gauge
4 stitches and 6 rows = 4 inches in garter stitch. Gauge is not critical for this project, but it will affect the final size of your blanket. If you want a larger or smaller throw, simply adjust the number of stitches you increase to (see instructions below).
Step-by-Step Instructions
This blanket is worked diagonally from corner to corner using increases and decreases, creating a square shape. Each "block" is a series of garter stitch ridges. The color changes create a pixelated forest scene. Follow these instructions carefully, and you'll have a beautiful forest floor throw in no time.
Abbreviations
- K = knit
- Kfb = knit front and back (increase by 1 stitch)
- K2tog = knit two together (decrease by 1 stitch)
- Sl = slip (not used in this pattern, but good to know)
- RS = right side (the front of the work)
- WS = wrong side (the back of the work)
Foundation
Cast on 3 stitches with Color A (Deep Forest Green). This is the starting corner of your blanket. Don't worry if it looks tiny—it will grow quickly!
Increase Section (Rows 1-40)
This section builds the first corner of your blanket. You'll increase by 1 stitch on every right-side row, which creates a diagonal line.
Row 1 (RS): Kfb, knit to end of row. (You now have 4 stitches on your needle.)
Row 2 (WS): Knit all stitches.
Repeat Rows 1-2, increasing by 1 stitch every RS row, until you have 40 stitches on your needle. You will have 20 garter ridges on each side (a garter ridge is the bumpy line created by two rows of knitting).
Tip: Place a stitch marker at the beginning of each RS row to help you keep track of your increases.
Color Block Pattern
Now you'll begin the fun part—adding color! Continue the increase pattern (Kfb on RS rows, knit all stitches on WS rows) until you reach your desired width. For a standard throw, aim for 80 stitches on your needle. This will give you a blanket that's approximately 40 inches wide (based on gauge).
Change colors according to the sequence below. Each color block is 10 rows (5 garter ridges). To change colors, simply drop the old color and pick up the new one at the beginning of a RS row. Leave a 6-inch tail to weave in later.
- Rows 41-50: Color B (Moss)
- Rows 51-60: Color C (Fern)
- Rows 61-70: Color A (Deep Forest Green)
- Rows 71-80: Color D (Bark Brown)
- Rows 81-90: Color E (Cream)
- Rows 91-100: Color A (Deep Forest Green)
- Rows 101-110: Color C (Fern)
- Rows 111-120: Color B (Moss)
- Rows 121-130: Color D (Bark Brown)
- Rows 131-140: Color A (Deep Forest Green)
Continue alternating colors in this manner, creating a random, organic patchwork of forest hues. You can follow the sequence above or make up your own—the beauty of this pattern is its flexibility. For a more natural look, vary the lengths of your color blocks (e.g., 8 rows of one color, 12 of another).
Adding Tree Motifs (Optional)
To make your forest scene more interesting, you can introduce small "tree" motifs. Here's how:
While working a section in Color A (Deep Forest Green), knit a vertical line of Color D (Bark Brown) for a few rows. For example, on Row 1 of a Color A section, knit 20 stitches in Color A, then 5 stitches in Color D, then continue in Color A to the end of the row. On the next row, knit the same 5 stitches in Color D (you'll need to carry the Color A yarn along the back). Repeat for 6-8 rows, then drop Color D and continue with Color A. This creates a simple tree trunk. You can add a few of these throughout the blanket for extra visual interest.
Important: When changing colors mid-row, twist the yarns around each other to prevent holes.
Decrease Section
Once your blanket reaches the desired width (e.g., 80 stitches), it's time to start decreasing. This will create the opposite corner of your square.
Row 1 (RS): K1, K2tog, knit to end of row. (You'll decrease by 1 stitch.)
Row 2 (WS): Knit all stitches.
Repeat Rows 1-2, decreasing by 1 stitch every RS row, until you have 3 stitches left on your needle. Bind off loosely. Cut yarn, leaving a 6-inch tail.
Tip: As you decrease, continue following your color sequence. The blanket will naturally form a square shape.
Finishing
Now it's time to make your blanket look polished and professional.
Step 1: Weave in all ends. Use a tapestry needle to weave in the yarn tails from your color changes and cast-on/bind-off edges. Weave them through the back of the work, going in several directions to secure them firmly.
Step 2: Block gently. Lay your blanket flat on a clean surface. Spray it lightly with water (or use a steam iron held a few inches above the fabric—don't press directly). Gently stretch it to shape, making sure the corners are square. Let it dry completely.
Step 3: Add a crochet border (optional but recommended). Using your crochet hook and Color A (Deep Forest Green), work a single crochet border around the entire edge of the blanket. Here's how:
- Start at any corner. Insert your hook into the edge of the blanket, yarn over, and pull up a loop.
- Yarn over and pull through both loops on the hook. This is one single crochet.
- Work single crochet evenly around the entire edge, working 3 single crochet into each corner to keep the corners flat.
- When you reach the starting point, slip stitch into the first single crochet to join. Cut yarn and weave in the end.
This border gives the blanket a clean, finished look and helps stabilize the edges.
Final Thoughts
Your Verdant Canopy C2C Blanket is complete! This project is perfect for cozy evenings, mindful crafting, and creating a beautiful heirloom piece. The corner-to-corner technique is addictive—once you master it, you'll want to make blankets in every color palette imaginable. Enjoy your forest floor throw, and happy knitting!