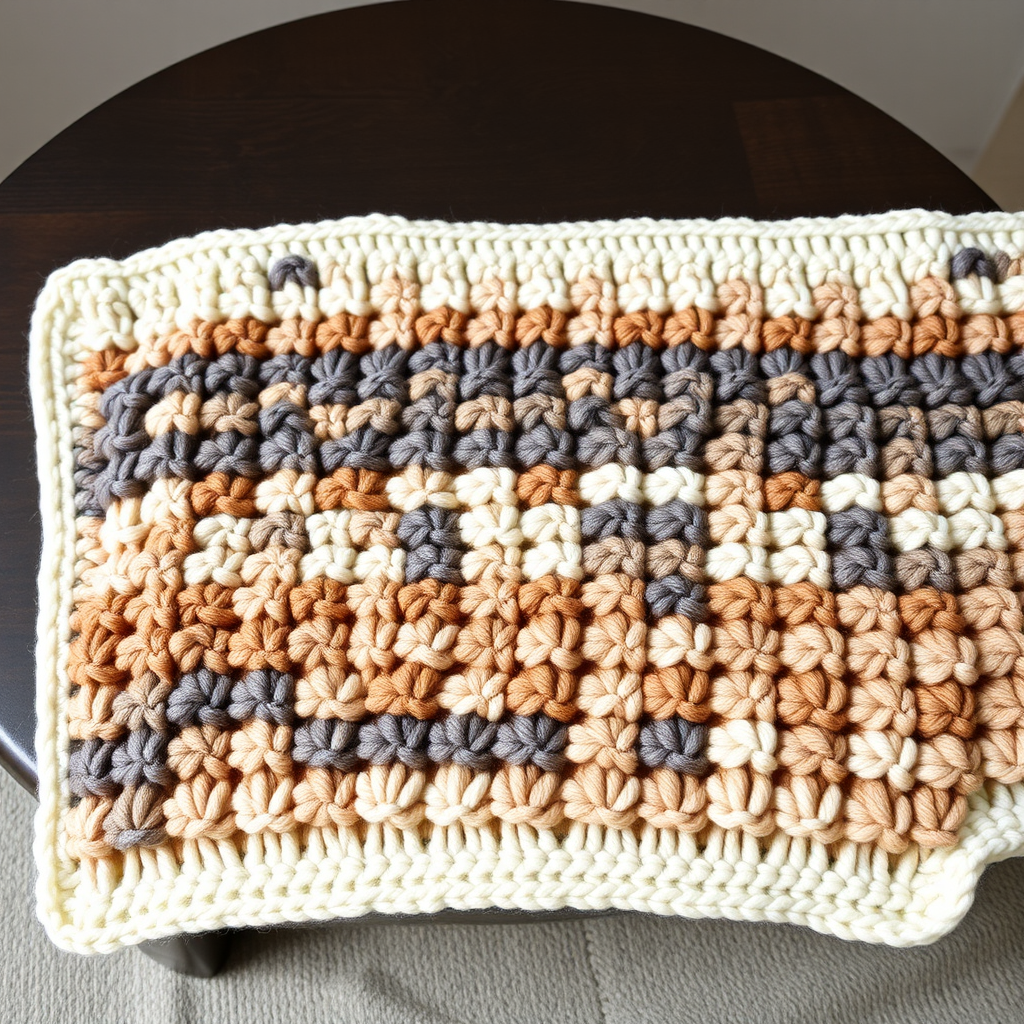
Celestial Drift Chunky Knit Throw Free Pattern

Celestial Drift Chunky Knit Throw: A Free Pattern for a Cozy Night Sky
Imagine wrapping yourself in a blanket that feels like a cloud and looks like a starry night sky. The Celestial Drift Chunky Knit Throw is exactly that—a plush, oversized knit blanket designed to bring a touch of modern, celestial magic to your cozy evenings. With its alternating bands of deep navy, soft silver, and muted lavender, this throw features a beautiful mix of smooth stockinette, delicate eyelet ripples, and a woven-like dash texture. Whether you're an experienced knitter looking for a quick weekend project or a confident beginner ready for a new challenge, this free pattern will guide you through creating a stunning, handmade centerpiece for your home.
This pattern is not just about staying warm; it's about creating a piece of art. The cool, celestial color palette evokes the quiet beauty of a night sky, while the chunky, super bulky yarn ensures your project works up quickly and feels incredibly luxurious. Let’s dive into the materials and steps you'll need to craft your very own Celestial Drift Throw.
Materials Needed
Before you begin, gather the following materials to ensure a smooth and enjoyable knitting experience. The quality of your yarn will significantly impact the final look and feel of your throw, so choose soft, high-quality fibers for the best results.
- Yarn: Super bulky weight yarn (size 6) in three colors: deep navy, soft silver, and muted lavender. You will need approximately 1200 yards total. (A great option is a blend of wool and acrylic for softness and durability.)
- Needle: US Size 13 (9 mm) circular knitting needle with a 32-inch cable. The long cable is essential for holding the large number of stitches comfortably.
- Other Tools: A tapestry needle for weaving in ends, a pair of scissors, and stitch markers (optional, but helpful for keeping track of pattern repeats).
Gauge & Finished Size
- Gauge: 8 stitches and 10 rows = 4 inches in stockinette stitch (lightly stretched). Getting the correct gauge is crucial for achieving the right dimensions, though this pattern is forgiving if you are slightly off.
- Finished Size: Approximately 45 x 60 inches. This is a perfect size for draping over a sofa or the foot of a bed.
Step-by-Step Instructions
This pattern is a wonderful exploration of texture. It uses a simple stitch multiple of 6 + 2 stitches, making it easy to memorize and relaxing to knit. Follow the instructions carefully, and you'll see the celestial design come to life row by row.
Abbreviations
- CO: Cast On
- K: Knit
- P: Purl
- K2tog: Knit two stitches together (decrease)
- YO: Yarn Over (increase, creates an eyelet hole)
- sl: Slip stitch (purlwise unless otherwise stated)
- wyif: With Yarn In Front (hold yarn to the front of work when slipping)
- rep: Repeat
- st(s): Stitch(es)
- RS: Right Side
- WS: Wrong Side
Getting Started: The Navy Base
We'll begin with a solid foundation in deep navy, creating a smooth, calming base that anchors the entire design.
Cast On: With your navy yarn, CO 92 stitches onto your circular needle. Ensure your cast-on is not too tight, as this will make the first row difficult to knit.
- Row 1 (RS): With navy, K all stitches.
- Row 2 (WS): With navy, P all stitches.
- Row 3 (RS): With navy, K all stitches.
- Row 4 (WS): With navy, P all stitches.
You have now completed the first navy section. This stockinette stitch block will form a smooth, solid band at the bottom of your throw.
Creating the Silver Eyelet Ripple
Now, we introduce the soft silver yarn and the first of our celestial textures: a delicate eyelet ripple that mimics the twinkling of stars. When you switch colors, simply tie the new yarn to the old one at the end of a row, or leave a tail to weave in later.
- Row 5 (RS): Switch to silver yarn. K all stitches.
- Row 6 (WS): P all stitches.
- Row 7 (RS): K1, *K2tog, YO, K1, YO, K2tog, K1; rep from * to last st, K1. (This is the magic row that creates the ripple effect. The YOs create small holes, while the K2togs pull the fabric together.)
- Row 8 (WS): P all stitches.
- Row 9 (RS): K all stitches.
- Row 10 (WS): P all stitches.
You've just completed the silver section. The eyelet pattern should be visible as a series of small, even holes that form a subtle wave across the band.
Adding the Lavender Dash Texture
Next, we'll switch to the muted lavender yarn to create a woven-like dash texture. This section adds a beautiful, tactile contrast to the smooth navy and airy silver bands.
- Row 11 (RS): Switch to lavender yarn. K all stitches.
- Row 12 (WS): P all stitches.
- Row 13 (RS): K1, *sl 1 wyif, K1; rep from * to last st, K1. (Remember, when you slip a stitch with the yarn in front, you are creating a horizontal strand of yarn across the front of the work, which forms the 'dash' texture.)
- Row 14 (WS): P1, *sl 1 wyif, P1; rep from * to last st, P1. (This row is worked on the wrong side, so the slipped stitches will create the same dash effect on the right side.)
- Row 15 (RS): K all stitches.
- Row 16 (WS): P all stitches.
Your lavender section is complete. You should see a lovely, subtle woven texture that adds depth to the blanket.
Building the Pattern: The Repeat
Now that you have completed the first set of color bands, you will repeat the sequence to build the length of the throw. This is where the pattern becomes rhythmic and meditative.
- Row 17 (RS): Switch to navy yarn. K all stitches.
- Row 18 (WS): P all stitches.
- Row 19 (RS): K all stitches.
- Row 20 (WS): P all stitches.
Repeat Rows 5-20 two more times. This means you will knit the silver, lavender, and navy sections two more times. After completing this, repeat Rows 5-10 once more to add a final silver band.
Finishing Touches: The Final Navy Border & Bind Off
To complete the design symmetrically, we will end with a navy section that mirrors the one we started with. This gives the blanket a polished, balanced look.
- Final Navy Section: Work Rows 1-4 in navy yarn.
- Bind Off: Bind off loosely in knit on the RS with navy yarn. To ensure a stretchy edge that won't pucker, bind off using a larger needle if needed, or use a simple "knit two together and pass over" method loosely.
Weaving in Ends & Blocking
Your Celestial Drift Throw is almost complete! The final steps are crucial for a professional finish.
- Weave in all ends: Use your tapestry needle to carefully weave in all loose yarn tails along the edges of the color blocks, being sure to do so on the wrong side of the work.
- Block lightly: To open up the eyelet pattern and even out your stitches, lightly block the blanket. Lay it flat on a clean surface, gently pat it into shape, and mist it with water. Allow it to dry completely before using. This step will help the eyelet ripple pattern truly shine.
Congratulations! You've created a stunning, cloud-soft throw that brings the beauty of the night sky into your home. The Celestial Drift Chunky Knit Throw is perfect for draping over your lap on a cool evening, adding a layer of texture to your decor, or gifting to a loved one. Enjoy the fruits of your labor and the cozy, celestial ambiance you've crafted with your own hands.