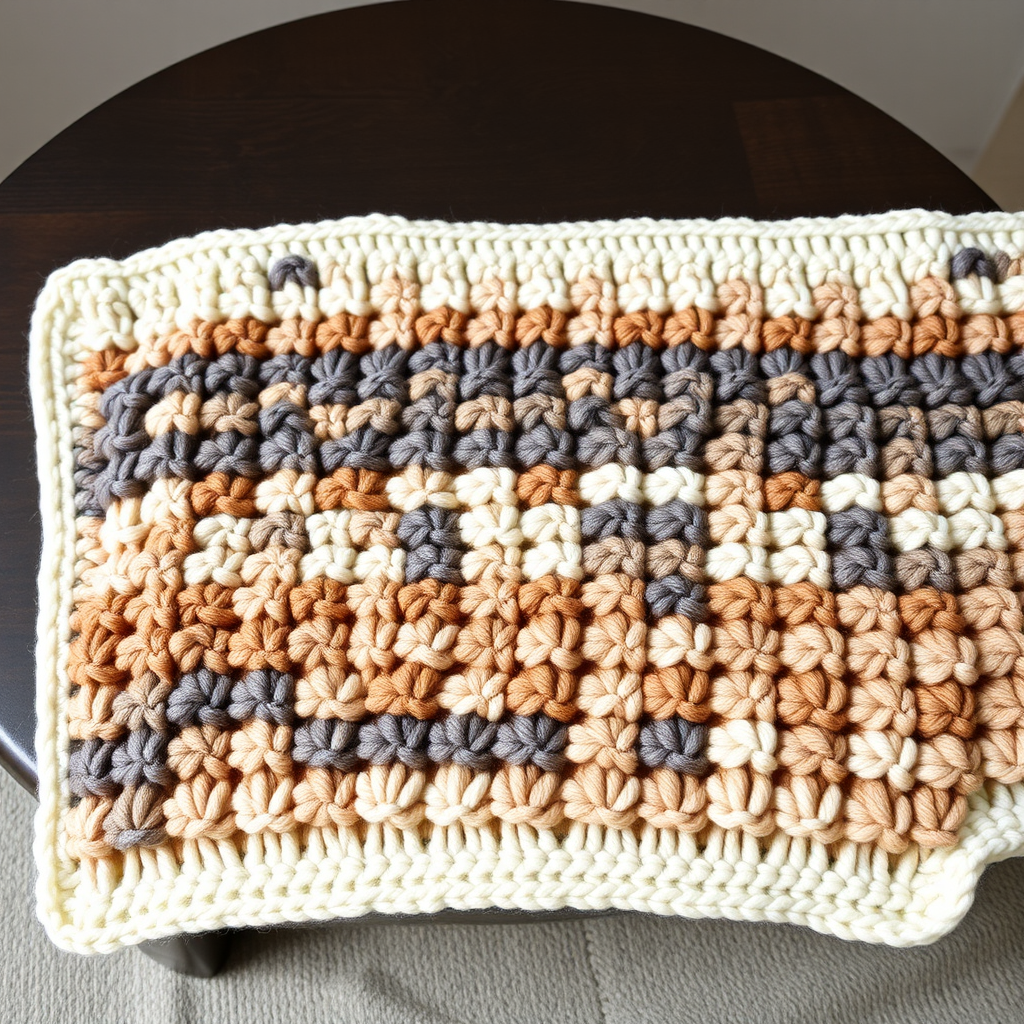
Canyon Sunset Mosaic Blanket Free Pattern – Knit a Desert Horizon Throw

Introducing the Canyon Sunset Mosaic Blanket
Wrap yourself in the warm hues of a desert sunset with this stunning mosaic knit blanket. Featuring a geometric diamond motif that evokes the layered red rocks of Sedona, this cozy throw is a meditative project that rewards you with a richly textured, heirloom-quality piece. The mosaic technique creates bold, graphic patterns by slipping stitches and working with two colors per row—it's easier than it looks and perfect for adventurous beginners ready to level up their knitting skills.
This pattern is worked flat in one piece, so there's no seaming at the end. The slipped stitches form subtle ridges that catch the light, mimicking the layered rock formations of a canyon at dusk. The finished throw measures approximately 50 inches wide and 60 inches long, making it perfect for draping over a sofa or curling up with on a cool evening.
Materials Needed
Before you begin, gather the following supplies:
- Yarn: Worsted weight yarn in 4 colors:
- Color A (Terracotta) – approx. 400 yds
- Color B (Burnt Orange) – approx. 300 yds
- Color C (Cream) – approx. 300 yds
- Color D (Deep Rust) – approx. 200 yds
- Needle: US 8 (5 mm) circular knitting needle, 32-inch or longer (circular needle is recommended to accommodate the large number of stitches)
- Other: Stitch markers (optional), tapestry needle for weaving in ends, scissors
Gauge: 18 stitches and 24 rows = 4 inches in stockinette stitch. Be sure to check your gauge before starting—if your gauge is off, your finished blanket will be a different size than specified.
Step-by-Step Instructions
Abbreviations
Familiarize yourself with these abbreviations before you begin:
- k = knit
- p = purl
- sl = slip stitch purlwise with yarn in back (unless otherwise noted)
- yo = yarn over
- k2tog = knit two together
- skpo = slip, knit, pass slipped stitch over
- RS = right side
- WS = wrong side
Setup: Cast On and Bottom Border
With Color A (Terracotta), cast on 120 stitches loosely. A long-tail cast-on works well here. Work 6 rows of garter stitch (knit every row) for the bottom border. This creates a sturdy, non-curling edge that frames the blanket beautifully.
Main Pattern
The main pattern consists of a 24-row repeat. You'll work rows 1–24 of the mosaic pattern, then repeat these rows until the blanket measures approximately 60 inches from the cast-on edge. The pattern below is written out row by row for clarity.
Row 1 (RS): With Color A, knit across.
Row 2 (WS): With Color A, purl across.
Row 3 (RS): With Color B, *k5, sl1, k3, sl1, k5, sl1, k3, sl1* repeat to end of row.
Row 4 (WS): With Color B, *p5, sl1, p3, sl1, p5, sl1, p3, sl1* repeat to end of row.
Row 5 (RS): With Color A, knit across.
Row 6 (WS): With Color A, purl across.
Row 7 (RS): With Color C, *k3, sl1, k5, sl1, k3, sl1, k5, sl1* repeat to end of row.
Row 8 (WS): With Color C, *p3, sl1, p5, sl1, p3, sl1, p5, sl1* repeat to end of row.
Row 9 (RS): With Color A, knit across.
Row 10 (WS): With Color A, purl across.
Row 11 (RS): With Color D, *k1, sl1, k5, sl1, k3, sl1, k5, sl1, k1* repeat to end of row.
Row 12 (WS): With Color D, *p1, sl1, p5, sl1, p3, sl1, p5, sl1, p1* repeat to end of row.
Row 13 (RS): With Color A, knit across.
Row 14 (WS): With Color A, purl across.
Row 15 (RS): With Color B, *k3, sl1, k5, sl1, k3, sl1, k5, sl1* repeat to end of row.
Row 16 (WS): With Color B, *p3, sl1, p5, sl1, p3, sl1, p5, sl1* repeat to end of row.
Row 17 (RS): With Color A, knit across.
Row 18 (WS): With Color A, purl across.
Row 19 (RS): With Color C, *k5, sl1, k3, sl1, k5, sl1, k3, sl1* repeat to end of row.
Row 20 (WS): With Color C, *p5, sl1, p3, sl1, p5, sl1, p3, sl1* repeat to end of row.
Row 21 (RS): With Color A, knit across.
Row 22 (WS): With Color A, purl across.
Row 23 (RS): With Color D, *k1, sl1, k5, sl1, k3, sl1, k5, sl1, k1* repeat to end of row.
Row 24 (WS): With Color D, *p1, sl1, p5, sl1, p3, sl1, p5, sl1, p1* repeat to end of row.
Repeat rows 1–24 until your blanket measures approximately 60 inches from the cast-on edge. You can adjust the length to your preference—simply stop at the end of a full repeat for a clean edge.
Finishing: Top Border and Bind Off
After completing your final pattern repeat, work 6 rows of garter stitch (knit every row) with Color A for the top border. This mirrors the bottom border and creates a balanced, finished look.
Bind off loosely—if your bind-off is too tight, the edge will pucker. A stretchy bind-off method like the "Jeny's Surprisingly Stretchy Bind-Off" works beautifully here, or you can simply use a larger needle to bind off.
Weaving in Ends and Blocking
Weave in all loose ends with a tapestry needle, being careful to weave them into the same color yarn so they disappear into the fabric. Take your time with this step—it makes a huge difference in the finished look.
Finally, block the blanket gently. Wet blocking or steam blocking will help open up the mosaic pattern and even out the stitches, giving your blanket that crisp, professional finish. Lay it flat to dry, gently shaping it to the correct dimensions.
Tips for Success
- Keep your slipped stitches loose: When you slip a stitch, the yarn should be carried loosely across the back. If you pull too tight, the fabric will pucker.
- Use stitch markers: Place a marker every 20 stitches to help you keep track of the pattern repeats, especially if you're interrupted mid-row.
- Carry your yarns up the side: Since you're switching colors every couple of rows, you can carry the unused yarn up the side of the work rather than cutting it. Just twist the yarns at the edge to avoid long floats.
- Check your gauge: This pattern is designed for a specific gauge. If your gauge is off, adjust your needle size accordingly.
This Canyon Sunset Mosaic Blanket is a rewarding project that combines simple techniques with stunning results. The rhythmic repetition of the mosaic pattern makes it a perfect mindless knit for cozy evenings, and the finished throw will be a treasured piece for years to come. Happy knitting!