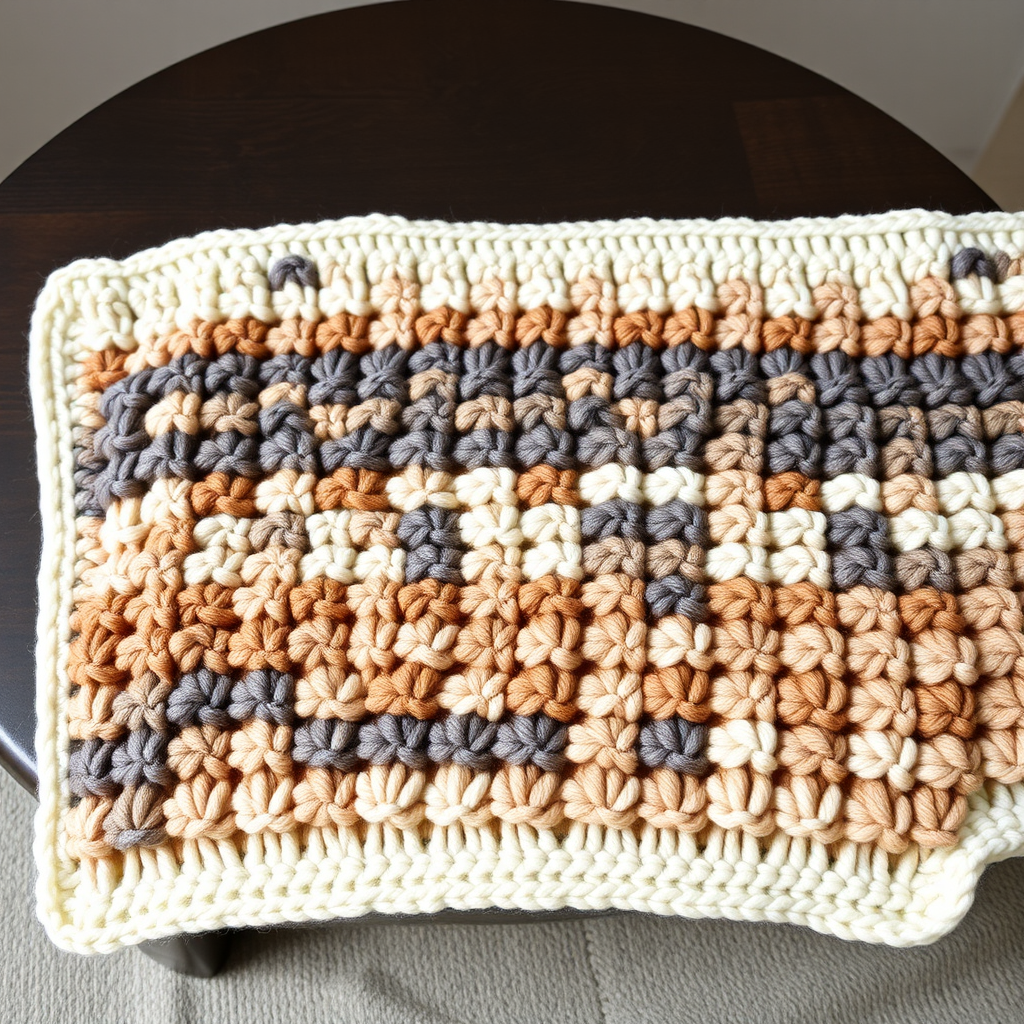
The Whispering Pines Forest Floor Blanket Free Pattern – A Knitted Mosaic of Textured Pine Needles and Ferns

The Whispering Pines Forest Floor Blanket: A Free Knitting Pattern for a Woodland-Inspired Heirloom
Imagine wrapping yourself in the quiet beauty of a sun-dappled forest floor—the soft crunch of pine needles, the delicate unfurling of fern fronds, and the earthy scent of moss after rain. That serene experience is now something you can create with your own hands. The Whispering Pines Forest Floor Blanket is a stunning knitted mosaic that captures the essence of nature in every stitch. This free pattern guides you through crafting 12 individual textured squares, each a miniature landscape inspired by woodland elements, which you then join into a cozy, heirloom-quality blanket. Whether you're an experienced knitter looking for a meditative project or a confident beginner ready for a rewarding challenge, this pattern offers a beautiful journey into textured knitting.
This isn't just a blanket; it's a tactile exploration of the forest. You'll knit raised ribbed ridges that mimic pine needles, delicate eyelet lace that echoes fern fronds, and bumpy seed stitches that resemble mossy stones. The palette of deep forest green, soft moss, heathery purple-grey, cream, and rust orange creates a rich, earthy tapestry that will add warmth and charm to any room. Let's gather our materials and begin this woodland knitting adventure.
Materials Needed
Before you begin, ensure you have all the necessary supplies. This project is wonderfully portable, as you work on individual squares, making it perfect for knitting on the go.
- Yarn: Worsted weight yarn in 5 shades: deep forest green, moss, heather, cream, and rust. You will need approximately 1800-2200 yards total. This allows for a generous, snuggly blanket. Feel free to adjust colors to your own forest palette!
- Needles: US 8 (5.0 mm) knitting needles, or the size needed to achieve the correct gauge. A circular needle (at least 32 inches long) will be helpful for the border.
- Notions: Tapestry needle for weaving in ends and seaming squares, stitch markers (optional but helpful), and a tape measure.
- Gauge: 18 stitches and 24 rows = 4 inches in stockinette stitch. Always knit a gauge swatch to ensure your finished blanket is the correct size.
Blanket Construction Overview
The Whispering Pines blanket is constructed from 12 individual squares, each measuring approximately 12x12 inches. You will arrange these squares in a 3x4 grid. Each square features a unique stitch pattern inspired by forest elements, and you'll make three of each pattern. After completing all squares, you'll seam them together using an invisible mattress stitch, then finish with a thick, cozy ribbed border. This modular approach makes the project manageable and allows you to work on one square at a time.
Step-by-Step Instructions
Square 1: Pine Needle Ridge (Make 3)
This square features a beautiful ribbed border and a central panel with delicate eyelet ridges that mimic the texture of fallen pine needles.
- Cast on 54 stitches.
- Ribbed Border:
- Row 1 (Right Side): *K2, P2*; repeat from * to end of row.
- Row 2 (Wrong Side): *P2, K2*; repeat from * to end of row.
- Repeat Rows 1 and 2 until the ribbing measures 2 inches from the cast-on edge.
- Center Panel: Work in stockinette stitch (knit on the right side, purl on the wrong side) for 6 inches. To create the 'pine needle' texture, work a special eyelet row every 4th row:
- Pine Needle Row (Right Side): K1, *yo, k2tog*; repeat from * to the last stitch, K1. (This creates a row of small, decorative holes.)
- Work the following 3 rows in plain stockinette stitch.
- Repeat this 4-row sequence until the center panel measures 6 inches.
- Finishing Border: Repeat the same 2x2 ribbing pattern from the beginning for another 2 inches.
- Bind off loosely in pattern (knit the knits and purl the purls).
Square 2: Fern Frond Lace (Make 3)
This square features a delicate, airy lace pattern that beautifully captures the shape of fern fronds, framed by a simple garter stitch border.
- Cast on 54 stitches.
- Garter Border: Knit every row for 4 rows.
- Lace Pattern: Work the following 4-row repeat until the piece measures 8 inches from the garter border.
- Row 1 (Right Side): K3, *yo, k2tog, k4*; repeat from * to the last 3 stitches, K3.
- Row 2 (Wrong Side): Purl all stitches.
- Row 3 (Right Side): K3, *k2tog, yo, k4*; repeat from * to the last 3 stitches, K3.
- Row 4 (Wrong Side): Purl all stitches.
- Finishing Border: Knit every row for 4 rows.
- Bind off knitwise.
Square 3: Mossy Pebble Stitch (Make 3)
This square uses a classic seed stitch to create a bumpy, textured surface that resembles a patch of soft, mossy stones. It's a wonderfully tactile and easy pattern.
- Cast on 54 stitches.
- Ribbed Border:
- Row 1 (Right Side): *K1, P1*; repeat from * to end of row.
- Row 2 (Wrong Side): *P1, K1*; repeat from * to end of row.
- Repeat Rows 1 and 2 until the ribbing measures 2 inches.
- Center Panel: Work in a seed stitch pattern for 8 inches. This is a simple 2-row repeat:
- Row 1 (Right Side): *K1, P1*; repeat from * to end of row.
- Row 2 (Wrong Side): *K1, P1*; repeat from * to end of row. (This creates the bumpy texture by alternating knits and purls on every row.)
- Finishing Border: Repeat the same 1x1 ribbing from the beginning for another 2 inches.
- Bind off in pattern.
Square 4: Autumn Leaf Drop (Make 3)
This square features a simple, elegant leaf motif in the center, surrounded by a smooth stockinette field. It's a great introduction to simple increases and decreases.
- Cast on 54 stitches.
- Base: Work in stockinette stitch (knit on the right side, purl on the wrong side) for 2 inches.
- Leaf Motif: On the next right-side row, begin the leaf chart on the center 20 stitches. Keep the side stitches (17 on each side) in stockinette.
- Leaf Chart (worked over 20 rows): The leaf is shaped by increasing to 22 stitches and then decreasing back to 20.
- Row 1: On the center 20 stitches: K9, M1 (make one), K2, M1, K9. (22 stitches)
- Row 2 and all even rows: Purl all center stitches.
- Row 3: K8, M1, K1, K2tog, yo, K1, yo, ssk, K1, M1, K8.
- Row 5: K7, M1, K2, K2tog, yo, K1, yo, ssk, K2, M1, K7.
- Row 7: K6, M1, K3, K2tog, yo, K1, yo, ssk, K3, M1, K6.
- Row 9: K5, M1, K4, K2tog, yo, K1, yo, ssk, K4, M1, K5.
- Row 11: K4, M1, K5, K2tog, yo, K1, yo, ssk, K5, M1, K4.
- Row 13: K3, M1, K6, K2tog, yo, K1, yo, ssk, K6, M1, K3.
- Row 15: K2, M1, K7, K2tog, yo, K1, yo, ssk, K7, M1, K2.
- Row 17: K1, M1, K8, K2tog, yo, K1, yo, ssk, K8, M1, K1.
- Row 19: K9, K2tog, yo, K1, yo, ssk, K9. (20 stitches)
- Row 20: Purl all center stitches.
- Leaf Chart (worked over 20 rows): The leaf is shaped by increasing to 22 stitches and then decreasing back to 20.
- Finishing: After completing the leaf chart, continue in stockinette stitch for another 2 inches.
- Bind off knitwise.
Assembly: Seaming Your Squares
Once all 12 squares are complete, it's time to bring your forest floor together.
- Arrange the Squares: Lay out your squares in a 3x4 grid. Alternate the patterns and colors to create a balanced, harmonious mosaic. Play with the placement until you're happy with the overall look.
- Seam the Squares: Use the mattress stitch to sew the squares together. This creates a nearly invisible, flat seam. With right sides facing up, thread your tapestry needle with a length of yarn. Working from the bottom up, pick up the horizontal bars between the first and second stitches on each edge, alternating sides. Gently pull the yarn taut to close the seam. Repeat for all vertical and horizontal seams.
Adding the Border
The border frames your beautiful mosaic and gives the blanket a polished, cozy finish.
- Pick Up Stitches: With the right side facing you and using your circular needle, pick up and knit stitches evenly around the entire blanket. You will need approximately 240 stitches per side. Place a stitch marker at each corner to help you keep track.
- Knit the Ribbing: Work in a 2x2 ribbing pattern in the round:
- Round 1: *K2, P2*; repeat from * around the entire blanket.
- Repeat this round until the border measures 4 inches.
- Bind Off: Bind off loosely in pattern (knit the knits and purl the purls) to ensure the edge remains stretchy.
Finishing Touches
- Weave in Ends: Use your tapestry needle to carefully weave in all loose yarn ends on the wrong side of the blanket.
- Blocking: This is a crucial step! Blocking will even out your stitches, open up the lace patterns, and give your blanket a professional, polished look. Soak the blanket in cool water with a gentle wool wash, then gently squeeze out excess water (do not wring). Lay it flat on a clean towel or blocking mats, shape it to the correct dimensions, and pin it in place. Allow it to dry completely.
Congratulations! You've created a stunning, one-of-a-kind Whispering Pines Forest Floor Blanket. This textured, nature-inspired heirloom is sure to be treasured for years to come. Whether draped over a sofa or folded at the foot of a bed, it brings a touch of the peaceful woodland into your home. Happy knitting!