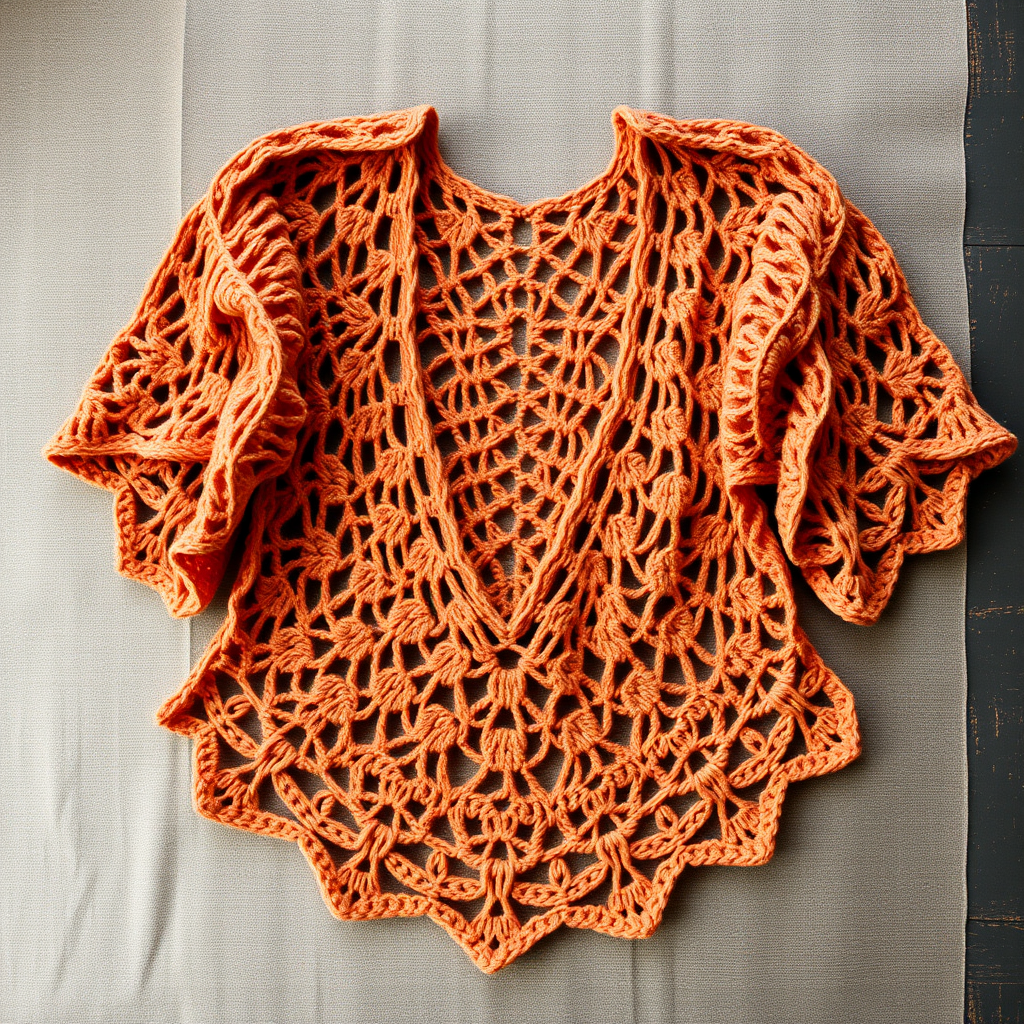
The Seafoam Trellis Crop Top: A Free Crochet Pattern for a Breezy Summer Essential

Introducing the Seafoam Trellis Crop Top
Embrace the warmth of summer with this airy, open-stitch crop top. The Seafoam Trellis Crop Top is the perfect layering piece for balmy days, featuring a beautiful trellis stitch that drapes elegantly. The combination of a soft cotton-linen blend yarn and a delicate, geometric pattern creates a garment that is both stylish and comfortable. Whether you're heading to the beach or enjoying a casual brunch, this top adds a touch of handmade charm to any outfit. This free pattern is designed for confident beginners and intermediate crocheters, guiding you through each step to create a breezy, handmade essential.
Materials Needed
To create your own Seafoam Trellis Crop Top, gather the following materials:
- Yarn: Lion Brand 24/7 Cotton (100% mercerized cotton; 100g/186 yds) in 'Seafoam' - 2 (2, 3) skeins. This yarn provides a beautiful sheen and crisp stitch definition.
- Hook: Size G (4.0 mm) crochet hook.
- Other: Yarn needle for weaving in ends, scissors, and a tape measure for checking gauge and sizing.
Gauge: 16 stitches and 8 rows in trellis stitch pattern = 4 inches. Achieving the correct gauge is essential for the proper fit of your top.
Step-by-Step Instructions
Sizes: S (M, L). Finished bust: 34 (38, 42) inches. Instructions are written for size S, with changes for sizes M and L in parentheses.
Stitches & Abbreviations
- ch = chain
- sc = single crochet
- dc = double crochet
- sk = skip
- st(s) = stitch(es)
- rep = repeat
- sl st = slip stitch
Special Stitch: Trellis Stitch (worked in rows)
Row 1: *Dc in next st, ch 1, sk 1 st* rep across.
Row 2: Ch 3 (counts as dc), *dc in next ch-1 space, ch 1* rep across, dc in top of turning ch.
Repeat Row 2 for the pattern. This creates the open, geometric grid.
BACK PANEL
- Foundation Chain: Ch 69 (77, 85).
- Row 1: Dc in 4th ch from hook (the first 3 ch count as the first dc), *ch 1, sk 1 ch, dc in next ch* rep across. You should have 34 (38, 42) dc stitches.
- Row 2: Ch 3, turn. *Dc in next ch-1 space, ch 1* rep across, dc in top of turning ch.
- Continue: Repeat Row 2 until the piece measures 12 (13, 14) inches from the beginning. This forms the main body of the back.
Shape Armholes
- Next Row: Sl st across the first 4 (5, 6) sts. Ch 3, work trellis st across until 4 (5, 6) sts remain, turn. You will now have 26 (28, 30) dc stitches.
- Continue: Work straight on these stitches (no further decreases) until the armhole measures 7 (8, 9) inches from the start of the armhole shaping.
Shape Shoulders
- Next Row: Sl st across the first 6 (7, 8) sts. Ch 3, work trellis st across until 6 (7, 8) sts remain, turn. You will now have 14 (14, 14) dc stitches.
- Fasten off. This completes the back panel.
FRONT PANEL
- Work the same as the Back until the piece measures 10 (11, 12) inches from the beginning.
Shape Neckline
- Left Shoulder: Work trellis st across the first 12 (13, 14) sts, turn. Continue on these stitches for the left shoulder. On each row, decrease 1 stitch at the neck edge (the edge closest to the center) by working a slip stitch over the first stitch, then ch 3 and continue the trellis pattern. Repeat this decrease every row 6 times. You will have 6 (7, 8) dc stitches remaining.
- Work even (no more decreases) until the piece matches the length of the back shoulder. Fasten off.
- Right Shoulder: Skip the center 10 (12, 14) stitches. Join yarn to the next stitch. Work trellis st across the remaining 12 (13, 14) sts. Complete the right shoulder to match the left, decreasing 1 stitch at the neck edge every row 6 times. You will have 6 (7, 8) dc stitches. Work even until the piece matches the back shoulder length. Fasten off.
FINISHING
- Sew Seams: Sew the shoulder seams together. Sew the side seams, leaving 8 (9, 10) inches open at the top for the armholes.
Edging
Armhole Edging (make 2):
- Round 1: Join yarn at the underarm seam. Single crochet evenly around the entire armhole opening. Join with a sl st to the first sc.
- Round 2: Ch 1, sc in each sc around. Join with a sl st. Fasten off.
Neckline Edging:
- Round 1: Join yarn at one shoulder seam. Single crochet evenly around the entire neckline. Join with a sl st.
- Round 2: Ch 1, sc in each sc around. Join with a sl st. Fasten off.
Bottom Edging:
- Round 1: Join yarn at a side seam. Single crochet evenly around the entire bottom edge. Join with a sl st.
- Round 2: Ch 1, sc in each sc around. Join with a sl st. Fasten off.
Final Steps: Weave in all ends with a yarn needle. Block the top to the specified measurements to open up the trellis stitch and ensure a perfect fit. Enjoy your new handmade summer essential!