Lacy Love Batwing Top Free Pattern – Crochet a Breezy Boho Cover-Up
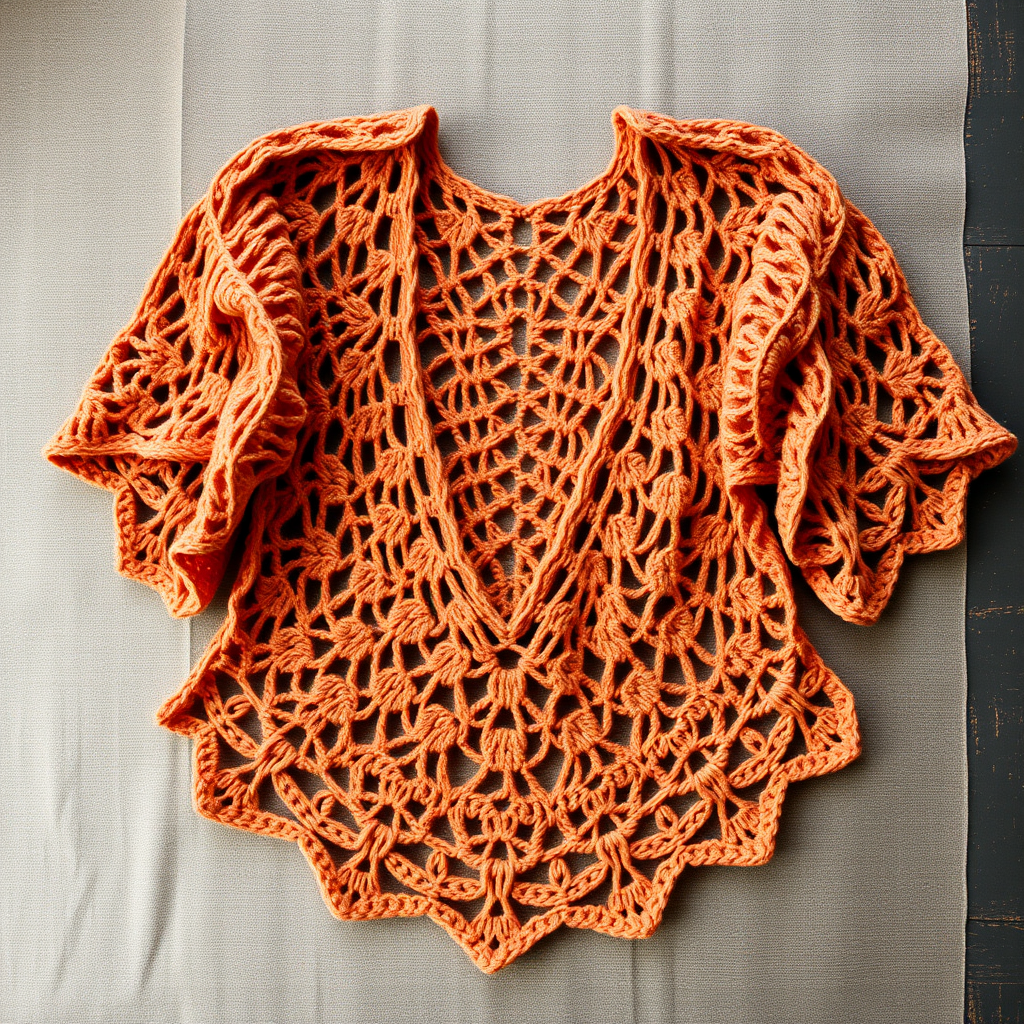
Lacy Love Batwing Top Free Pattern – Crochet a Breezy Boho Cover-Up
Imagine a garment that feels like a gentle summer breeze against your skin—that's exactly what you'll create with this Lacy Love Batwing Top. This airy design combines delicate lace stitches with a relaxed, flowing silhouette, making it the perfect cover-up for warm days, beach outings, or festival adventures. The openwork pattern is surprisingly simple to crochet, making it a delightful project for both beginners and seasoned makers alike. With its bohemian charm and handmade artisanal feel, this top will quickly become your go-to summer staple.
What makes this pattern truly special is its clever construction. Worked in two panels from the bottom up, the batwing shape emerges naturally through strategic increases at the sides. The lace pattern evolves as you work, with chain spaces growing progressively longer to create that beautiful, airy mesh effect. Whether you're lounging by the pool or strolling through a sun-drenched market, this top delivers effortless style with every stitch.
Materials Needed
Before you begin your crochet journey, gather these essential supplies:
- Yarn: Worsted weight cotton or cotton-blend yarn (approximately 600-800 yards for sizes S/M). The natural fiber content ensures breathability and that beautiful stitch definition visible in the finished piece.
- Crochet Hook: US Size G/6 (4.0 mm) crochet hook—this size creates the perfect balance between drape and structure.
- Other Supplies: Yarn needle for weaving in ends, scissors, and stitch markers (optional but helpful for tracking increases).
Gauge Information: 4 double crochet stitches x 2 rows = 1 inch in double crochet; 1 lace repeat (8 stitches) = 2 inches wide. Achieving the correct gauge ensures your top fits as intended, so take a moment to check your tension before starting.
Step-by-Step Instructions
Understanding the Pattern Structure
This top is worked in two panels—front and back—from the bottom up. The panels are then seamed at the shoulders and sides, leaving openings for the arms. The batwing silhouette is achieved by increasing at the sides as you work upward. Throughout the pattern, remember that ch 3 counts as a double crochet at the beginning of each row.
Front Panel
Row 1: Chain 92 (or a multiple of 8 + 4). Double crochet in the 4th chain from the hook and in each chain across. You should have 90 double crochet stitches total.
Row 2: Chain 3, turn. *Skip 2 double crochet, (double crochet, chain 1, double crochet) in next double crochet, skip 2 double crochet, double crochet in next double crochet; repeat from * across, ending with double crochet in the last double crochet. This creates 18 lace motifs.
Row 3: Chain 3, turn. *Double crochet in next double crochet, chain 1, double crochet in chain-1 space, chain 1, double crochet in next double crochet; repeat from * across, ending with double crochet in the last double crochet. Each motif now has 3 double crochet stitches separated by chain-1 spaces.
Row 4: Chain 3, turn. *Double crochet in next double crochet, chain 2, skip chain-1 space, double crochet in next double crochet, chain 2, skip chain-1 space, double crochet in next double crochet; repeat from * across, ending with double crochet in the last double crochet. The motifs now feature 3 double crochet stitches with chain-2 spaces between them.
Row 5: Chain 3, turn. *Double crochet in next double crochet, chain 3, skip chain-2 space, double crochet in next double crochet, chain 3, skip chain-2 space, double crochet in next double crochet; repeat from * across, ending with double crochet in the last double crochet.
Rows 6-20: Continue in this established pattern, increasing the chain length in the spaces by 1 every 4 rows. Specifically: Row 8 uses chain-4 spaces, Row 12 uses chain-5 spaces, Row 16 uses chain-6 spaces, and Row 20 uses chain-7 spaces. Important: On Rows 10, 15, and 20, increase at each side by working 2 double crochet in the first and last double crochet of the row. This widening creates the batwing effect.
Neck Shaping – Left Side
Row 21: Chain 3, turn. Work across in pattern for 30 stitches, chain 1, turn, leaving the remaining stitches unworked. Work even on these 30 stitches for 4 more rows, maintaining the lace pattern. Fasten off.
Neck Shaping – Right Side
Row 21: Skip the center 30 stitches, join yarn in the next stitch, chain 3, work across the remaining 30 stitches in pattern. Work even for 4 rows. Fasten off.
Back Panel
Work the back panel exactly as you did the front panel, but omit the neck shaping. Instead, work straight for 25 rows total. Fasten off.
Finishing Touches
- Sew Shoulder Seams: With right sides together, sew the shoulder seams, approximately 6 inches from each side. This leaves the center opening for the neckline.
- Sew Side Seams: Sew the side seams from the bottom up, leaving 8 inches open at the top for the armholes. This creates the batwing sleeve openings.
- Weave in Ends: Carefully weave in all loose ends using your yarn needle to ensure a clean, professional finish.
- Optional Border: Add a single crochet border around the neckline and armholes for a clean, polished edge. This also helps prevent stretching and gives the garment a more finished look.
Pro Tips for Success
As you work through this pattern, keep these helpful tips in mind:
- Count your stitches at the end of each row to ensure you maintain the correct number of motifs.
- Block your finished panels before seaming to open up the lace pattern and achieve the beautiful drape shown in the inspiration photo.
- Use stitch markers at the side increases to easily track where you need to add extra stitches.
- Choose a soft cotton yarn for maximum comfort against the skin on warm days.
Your Lacy Love Batwing Top will emerge as a stunning, one-of-a-kind piece that captures the essence of bohemian summer style. The flowing silhouette flatters every body type, while the intricate lace pattern showcases your crochet skills beautifully. Whether you pair it with jeans for a casual look or over a swimsuit for beach days, this top is sure to become a treasured addition to your handmade wardrobe.
Happy crocheting, and enjoy watching your creation come to life stitch by stitch!


