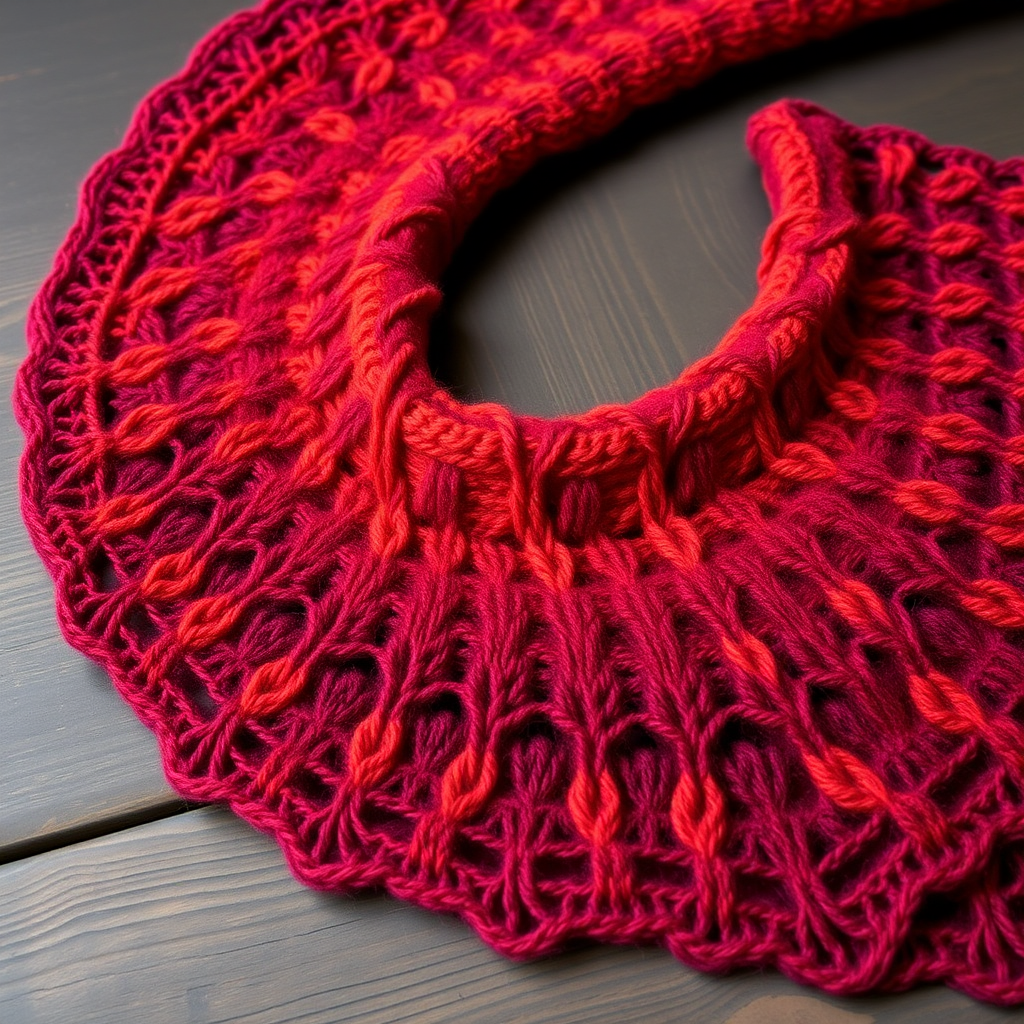
The Gilded Fern Crescent Shawl Free Pattern – Knit a Botanical Lace Wrap

The Gilded Fern Crescent Shawl: A Free Knitting Pattern for a Botanical Lace Wrap
Wrap yourself in the elegance of a sculptural crescent shawl, where cascading leaf motifs meet a softly ruffled edge. This knit pattern blends botanical charm with modern drape, perfect for cool evenings and special moments. Whether you're a seasoned lace knitter or looking to expand your skills, the Gilded Fern Crescent Shawl offers a rewarding project that results in a stunning, wearable piece of art.
In this comprehensive guide, we'll walk you through every step, from gathering your materials to the final blocking that will make your lace truly shine. Let's dive into creating this beautiful botanical wrap together.
Materials Needed
Before you begin, gather the following supplies to ensure a smooth knitting experience:
- Yarn: Fingering weight yarn (approx. 400-450 yards), such as a merino/silk blend in a deep forest green with subtle tonal variation. The tonal variation adds depth to the lace, mimicking dappled forest light.
- Needle: US 6 (4.0 mm) circular needle, 32-inch or longer. The long circular needle is essential to accommodate the growing number of stitches as the shawl expands.
- Gauge: 20 stitches and 28 rows = 4 inches in stockinette stitch, after blocking. While gauge is important for size, the drape of this shawl is forgiving—focus on consistent tension.
- Notions: Stitch markers (at least 3), tapestry needle for weaving in ends, blocking pins and mats.
Understanding the Construction
This crescent shawl is worked from the top center outwards, increasing at the edges and center to create a gentle curve. The pattern uses lace and textured stitches to form a fern-like motif. The construction is elegant in its simplicity: you'll establish a center spine and work outward, with increases happening consistently on right-side rows.
Abbreviations
Familiarize yourself with these standard knitting abbreviations before starting:
- k = knit
- p = purl
- yo = yarn over
- k2tog = knit two together (right-leaning decrease)
- ssk = slip, slip, knit (left-leaning decrease)
- pm = place marker
- sm = slip marker
- rep = repeat
- RS = right side
- WS = wrong side
Step-by-Step Instructions
Setup: Casting On and Establishing the Base
We'll begin with a simple cast-on and work a few short rows to establish the foundation of the shawl. This creates the center point from which everything else grows.
Cast on 5 stitches loosely.
Row 1 (RS): k2, yo, k1, yo, k2 (7 stitches)
Row 2 (WS): k2, p3, k2
Row 3 (RS): k2, yo, k1, yo, k1, yo, k1, yo, k2 (11 stitches)
Row 4 (WS): k2, p7, k2
Row 5 (RS): k2, yo, k3, yo, k1, yo, k3, yo, k2 (15 stitches)
Row 6 (WS): k2, p11, k2
You've now established the basic structure: garter stitch edges (knit every row) with a growing stockinette center. The yarn overs at the edges and around the center stitch are the increase points that will shape the crescent.
Body: Establishing the Pattern
Now we'll place markers to define the sections of the shawl and begin the fern motif pattern.
Place markers after the first 2 stitches and before the last 2 stitches to mark the edge sections. Place a center marker after the 7th stitch from the beginning (this marks the center stitch).
Row 7 (RS): k2, yo, *k1, yo, k2tog, yo, k1, yo, ssk, yo, k1, yo, k2tog, yo, k1, yo, ssk, yo, k1*; yo, k1 (center stitch), yo; repeat from * to * once more, yo, k2. (This row increases 4 stitches: 2 at each edge and 2 at center)
Row 8 (WS): k2, purl to last 2 stitches, k2.
Repeat Rows 7 and 8, but each time you work the pattern, the number of stitches between the edge markers and center marker will increase. This is the beauty of this construction—the pattern naturally accommodates growth.
The Fern Motif
The fern motif is the heart of this shawl, creating those beautiful cascading leaf shapes. It's worked over a multiple of 10 stitches + 1, which means it will repeat seamlessly as your stitch count grows.
Fern Motif (worked over a multiple of 10 stitches + 1):
Row A (RS): k1, yo, k2tog, yo, k1, yo, ssk, yo, k1, yo, k2tog, yo, k1, yo, ssk, yo, k1
Row B (WS): purl all stitches.
Continue increasing at the edges (yo after first 2 stitches and before last 2 stitches) and at the center (yo before and after the center stitch) every RS row. Work the fern motif across the body stitches, keeping the edge stitches in garter (knit every row).
Pro Tip: As the shawl grows, you'll notice the fern motifs stacking vertically. The yarn overs create the "veins" of the leaves, while the decreases (k2tog and ssk) shape the leaf edges. The combination of right-leaning (k2tog) and left-leaning (ssk) decreases creates the symmetrical leaf shape.
Work until the shawl measures approximately 20 inches from the cast-on edge at the center, ending with a WS row. This measurement is taken at the deepest point of the crescent, so don't worry if the edges seem shorter—that's the crescent shape forming.
Ruffled Edge: Adding the Dramatic Finish
Now we'll create that stunning ruffled edge that gives the shawl its whimsical, organic finish. This section doubles your stitch count, then uses a picot bind-off for a delicate, scalloped edge.
Next RS row: k2, *yo, k1* repeat to last 2 stitches, yo, k2. (This doubles the stitch count)
Work 4 rows in stockinette (knit RS, purl WS) with garter edges. This creates a smooth fabric that will ruffle beautifully when blocked.
Picot Bind-Off:
Bind off 3 stitches, *slip the last stitch back to left needle, cast on 2 stitches, bind off 5 stitches* repeat to end.
This bind-off creates small points along the edge, adding that final touch of elegance. Take your time with this step—it's worth the extra attention.
Finishing: Weaving and Blocking
Weave in all ends carefully, using a tapestry needle to hide them within the garter edge stitches or the wrong side of the work.
Blocking is crucial for this shawl. The lace pattern needs to be opened up to reveal its full beauty. Here's how:
- Soak the shawl in lukewarm water with a gentle wool wash for 20-30 minutes.
- Gently squeeze out excess water—never wring or twist.
- Roll in a towel to remove additional moisture.
- Lay the shawl on blocking mats, shaping it into a crescent.
- Pin out the points of the ruffled edge and the fern motifs to open up the lace. The picot points should be pinned individually to create that scalloped effect.
- Allow to dry completely, which may take 24-48 hours depending on humidity.
Once dry, unpin and enjoy your gorgeous Gilded Fern Crescent Shawl!
Tips for Success
- Use lifelines: If you're new to lace knitting, thread a lifeline through your stitches every 10-20 rows. If you make a mistake, you can easily rip back to the lifeline without losing your work.
- Count your stitches: After each pattern repeat, count your stitches to ensure you haven't accidentally dropped or added a yarn over. The pattern should increase by 4 stitches every RS row.
- Choose your yarn wisely: A merino/silk blend as suggested will have excellent stitch definition and a subtle sheen that makes the lace pop. The tonal variation adds depth and interest.
- Block generously: Don't be afraid to stretch the lace when blocking. The yarn overs need to be opened up to show the full fern pattern.
This pattern is a joy to knit, with each row building on the last to create something truly special. The combination of the botanical fern motif with the dramatic ruffled edge makes this shawl a standout piece in any wardrobe. Whether you're knitting it for yourself or as a gift, the Gilded Fern Crescent Shawl is sure to be treasured for years to come.
Happy knitting, and enjoy watching your botanical lace wrap come to life!