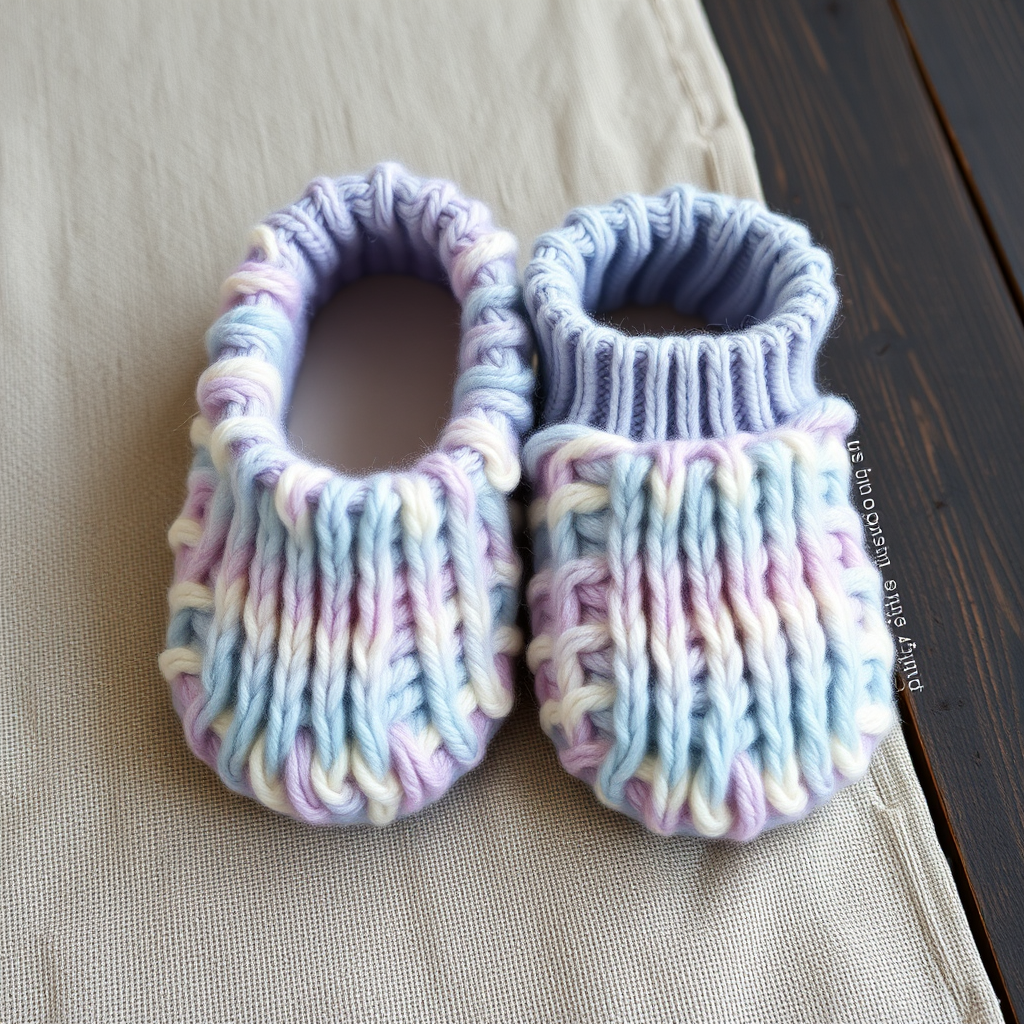
The Cloudberry Cottage Slippers: A Free Knitting Pattern for Cozy, Double-Stranded Flops

Introducing the Cloudberry Cottage Slippers
Wrap your feet in the plush, cloud-like comfort of these double-stranded slipper flops. Featuring a unique ruffle edge and a chunky, hand-knit texture, this pattern is perfect for using up scrap yarn and creating a truly one-of-a-kind, cozy accessory. The combination of two contrasting colors held together creates a marled, heathered effect that is both modern and timeless. Whether you're a seasoned knitter or a beginner looking for a rewarding project, these slippers are a joy to make and an even greater joy to wear.
Materials Needed
Before you begin, gather the following materials. Using the exact yarn and needle sizes will ensure your slippers match the intended gauge and fit.
Yarn
- Lion Brand Wool-Ease Thick & Quick (or any super bulky weight yarn) in two contrasting colors:
- Color A (Main Color): 1 skein (e.g., Cream)
- Color B (Contrast Color): 1 skein (e.g., Raspberry Pink)
- Note: You will hold one strand of Color A and one strand of Color B together throughout the entire project.
Tools & Notions
- Knitting Needles: US 15 (10 mm) – straight needles or circular needles for magic loop method
- Tapestry Needle: For weaving in ends and seaming
- Stitch Markers: Optional, for keeping track of rows
- Scissors
Gauge
8 stitches and 12 rows = 4 inches (10 cm) in stockinette stitch with two strands held together (one strand of Color A and one strand of Color B).
Always check your gauge before starting. If your gauge is off, adjust your needle size accordingly.
Step-by-Step Instructions
Sizes & Abbreviations
Sizes: Women's US 6-8 (Small), 9-11 (Medium). Instructions for Medium are given in parentheses.
Abbreviations:
- CO: Cast on
- K: Knit
- P: Purl
- K2tog: Knit two stitches together (decrease)
- SSK: Slip, slip, knit (slip one stitch as if to knit, slip another as if to knit, then knit them together through the back loops – a left-leaning decrease)
- St(s): Stitch(es)
- Rep: Repeat
- yo: Yarn over (increase)
- WS: Wrong side
- RS: Right side
Pattern Notes
- The slippers are worked flat from the heel to the toe, then seamed.
- The ruffle is created by working a series of increases along the top edge.
- Hold one strand of Color A and one strand of Color B together throughout the entire project.
- Make two identical slippers.
Slipper (Make 2)
Heel Section
- CO: Cast on 20 (24) stitches.
- Row 1 (WS): Purl all stitches.
- Row 2 (RS): Knit all stitches.
- Repeat Rows 1-2 for a total of 10 (12) rows, ending with a WS row. This creates the heel flap.
Foot Section
- Row 1 (RS - decrease row): K2tog, knit to the last 2 stitches, SSK. (18 (22) stitches remain)
- Row 2 (WS): Purl all stitches.
- Row 3 (RS): Knit all stitches.
- Row 4 (WS): Purl all stitches.
- Repeat Rows 1-4 until 10 (12) stitches remain, ending with a WS row. This shapes the foot and creates a gentle taper.
Toe Section
- Row 1 (RS - decrease row): K2tog, knit to the last 2 stitches, SSK. (8 (10) stitches remain)
- Row 2 (WS): Purl all stitches.
- Repeat Rows 1-2 until 4 (6) stitches remain.
- Finish: Cut the yarn, leaving a long tail (about 12 inches). Thread the tail through a tapestry needle, then pass it through the remaining stitches. Pull tight to close the toe. Weave in the end securely.
Ruffle Edge
- Pick up stitches: With the Right Side (RS) facing you, pick up and knit 1 stitch in each row along the top edge of the slipper (from the heel to the toe). You should have approximately 20 (24) stitches. Tip: Pick up stitches evenly to avoid gaps.
- Row 1 (WS): Purl all stitches.
- Row 2 (RS - increase row): *K1, yo; repeat from * across. (40 (48) stitches)
- Row 3 (WS): Purl all stitches.
- Row 4 (RS - increase row): *K1, yo; repeat from * across. (80 (96) stitches)
- Row 5 (WS): Purl all stitches.
- Bind off: Bind off all stitches loosely knitwise. Tip: Use a larger needle or a loose tension to keep the ruffle from puckering.
- Finish: Weave in all ends.
Finishing
- Fold: Fold the slipper in half with Wrong Sides (WS) together, matching the heel and toe.
- Seam: Using the long tail from the toe closure, seam the back of the heel and the bottom of the foot. Use a mattress stitch for an invisible seam or a whip stitch for a sturdy finish. Tip: Seam from the inside for a cleaner look.
- Weave in ends: Weave in all remaining ends securely.
- Repeat: Repeat all steps for the second slipper.
Optional: Non-Slip Sole
For added safety on hard floors, you can sew a piece of suede, fabric, or non-slip rug pad to the bottom of each slipper. Cut the material to match the shape of the sole and stitch it in place using a strong thread or yarn.
Enjoy your cozy, handmade Cloudberry Cottage Slippers! They make wonderful gifts and are perfect for keeping your feet warm all season long.