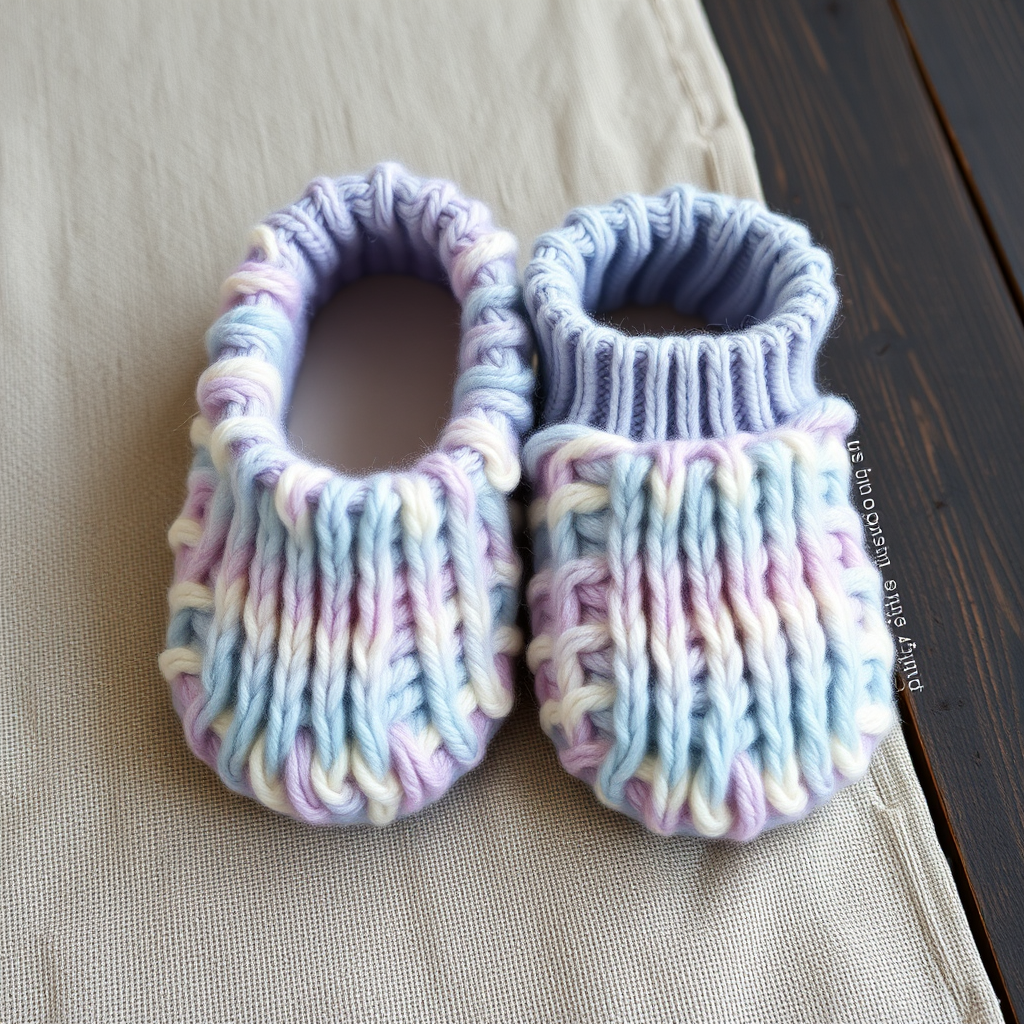
The Cloudberry Bloom Slippers Free Pattern – A Knitted Ode to Nordic Meadows

The Cloudberry Bloom Slippers: A Knitted Ode to Nordic Meadows
Wrap your feet in the softest embrace of chunky yarn with these cloudberry-inspired slippers. Featuring a delicate cable-and-lace motif that mimics wild berries nestled in moss, this pattern offers a cozy, modern take on traditional house footwear. Perfect for chilly evenings, mindful crafting, or as a heartfelt handmade gift, these slippers combine botanical beauty with practical warmth. The combination of soft heather gray and warm golden yellow evokes the serene landscapes of Nordic meadows, bringing a touch of nature's tranquility into your home.
Whether you're a seasoned knitter looking for a quick weekend project or a confident beginner ready to tackle cables and lace, this pattern is designed to guide you through every step. The result is a pair of slippers that are as beautiful as they are comfortable—your feet will thank you!
Materials Needed
Before you begin, gather the following materials to ensure a smooth and enjoyable knitting experience:
- Yarn: Worsted weight yarn in two colors:
- Main Color (MC): Soft heather gray (approx. 150g)
- Contrast Color (CC): Warm golden yellow (approx. 50g)
- Needles: US 7 (4.5 mm) knitting needles (or size needed to obtain gauge)
- Notions: Tapestry needle for weaving in ends and seaming, stitch markers (at least 2)
- Optional: Cable needle (or use a spare double-pointed needle), small button or bead for flower center
Gauge: 18 stitches and 24 rows = 4 inches in stockinette stitch (blocked). Always knit a gauge swatch to ensure your slippers fit perfectly!
Step-by-Step Instructions
Sizes and Abbreviations
Sizes: Women's US 6-8 (adjustable by changing needle size or adding/removing stitches in multiples of 4).
Abbreviations:
- CO: Cast on
- K: Knit
- P: Purl
- K2tog: Knit two together (right-leaning decrease)
- SSK: Slip, slip, knit (left-leaning decrease)
- YO: Yarn over
- PM: Place marker
- SM: Slip marker
- St(s): Stitch(es)
- MC: Main color
- CC: Contrast color
Special Stitch Pattern: Cable-Lace Panel (Worked over 8 sts)
This beautiful panel combines a simple cable with delicate lace decreases and yarn overs, creating a texture reminiscent of leaves and berries. Follow the chart below or the written instructions:
- Row 1 (RS): K2, YO, SSK, K2, K2tog, YO, K2
- Row 2 (WS): Purl all sts
- Row 3: K2, YO, SSK, K2, K2tog, YO, K2
- Row 4: Purl all sts
- Row 5: Slip next 2 sts to cable needle and hold in front, K2, then K2 from cable needle (C2F), K2, YO, SSK, K2
- Row 6: Purl all sts
- Row 7: K2, YO, SSK, K2, K2tog, YO, K2
- Row 8: Purl all sts
Repeat rows 1-8 for pattern.
Note: The cable (C2F) is worked on Row 5 only. The lace pattern (YO, SSK, K2tog) creates the leaf-like openings on Rows 1, 3, and 7.
Slipper (Make 2)
Follow these instructions to create each slipper. The pattern is identical for both feet—the shaping is symmetrical.
Cuff
- With MC, CO 40 sts.
- Work in K2, P2 ribbing for 10 rows (approx. 1.5 inches). This creates a snug, stretchy cuff that will hug your ankle.
- Next row (RS): K all sts, increasing 4 sts evenly across (44 sts). To increase evenly, knit 10, M1, knit 11, M1, knit 11, M1, knit 12. (M1 = make one by picking up the bar between stitches and knitting it through the back loop.)
Instep
- Row 1 (RS): K16, PM, work Cable-Lace Panel over next 8 sts, PM, K20.
- Row 2 (WS): P20, SM, work row 2 of panel (purl all 8 sts), SM, P16.
- Continue working in pattern, keeping 16 sts on each side in stockinette (knit on RS, purl on WS) and the center 8 sts in the Cable-Lace Panel. Work until piece measures 5 inches from cast-on edge, ending with a WS row.
Pro Tip: Place a removable stitch marker or a piece of scrap yarn at the end of this section to mark where the toe shaping begins.
Toe Shaping
Now we'll shape the toe by decreasing on either side of the cable panel and at the edges. This creates a rounded, comfortable toe box.
- Next row (RS): K16, SM, work panel row, SM, K20 (44 sts). (This is just a setup row to ensure you're at the right point in the pattern.)
- Row 1 (RS): K2, SSK, K to 2 sts before marker, K2tog, SM, work panel, SM, K2, SSK, K to last 4 sts, K2tog, K2 (40 sts). (You've decreased 4 sts: 2 on each side of the panel.)
- Row 2 (WS): Purl all sts.
- Row 3: K2, SSK, K to 2 sts before marker, K2tog, SM, work panel, SM, K2, SSK, K to last 4 sts, K2tog, K2 (36 sts).
- Row 4: Purl all sts.
- Repeat rows 1-4 two more times (24 sts remain). (After the first repeat, you'll have 32 sts; after the second, 24 sts.)
- Next row (RS): K2, SSK, K to 2 sts before marker, K2tog, SM, work panel, SM, K2, SSK, K to last 4 sts, K2tog, K2 (20 sts).
- Next row (WS): Purl all sts.
- Cut yarn, leaving a long tail (at least 12 inches). Thread tail through remaining 20 sts using a tapestry needle, pull tight to gather, and secure with a few stitches.
Finishing
- Sew the back seam of the slipper from the cuff down to the toe, using mattress stitch for a neat, invisible finish. (With right sides facing, use the mattress stitch on the stockinette sections and a whip stitch on the ribbing for a clean look.)
- Weave in all ends securely using a tapestry needle.
Embellishment: Cloudberry Flower (Make 2)
These charming flowers add a pop of golden yellow, mimicking the cloudberry blooms found in Nordic meadows. They're simple to knit and sew on.
- With CC, CO 5 sts.
- Row 1 (RS): K1, YO, K1, YO, K1, YO, K1, YO, K1 (9 sts). (You've increased 4 sts.)
- Row 2 (WS): Purl all sts.
- Row 3: K1, YO, K2, YO, K3, YO, K2, YO, K1 (13 sts).
- Row 4: Purl all sts.
- Row 5: K1, YO, K3, YO, K5, YO, K3, YO, K1 (17 sts).
- Row 6: Purl all sts.
- Row 7: K1, YO, K4, YO, K7, YO, K4, YO, K1 (21 sts).
- Row 8: Purl all sts.
- Bind off loosely. (A loose bind-off ensures the flower lies flat.)
- Gather the cast-on edge to form a flower shape. Thread the tail through the cast-on stitches and pull tight, then secure with a few stitches.
- Sew the flower onto the center of the instep panel, just above the toe shaping. Position it so it sits comfortably on the top of your foot.
- Optionally, add a small button or bead in the center of each flower for a berry-like accent. This adds a lovely tactile detail.
Care Instructions
To keep your Cloudberry Bloom Slippers looking their best: Hand wash in cold water with a gentle wool wash, lay flat to dry, and block gently to shape. Avoid wringing or twisting, as this can felt the wool and distort the cable pattern.
Enjoy your cozy, handcrafted slippers—a true ode to Nordic meadows!