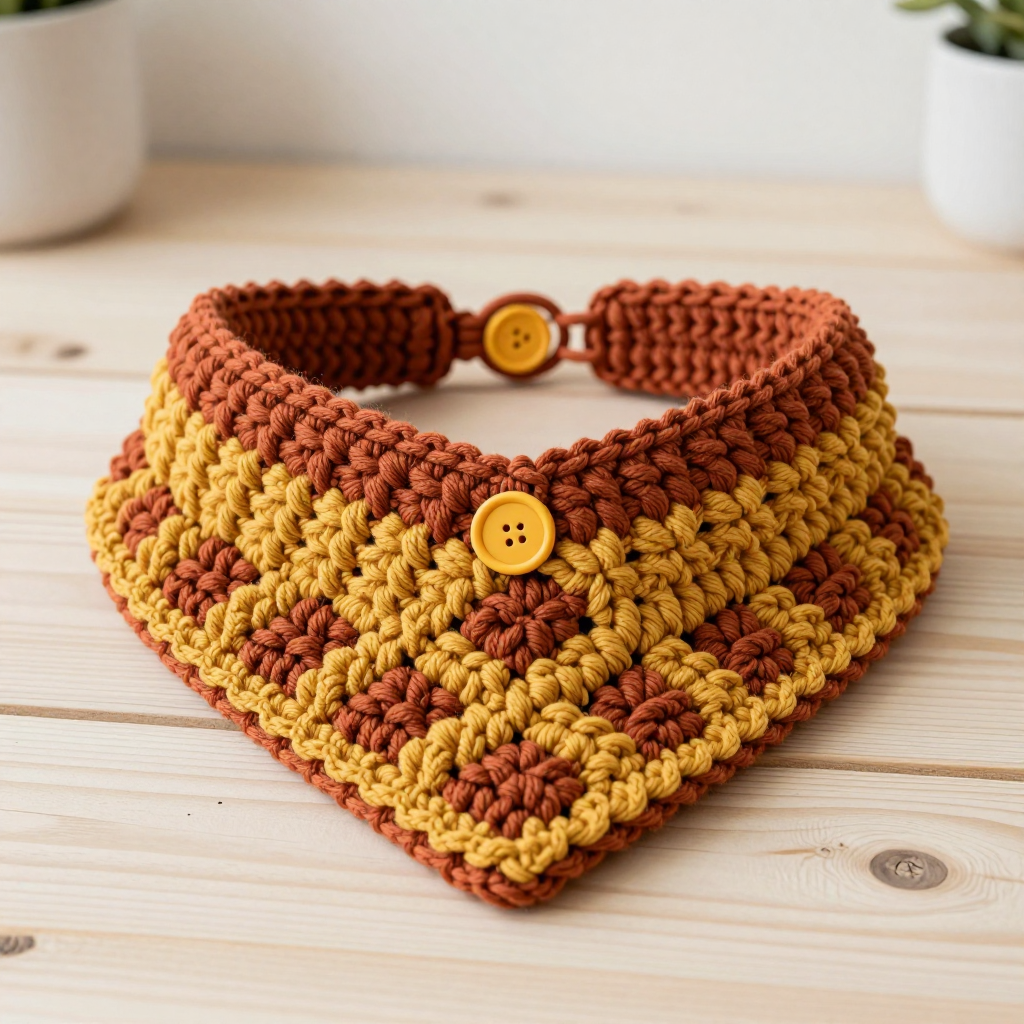
Moonlit Tide Washcloth Free Pattern

Moonlit Tide Washcloth: A Free, Beginner-Friendly Crochet Pattern
Introduction
Welcome to the Moonlit Tide Washcloth, a serene little project that is absolutely perfect for anyone who has never picked up a crochet hook before. This washcloth is worked in a rhythmic shell-and-post stitch pattern that gently evokes moonlit water rippling over sand, and because it is a small, flat square, it is one of the most forgiving projects you can make as a first-timer. The finished cloth is soft, absorbent, and about nine inches square, with a raised, rippled texture that feels wonderful against your skin and looks far more complicated than it actually is. Made in a pale silver-blue or seafoam cotton, it makes a calming addition to any bath or kitchen, and it works up quickly enough to finish in just a few evenings. Best of all, every single stitch is explained below, so you truly do not need any prior experience to begin.
Materials Needed
- Yarn: Worsted or DK weight cotton yarn, approximately 120–150 yards. A soft mercerized cotton in pale silver-blue or seafoam is ideal. Cotton is recommended because it is absorbent, machine washable, and holds the textured stitches beautifully.
- Crochet hook: Size H/8 (5.0 mm).
- Stitch markers: At least 4. These are small clips or loops you place in your work to mark important spots, such as corners or the first stitch of a round.
- Tapestry needle: A large, blunt-tipped needle with an eye big enough for yarn, used for weaving in the loose ends.
- Scissors: Any sharp pair for cutting yarn.
- Blocking supplies (optional but recommended): Rust-proof pins and a flat, padded surface (a blocking mat or a towel over a board) for shaping the finished cloth.
- Finished size: Approximately 9 inches square after blocking.
Abbreviations and Beginner Glossary
Every abbreviation used in this pattern is listed here and explained in plain English. Read through this list once before you begin, and come back to it any time a term feels unfamiliar.
- ch – chain. Make a slip knot on your hook, then wrap the yarn over the hook and pull it through the loop on your hook. That is one chain. A row of chains is the foundation you build the first row into.
- st / sts – stitch / stitches. A “stitch” is one completed loop of crochet in your fabric. “Sts” is simply the plural.
- sl st – slip stitch. Insert your hook into the indicated stitch, wrap the yarn over the hook, and pull it through both the stitch and the loop on your hook at the same time. It creates almost no height and is used to join rounds.
- sc – single crochet. Insert your hook into the indicated stitch, wrap the yarn over the hook and pull up a loop (you now have two loops on your hook), wrap the yarn over again, and pull it through both loops on your hook. One single crochet made.
- dc – double crochet. Wrap the yarn over your hook first, insert the hook into the indicated stitch, wrap the yarn over and pull up a loop (three loops on your hook), wrap the yarn over and pull through the first two loops (two loops remain), wrap the yarn over and pull through the last two loops. One double crochet made.
- FPdc – front post double crochet. Work a double crochet exactly as described above, but instead of inserting your hook into the top of the stitch, insert it horizontally around the vertical “post” (the body) of the indicated stitch, coming in from the front of the work. This pushes the stitch forward and creates a raised rib.
- BPdc – back post double crochet. The same idea as FPdc, but you insert your hook around the post of the indicated stitch from the back of the work. This pushes the stitch backward and creates a recessed rib.
- shell – a group of stitches worked into the same stitch or space: (2 dc, ch 1, 2 dc). This makes a little fan that looks like a wave crest.
- ch-1 space – the small gap created by a single chain in a previous row. You work your hook into the gap itself rather than into a stitch top.
- skip – do not work into that stitch at all; simply move past it to the next one.
- turn – flip your work over so you can work back across the row you just finished. The side facing you changes with every row.
- join – connect the end of a round to its beginning, usually with a slip stitch, so the round becomes a closed circle.
- fasten off – cut the yarn a few inches from your work and pull the tail all the way through the last loop to secure it.
- weave in ends – thread a loose yarn tail onto a tapestry needle and run it back and forth through the fabric so it disappears and cannot unravel.
- block – dampen the finished piece and pin it to its final measurements so it dries flat, even, and square.
Gauge
Gauge: 16 sts and 10 rows = 4 inches in the shell-and-post pattern after blocking.
Gauge simply means how big your stitches turn out. It matters because it is the only way to know your finished washcloth will measure about 9 inches square rather than coming out too small or too large. Everyone crochets a little differently, so the same yarn and hook can produce different sizes in different hands.
How to make a gauge swatch: Chain 22, then work Rows 1–2 of the pattern below, then repeat Rows 3–4 until your swatch is about 4½ inches tall. Fasten off, block it gently, and lay a ruler across the middle. Count the stitches across 4 inches and the rows up 4 inches. If you have more than 16 stitches in 4 inches, your stitches are too tight — try again with a hook one size larger. If you have fewer than 16, your stitches are too loose — try a hook one size smaller. A swatch takes only a few minutes and saves you from a disappointing finished size.
Beginner Tips Before You Start
- Count every row. The shell pattern is a repeating rhythm, and the easiest way to stay on track is to count your shells as you go. Each row should contain 7 shells. If you count 7, you are almost certainly correct.
- Do not pull your yarn too tight. Beginners tend to grip the yarn hard, which makes stiff, tiny stitches and sore hands. Aim for an even, relaxed tension so your hook slides easily through each loop.
- Use stitch markers to mark your shells. Place a marker in the ch-1 space of the first shell of each row. When you reach it on the next row, you will know exactly where that shell belongs, and you will never lose your place.
- Remember that ch 3 counts as your first dc. At the start of each row, the chain of three stands in for the first double crochet. Do not work an extra double crochet into the very first stitch, or your row will grow by one stitch each time.
- Keep your turning chain upright. After you chain 3 and turn, the chain should stand straight up along the edge of your work, not lean sideways. A straight edge makes the border much easier later.
- Post stitches feel awkward at first — that is normal. Working around the post instead of into the top of a stitch is a new motion. Go slowly for the first two rows; by the third row your hands will understand it.
Step-by-Step Instructions
Finished size: approximately 9 inches square after blocking.
Special Stitches:
- Shell: (2 dc, ch 1, 2 dc) all worked into the same stitch or space.
- Front Post Double Crochet (FPdc): Work a double crochet around the post of the indicated stitch from the front.
- Back Post Double Crochet (BPdc): Work a double crochet around the post of the indicated stitch from the back.
Note: Ch 3 at the beginning of a row counts as the first dc unless otherwise stated. Ch 1 at the beginning of a row does not count as a stitch.
Body
Row 1: Ch 34. Dc in the 4th ch from hook and in each ch across. Turn. (32 dc)
What this means: You make 34 chains. The first 3 chains you skip stand in for your first double crochet, so your first real double crochet goes into the 4th chain from the hook. Then you work one double crochet into every remaining chain. You end with 32 double crochet stitches in the row.
Row 2: Ch 3 (counts as first dc). Dc in the next st. *Skip 1 st, shell in the next st, skip 1 st, dc in each of the next 2 sts; repeat from * across, ending with dc in the last 2 sts. Turn. (7 shells, 16 dc)
What this means: After the turning chain and one double crochet, you repeat this sequence seven times: skip one stitch, work a whole shell into the next stitch, skip one stitch, then work one double crochet into each of the next two stitches. The row ends with two plain double crochets. The math: 2 dc at the start + 7 shells (each shell uses 1 stitch) + 7 skipped stitches + 14 dc between and after the shells + 2 dc at the end = 32 stitches accounted for, with 7 shells and 16 plain double crochets in the row.
Row 3: Ch 3. FPdc around the first dc, BPdc around the next dc, *shell in the ch-1 space of the next shell, BPdc around the next dc, FPdc around the next dc; repeat from * across, ending with BPdc around the last dc. Turn. (7 shells, 16 post sts)
What this means: The chain 3 counts as your first double crochet. Then you work a front post double crochet around the post of the next double crochet, and a back post double crochet around the post of the one after that. Next, work a full shell into the little chain-1 gap at the top of the first shell from the row below. Then work a back post double crochet around the next plain double crochet and a front post double crochet around the one after it. Repeat that whole sequence across the row. The row ends with a back post double crochet around the final stitch. You still have 7 shells and 16 post stitches.
Row 4: Ch 3. BPdc around the first dc, FPdc around the next dc, *shell in the ch-1 space of the next shell, FPdc around the next dc, BPdc around the next dc; repeat from * across, ending with FPdc around the last dc. Turn. (7 shells, 16 post sts)
What this means: This row is the mirror image of Row 3. The post stitches swap places: where you made a front post double crochet last row, you now make a back post double crochet, and the other way around. This is what creates the alternating ribbed texture beside each shell. The shells themselves are worked exactly as before, into the chain-1 space of each shell below.
Row 5: Repeat Row 3 exactly as written above. (7 shells, 16 post sts)
Row 6: Repeat Row 4 exactly as written above. (7 shells, 16 post sts)
Row 7: Repeat Row 3 exactly as written above. (7 shells, 16 post sts)
Row 8: Repeat Row 4 exactly as written above. (7 shells, 16 post sts)
Row 9: Repeat Row 3 exactly as written above. (7 shells, 16 post sts)
Row 10: Repeat Row 4 exactly as written above. (7 shells, 16 post sts)
Row 11: Repeat Row 3 exactly as written above. (7 shells, 16 post sts)
Row 12: Repeat Row 4 exactly as written above. (7 shells, 16 post sts)
Row 13: Repeat Row 3 exactly as written above. (7 shells, 16 post sts)
Row 14: Repeat Row 4 exactly as written above. (7 shells, 16 post sts)
Row 15: Repeat Row 3 exactly as written above. (7 shells, 16 post sts)
Row 16: Repeat Row 4 exactly as written above. (7 shells, 16 post sts)
Row 17: Repeat Row 3 exactly as written above. (7 shells, 16 post sts)
Row 18: Repeat Row 4 exactly as written above. (7 shells, 16 post sts)
Row 19: Repeat Row 3 exactly as written above. (7 shells, 16 post sts)
Row 20: Repeat Row 4 exactly as written above. (7 shells, 16 post sts)
What Rows 5–20 mean: You simply alternate the two rows you already know. Odd-numbered rows (5, 7, 9, 11, 13, 15, 17, 19) are worked exactly like Row 3. Even-numbered rows (6, 8, 10, 12, 14, 16, 18, 20) are worked exactly like Row 4. Every row keeps the same count: 7 shells and 16 post stitches. After Row 20 your piece should measure approximately 8.5 inches tall. Do not fasten off.
Border
Round 1: Ch 1. Work sc evenly around the entire perimeter, placing 1 sc in each stitch along the sides and 3 sc in each corner. Join with a sl st to the first sc. (approximately 116 sc)
What this means: Do not turn. Work along the edge you are facing, then continue around the cloth in a single continuous loop. Along each side edge, work one single crochet into the end of each row — you have 20 rows, so that is about 20 single crochet per side. Along the top and bottom edges, work one single crochet into each stitch across, which is 32 per edge. At each of the four corners, work 3 single crochet into the same spot so the corner can turn without puckering. The count is approximate because edge stitches can be slightly uneven; the important thing is that the border lies flat. Join the last stitch to the first with a slip stitch.
Round 2: Ch 1. Sc in each sc around, working 3 sc in each corner sc. Join with a sl st to the first sc. Fasten off. (approximately 124 sc)
What this means: Work one single crochet into every single crochet of the previous round. When you reach a corner, the middle stitch of the three corner stitches gets three single crochets worked into it, which keeps the corner sharp and square. Join with a slip stitch to the first single crochet of the round, then cut the yarn and pull the tail through the last loop to fasten off.
Assembly and Finishing
Weaving in ends: Thread each loose yarn tail onto your tapestry needle. Turn the cloth to the wrong side and run the needle back and forth through the backs of several stitches, changing direction once or twice so the tail cannot work its way loose. Trim the yarn close to the fabric. Do this for the starting tail, the fastening-off tail, and any other ends.
Blocking: Fill a basin with cool water and submerge the washcloth for about ten minutes, letting the cotton soak through completely. Gently squeeze the water out — do not wring or twist, which distorts the stitches. Roll the cloth in a clean towel and press to remove more water. Lay it flat on your blocking surface and pin each corner out to 9 inches square, using rust-proof pins. Gently pat the shell motifs open and smooth the post-stitch ribs so the texture sits evenly. Leave it to dry completely, which usually takes a full day. Blocking is what turns a slightly wobbly rectangle into a crisp, professional-looking square.
Care: Machine wash on a gentle cycle with like colors and tumble dry low, or lay flat to dry to keep the texture looking its best.
Pro Tips and Variations
- Change colors for a striped tide: Work Rows 1–6 in one shade, Rows 7–14 in a second, and Rows 15–20 in a third, changing color at the end of a row by pulling the new yarn through the last loop. Work the border in whichever color you like best. Soft gradient sets of cotton look especially lovely here.
- Adjust the size: To make a larger cloth, begin with a longer foundation chain. The pattern repeats over a multiple of 4 stitches plus 2, so try ch 38 for a slightly wider cloth or ch 42 for a generous one. Every extra 4 chains adds one more shell to each row. To make it taller, simply keep alternating Rows 3 and 4 until the piece is as long as you want, then work the border.
- Substitute the yarn: Any worsted or DK cotton will work beautifully. A linen-cotton blend gives a crisper, more rustic cloth, while a bamboo-cotton blend feels silkier and drapes more. Avoid acrylic for washcloths, as it does not absorb water well.
- Make a matching set: Work three cloths in coordinating shades and tie them with a ribbon for a lovely handmade gift. Because each one takes only a few evenings, a set is a realistic weekend-to-weekend project even for a complete beginner.