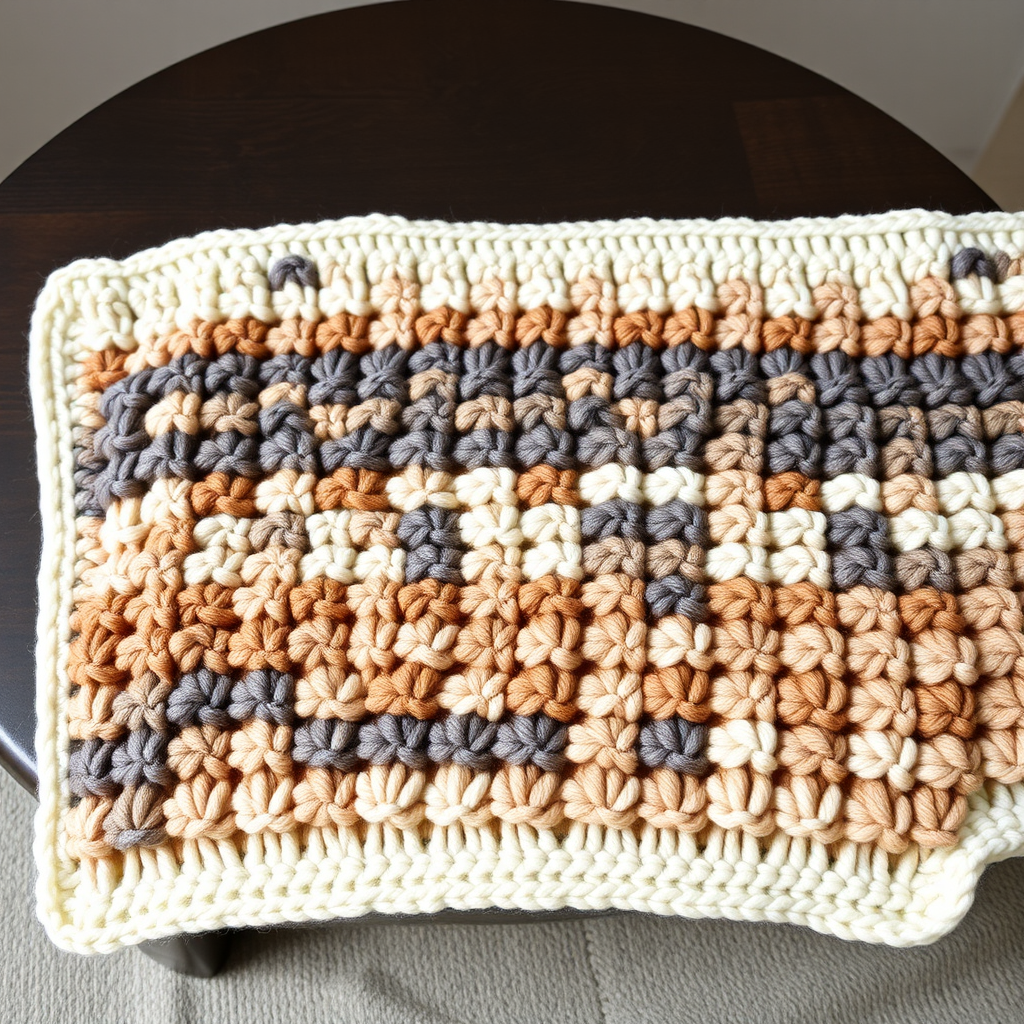
Aurora Borealis Mosaic Knit Blanket Free Pattern – A Shifting Sky Throw

Aurora Borealis Mosaic Knit Blanket Free Pattern – A Shifting Sky Throw
Wrap yourself in the dancing colors of the northern lights with this mesmerizing mosaic knit blanket. The slipped-stitch colorwork creates a fluid, gradient effect that feels both modern and magical. This pattern is perfect for intermediate knitters looking to explore colorwork without the complexity of stranded knitting—mosaic knitting only uses one color per row, making it surprisingly approachable. The finished throw measures approximately 40 inches wide by 60 inches long, making it ideal for draping over a sofa or curling up with on chilly evenings.
What makes this blanket truly special is its ability to capture the ethereal quality of the aurora borealis. The deep teal base anchors the piece, while emerald, lavender, and mint shades ripple across the surface like light waves in the night sky. The geometric diamond and zigzag motifs emerge organically through simple slipped stitches, creating a woven tapestry effect that looks far more complex than it actually is. Whether you're an experienced knitter seeking a meditative project or a confident beginner ready for a challenge, this pattern delivers stunning results.
Materials Needed
Before you begin, gather the following supplies to ensure a smooth knitting experience:
Yarn
- Color A (Deep Teal): Worsted weight yarn, approximately 400g (used for foundation, border, and first/last color blocks)
- Color B (Emerald): Worsted weight yarn, approximately 300g
- Color C (Soft Lavender): Worsted weight yarn, approximately 300g
- Color D (Pale Mint): Worsted weight yarn, approximately 200g
Total yarn needed: approximately 1200g of worsted weight yarn. Choose a soft, machine-washable wool blend or acrylic for easy care and cozy comfort.
Needles and Notions
- US 8 (5mm) circular knitting needle, 32-inch or longer (the long cable is essential to accommodate the 180 stitches comfortably)
- Stitch markers (optional, but helpful for keeping track of pattern repeats)
- Tapestry needle for weaving in ends
- Scissors
- Blocking mats and pins (recommended for finishing)
Gauge
18 stitches and 24 rows = 4 inches in stockinette stitch (knit on RS, purl on WS). Always knit a gauge swatch before starting to ensure your blanket matches the intended dimensions. If your gauge is off, adjust your needle size accordingly—smaller needles for tighter gauge, larger needles for looser gauge.
Step-by-Step Instructions
This blanket is worked flat in one piece using a mosaic knitting technique with slipped stitches. Each color block is worked over 10 rows, creating a shifting geometric pattern. The entire project is knit from the bottom up, starting and ending with a garter stitch border in Deep Teal.
Foundation and Bottom Border
Step 1: With Color A (Deep Teal), cast on 180 stitches using your preferred method (long-tail cast on works beautifully here). Take your time to ensure the cast-on edge is even but not too tight—you'll be working with this edge for the entire blanket.
Step 2: Knit 6 rows of garter stitch (knit every row) for a sturdy, non-curling edge. This creates a solid foundation that will anchor the mosaic pattern beautifully. After completing these 6 rows, you should be ready to begin the pattern with the right side facing you.
Pattern Repeat (Worked over 10 Rows)
The mosaic pattern is built on a 10-row repeat. Each repeat uses two colors: the first color knits the base rows, and the second color creates the slipped-stitch pattern. Pay close attention to the slipped stitch instructions—slipping purlwise keeps the stitch untwisted and maintains the correct tension.
Row 1 (RS): With Color A, knit all stitches across. This row establishes the base color for the first half of the pattern block.
Row 2 (WS): With Color A, purl all stitches across. You're now ready to introduce the pattern color.
Row 3 (RS): With Color B, work the following repeat: *k3, slip 1 wyib (with yarn in back), k5, slip 1 wyib, k1; repeat from * to end of row. The slipped stitches will create vertical bars that form the mosaic pattern. Remember to keep the yarn at the back of the work when slipping on right-side rows.
Row 4 (WS): With Color B, work the following repeat: *p3, slip 1 wyif (with yarn in front), p5, slip 1 wyif, p1; repeat from * to end of row. On wrong-side rows, keep the yarn in front when slipping. This mirrors the right-side pattern and maintains the mosaic effect.
Row 5 (RS): With Color B, knit all stitches across. This completes the first half of the color block.
Row 6 (WS): With Color B, purl all stitches across.
Row 7 (RS): With Color C, work the following repeat: *k1, slip 1 wyib, k5, slip 1 wyib, k3; repeat from * to end of row. Notice how this pattern is offset from Row 3—this creates the zigzag, shifting effect that mimics the aurora's movement.
Row 8 (WS): With Color C, work the following repeat: *p1, slip 1 wyif, p5, slip 1 wyif, p3; repeat from * to end of row.
Row 9 (RS): With Color C, knit all stitches across.
Row 10 (WS): With Color C, purl all stitches across. This completes one full 10-row pattern repeat.
Color Sequence and Gradient Effect
The magic of this blanket lies in its color progression. Repeat the 10-row pattern, changing colors in this specific order to create the aurora effect:
- First block: Base Color A, Pattern Color B (Rows 1-10 as written above)
- Second block: Base Color B, Pattern Color C (use B for Rows 1-2 and 5-6, C for Rows 3-4 and 7-10)
- Third block: Base Color C, Pattern Color D (use C for Rows 1-2 and 5-6, D for Rows 3-4 and 7-10)
- Fourth block: Base Color D, Pattern Color C (use D for Rows 1-2 and 5-6, C for Rows 3-4 and 7-10)
- Fifth block: Base Color C, Pattern Color B (use C for Rows 1-2 and 5-6, B for Rows 3-4 and 7-10)
- Sixth block: Base Color B, Pattern Color A (use B for Rows 1-2 and 5-6, A for Rows 3-4 and 7-10)
Continue this gradient back-and-forth—A→B→C→D, then D→C→B→A—until the blanket measures 60 inches long from the cast-on edge. End with a complete color block so the pattern finishes symmetrically. The gradual color transition creates the illusion of the aurora borealis shifting across the night sky.
Top Border and Finishing
Step 1: Once your blanket reaches 60 inches, switch to Color A (Deep Teal) and knit 6 rows of garter stitch (knit every row) to mirror the bottom border. This frames the mosaic pattern beautifully and provides a cohesive finish.
Step 2: Bind off loosely using your preferred method. A stretchy bind-off (such as the knit-two-together bind-off or Jeny's surprisingly stretchy bind-off) is recommended to prevent the edge from pulling in. Take care to bind off with the same tension as your knitting—too tight will distort the edge, too loose will create a flared border.
Step 3: Weave in all ends using a tapestry needle. Take your time with this step—secure each end by weaving it through the back of the work for at least 4-5 inches, then trim any excess. This ensures your blanket will withstand years of use and washing.
Blocking for Perfection
Step 1: Soak the finished blanket in lukewarm water with a gentle wool wash for 15-20 minutes. Gently squeeze out excess water—never wring or twist, as this can felt the fibers.
Step 2: Lay the blanket flat on blocking mats and gently stretch it to the intended dimensions (approximately 40 inches wide by 60 inches long). Use blocking pins to secure the edges, especially along the sides where the mosaic pattern may have pulled in slightly.
Step 3: Allow the blanket to dry completely, which may take 24-48 hours depending on humidity. Once dry, remove the pins and enjoy your finished Aurora Borealis Mosaic Knit Blanket!
Pro Tips for Success
- Keep slipped stitches loose: When slipping stitches, avoid pulling the yarn too tightly. Loose slipped stitches create an even, drapey fabric that showcases the mosaic pattern beautifully.
- Use stitch markers: Place a marker every 20 stitches (or after each pattern repeat) to help you keep track of your place, especially when working the longer rows.
- Carry yarn up the side: When changing colors between blocks, carry the unused yarn up the side of the work rather than cutting it. This reduces ends to weave in and creates a cleaner edge. Just be sure to twist the yarns at the color change to prevent long floats.
- Count your stitches: If you lose your place, count your stitches between markers. Each repeat should have 20 stitches (k3, sl1, k5, sl1, k1 = 11 stitches, but the pattern works over a 10-stitch repeat with the final k1 completing the sequence).
- Blocking is essential: Don't skip the blocking step! Blocking opens up the mosaic pattern, evens out the tension, and transforms the blanket from a rumpled piece into a polished heirloom piece.
This Aurora Borealis Mosaic Knit Blanket is more than just a cozy throw—it's a statement piece that brings the magic of the northern lights into your home. The rhythmic slipped-stitch pattern is meditative to knit, and watching the colors shift and blend is deeply satisfying. Whether you gift it to a loved one or keep it for yourself, this blanket is sure to become a treasured favorite for years to come.
Happy knitting, and may your stitches always be even and your colors always dance!