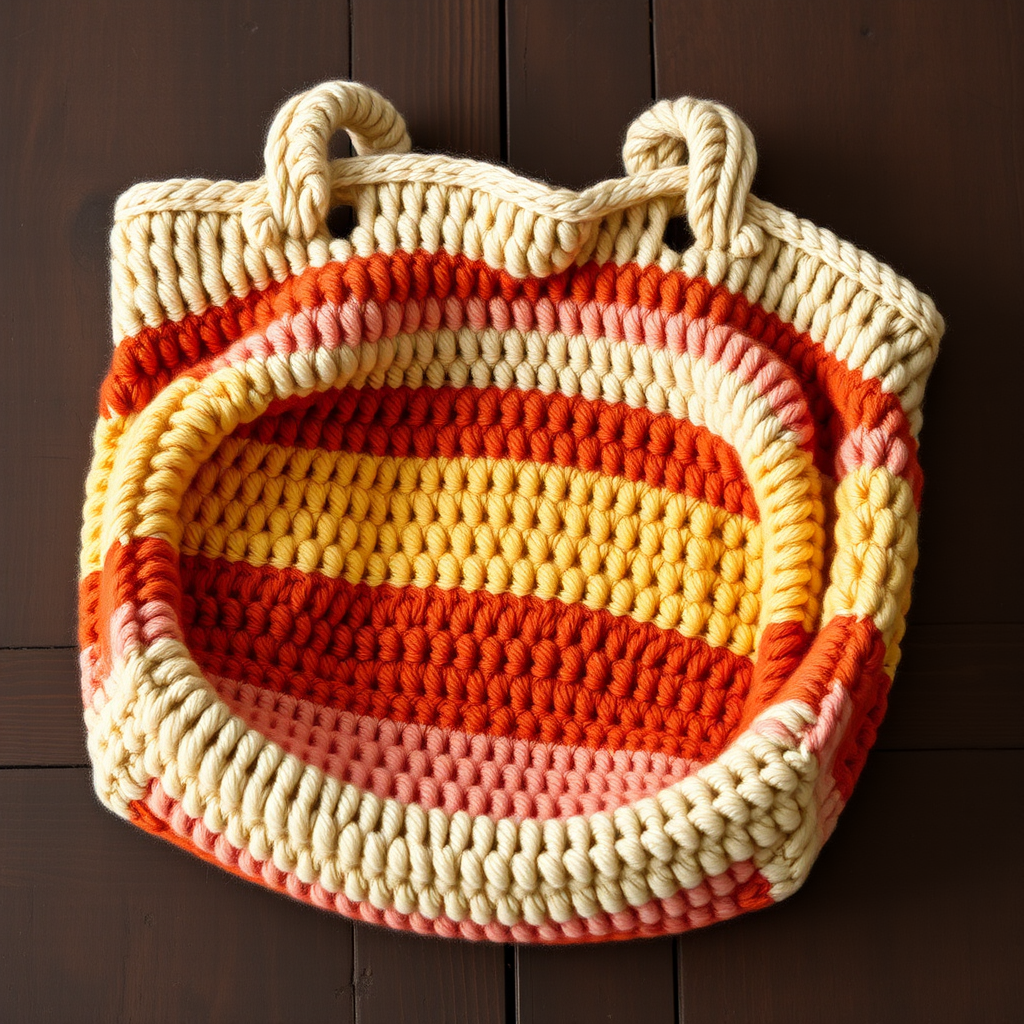
Whispering Willow Market Bag Free Pattern – Crochet a Textured Forest Tote

Whispering Willow Market Bag Free Pattern – Crochet a Textured Forest Tote
Carry your yarn, farmers market finds, or beach essentials in this lush, textured crochet tote inspired by the dappled light of a willow grove. The combination of puff stitches and open mesh creates a sturdy yet airy bag that's as beautiful as it is functional. This pattern is perfect for intermediate beginners who have mastered basic stitches and are ready to explore new textures. The natural color palette of sage green and cream evokes a forest floor with dappled sunlight, making this bag a stunning accessory for any season.
Materials Needed
Before you begin, gather the following materials to ensure a smooth crochet experience:
- Yarn: Worsted weight cotton yarn (e.g., Lion Brand 24/7 Cotton) in two colors:
- Main Color (MC) – Sage Green (approximately 400 yards)
- Contrast Color (CC) – Cream (approximately 300 yards)
- Hook: 5.0 mm (H-8) crochet hook
- Gauge: 14 dc x 8 rows = 4 inches (10 cm) in double crochet
- Extras: Yarn needle for weaving in ends, scissors, stitch markers (optional but helpful)
Abbreviations (US Terms)
- ch = chain
- sl st = slip stitch
- sc = single crochet
- dc = double crochet
- puff st = puff stitch (see special stitch below)
- rnd = round
- MC = Main Color (Sage Green)
- CC = Contrast Color (Cream)
Special Stitch – Puff Stitch (puff st)
Yarn over, insert hook into indicated stitch, yarn over and pull up a loop (3 loops on hook). Yarn over, insert hook into same stitch, yarn over and pull up a loop (5 loops on hook). Yarn over, insert hook into same stitch, yarn over and pull up a loop (7 loops on hook). Yarn over and draw through all 7 loops on hook. Ch 1 to close the puff.
Step-by-Step Instructions
This bag is worked in the round from the bottom up. The base is a solid circle, then the sides alternate between puff stitch bands and open mesh bands for texture and breathability. Finally, you'll create a sturdy strap and a simple drawstring closure.
Base (Worked in MC)
Follow these rounds carefully to create a flat, circular base:
- Rnd 1: Make a magic ring, ch 3 (counts as first dc), work 11 dc into ring. Join with sl st to top of ch-3. (12 dc)
- Rnd 2: Ch 3, dc in same st, 2 dc in each st around. Join. (24 dc)
- Rnd 3: Ch 3, dc in same st, dc in next st, *2 dc in next st, dc in next st* repeat from * to * around. Join. (36 dc)
- Rnd 4: Ch 3, dc in same st, dc in next 2 sts, *2 dc in next st, dc in next 2 sts* repeat from * to * around. Join. (48 dc)
- Rnd 5: Ch 3, dc in same st, dc in next 3 sts, *2 dc in next st, dc in next 3 sts* repeat from * to * around. Join. (60 dc)
- Rnd 6: Ch 3, dc in same st, dc in next 4 sts, *2 dc in next st, dc in next 4 sts* repeat from * to * around. Join. (72 dc)
- Rnd 7: Ch 3, dc in same st, dc in next 5 sts, *2 dc in next st, dc in next 5 sts* repeat from * to * around. Join. (84 dc)
- Rnd 8: Ch 3, dc in same st, dc in next 6 sts, *2 dc in next st, dc in next 6 sts* repeat from * to * around. Join. (96 dc)
- Rnd 9: Ch 3, dc in same st, dc in next 7 sts, *2 dc in next st, dc in next 7 sts* repeat from * to * around. Join. (108 dc)
- Rnd 10: Ch 3, dc in same st, dc in next 8 sts, *2 dc in next st, dc in next 8 sts* repeat from * to * around. Join. (120 dc)
The base is now approximately 10 inches in diameter. If you want a larger bag, continue increasing in this pattern until desired size.
Sides
Now we'll build the textured sides of the bag. Pay close attention to the alternating bands:
- Rnd 11 (Mesh band – MC): Ch 4 (counts as dc + ch 1), skip next st, dc in next st, *ch 1, skip next st, dc in next st* repeat from * to * around, ending with ch 1, skip last st, sl st to 3rd ch of beginning ch-4. (60 dc, 60 ch-1 spaces)
- Rnd 12: Ch 3, dc in each dc and in each ch-1 space around. Join. (120 dc)
- Rnd 13 (Puff band – CC): Ch 2 (does not count as st), puff st in same st, ch 1, skip next st, *puff st in next st, ch 1, skip next st* repeat from * to * around. Join with sl st to top of first puff st. (60 puff sts, 60 ch-1 spaces)
- Rnd 14: Ch 3, dc in each puff st and in each ch-1 space around. Join. (120 dc)
- Rnd 15 (Mesh band – MC): Repeat Rnd 11.
- Rnd 16: Repeat Rnd 12.
- Rnd 17 (Puff band – CC): Repeat Rnd 13.
- Rnd 18: Repeat Rnd 14.
- Rnd 19 (Mesh band – MC): Repeat Rnd 11.
- Rnd 20: Repeat Rnd 12.
- Rnd 21 (Puff band – CC): Repeat Rnd 13.
- Rnd 22: Repeat Rnd 14.
- Rnd 23 (Mesh band – MC): Repeat Rnd 11.
- Rnd 24: Repeat Rnd 12.
- Rnd 25 (Puff band – CC): Repeat Rnd 13.
- Rnd 26: Repeat Rnd 14.
- Rnd 27 (Mesh band – MC): Repeat Rnd 11.
- Rnd 28: Repeat Rnd 12.
- Rnd 29 (Puff band – CC): Repeat Rnd 13.
- Rnd 30: Repeat Rnd 14.
- Rnd 31 (Top edging – MC): Ch 1, sc in same st, sc in next st, *ch 3, skip 2 sts, sc in next 3 sts* repeat from * to * around, ending with ch 3, skip 2 sts, sc in last st. Join with sl st to first sc. Fasten off MC.
Strap (Worked in CC)
Create a sturdy, comfortable strap for your bag:
- Row 1: With CC, ch 8, sc in 2nd ch from hook and in each ch across. (7 sc)
- Row 2: Ch 1, turn, sc in each st across. (7 sc)
- Repeat Row 2 until strap measures approximately 40 inches (or desired length). Fasten off, leaving a long tail for sewing.
- Sew each end of the strap securely to the inside of the bag at opposite sides, just below the top edging. Weave in all ends.
Drawstring (Worked in CC)
Add the finishing touch with a simple drawstring closure:
- Make a chain approximately 60 inches long. Fasten off.
- Weave the drawstring through the mesh band just below the top edging (Rnd 27), entering and exiting through the ch-1 spaces.
- Tie a knot at each end of the drawstring to prevent it from slipping through.
Finishing
Complete your bag with these final steps:
- Weave in all remaining ends with your yarn needle.
- Block the bag lightly if desired to even out the stitches and give it a professional finish. To block, simply wet the bag, gently squeeze out excess water, and lay flat to dry, shaping as needed.
Your Whispering Willow Market Bag is now complete! This versatile tote is perfect for trips to the farmers market, a day at the beach, or as a stylish everyday carryall. The textured puff stitches and airy mesh create a beautiful contrast that will draw compliments wherever you go. Happy crocheting!