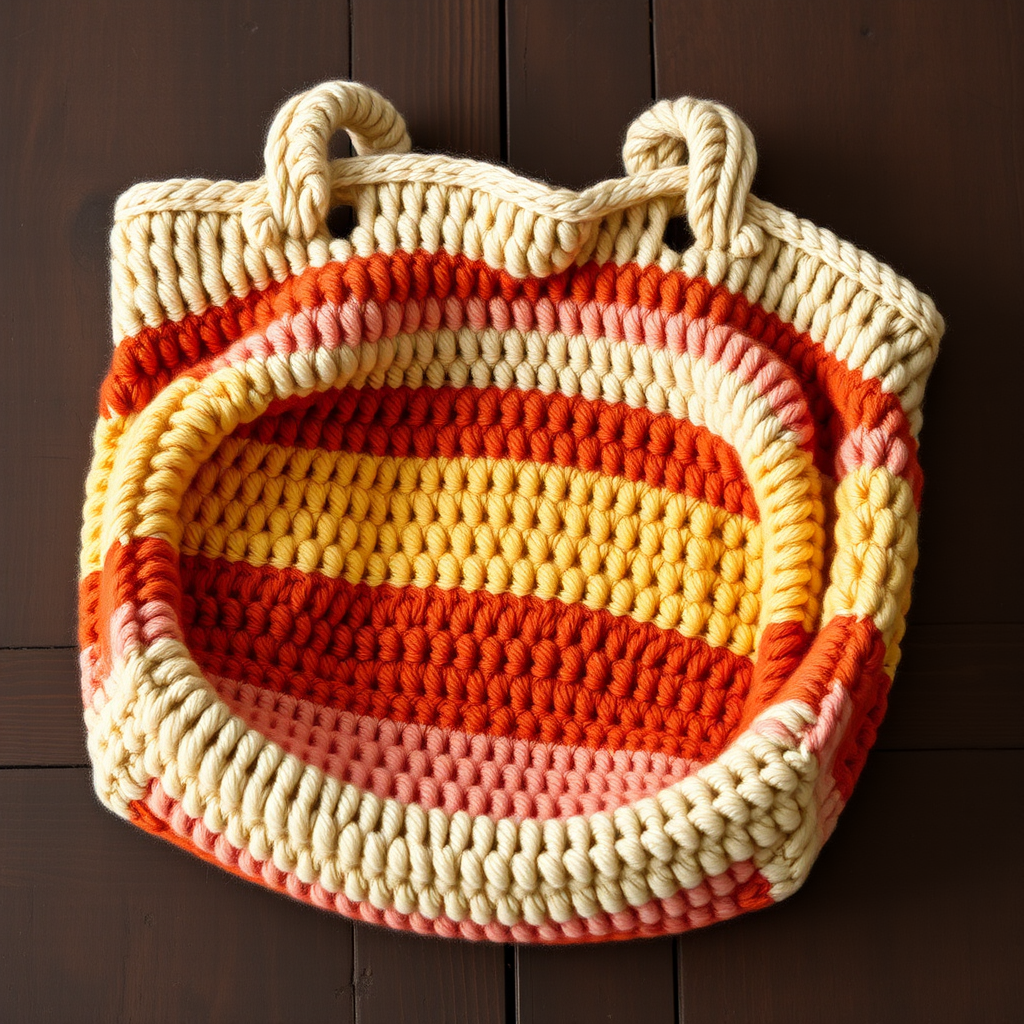
The Sun-Kissed Citrus Tote Free Pattern – A Crocheted Summer Shoulder Bag with Woven Lemon Slices

The Sun-Kissed Citrus Tote: A Free Crochet Pattern for a Summer Shoulder Bag
Imagine strolling through a sun-drenched farmers' market, your handmade tote swinging gently at your side, adorned with cheerful woven lemon slices. That's the magic of the Sun-Kissed Citrus Tote—a vibrant, textured crochet bag that captures the essence of summer in every stitch. This pattern is designed for confident beginners and intermediate crocheters alike, featuring a breezy open-stitch body, sturdy cotton yarn, and charming woven motifs that add a handcrafted touch. Whether you're heading to the beach, a picnic, or simply running errands, this bag is your perfect warm-weather companion.
In this comprehensive guide, I'll walk you through every step—from gathering materials to weaving in your final ends—so you can create a beautiful, functional tote that's as delightful to make as it is to carry. Let's dive in!
Materials Needed
Before you begin, gather these supplies to ensure a smooth crochet session:
- Yarn: Worsted weight cotton yarn in the following colors:
- MC (Main Color): Lemon Yellow – approximately 400g
- CC1 (Contrast 1): Cream – approximately 100g
- CC2 (Contrast 2): White – approximately 50g
- CC3 (Contrast 3): Leaf Green – approximately 50g
- Hook: 5.0 mm (H-8) crochet hook
- Notions: Yarn needle for weaving ends and sewing motifs
- Gauge: 16 single crochet (sc) x 18 rows = 4 x 4 inches. Tip: Always check your gauge to ensure the bag comes out the right size.
Step-by-Step Instructions
Follow these detailed instructions carefully, and you'll have a stunning tote in no time. The pattern is broken into four main sections: the bag body, the woven lemon motifs, the straps, and final assembly.
Part 1: Bag Body (Worked in Continuous Rounds)
The bag body is worked from the bottom up in a spiral, increasing evenly to create a flat circle, then working even for the sides.
- Foundation Ring: With MC (Lemon Yellow), chain (ch) 4. Join with a slip stitch (sl st) to form a ring.
- Round 1: Ch 1 (does not count as a stitch), work 8 single crochet (sc) into the ring. Join with a sl st to the first sc. (8 sc)
- Round 2: Ch 1, work 2 sc into each sc around. Join with a sl st. (16 sc)
- Round 3: Ch 1, *sc in the next sc, 2 sc in the next sc*; repeat from * to * around. Join with a sl st. (24 sc)
- Rounds 4-10 (Increasing): Continue increasing in this manner, adding 8 sc each round. The pattern for each round is as follows:
- Round 4: *Sc in next 2 sc, 2 sc in next sc* (32 sc)
- Round 5: *Sc in next 3 sc, 2 sc in next sc* (40 sc)
- Round 6: *Sc in next 4 sc, 2 sc in next sc* (48 sc)
- Round 7: *Sc in next 5 sc, 2 sc in next sc* (56 sc)
- Round 8: *Sc in next 6 sc, 2 sc in next sc* (64 sc)
- Round 9: *Sc in next 7 sc, 2 sc in next sc* (72 sc)
- Round 10: *Sc in next 8 sc, 2 sc in next sc* (80 sc)
- Rounds 11-22 (Bag Body): Now, work even in sc for 12 rounds. This means simply working 1 sc in each sc around without any increases. Join each round with a sl st. Do not fasten off; you'll continue with the straps later.
Part 2: Woven Lemon Motifs (Make 4)
These charming motifs are worked in the round with alternating colors to create the lemon slice effect. Each motif uses CC2 (White) and CC1 (Cream).
- Foundation Ring: With CC2 (White), ch 4, join with a sl st to form a ring.
- Round 1 (CC2): Ch 1, work 8 sc into the ring. Join with a sl st to the first sc. (8 sc)
- Round 2 (CC1): Switch to CC1 (Cream). Ch 1, *sc in the next sc, 2 sc in the next sc*; repeat from * to * around. Join with a sl st. (12 sc)
- Round 3 (CC2): Switch back to CC2. Ch 1, *sc in the next 2 sc, 2 sc in the next sc*; repeat from * to * around. Join with a sl st. (16 sc)
- Round 4 (CC1): Switch to CC1. Ch 1, *sc in the next 3 sc, 2 sc in the next sc*; repeat from * to * around. Join with a sl st. (20 sc)
- Round 5 (CC2): Switch to CC2. Ch 1, sc in each sc around. Join with a sl st. Fasten off, leaving a long tail (about 12 inches) for sewing the motif onto the bag.
- Embroider Leaves: Using CC3 (Leaf Green) and a yarn needle, embroider small leaf shapes on each lemon motif. To do this, bring the needle up from the back of the motif, create a small straight stitch or a lazy daisy stitch (a looped stitch secured with a tiny stitch) to form a leaf. Repeat to add 2-3 leaves per motif, positioning them near the edge or center as desired. Weave in the CC3 ends on the back.
Part 3: Attaching the Lemon Motifs
- Positioning: Lay your bag body flat. Place the four lemon motifs evenly around the bag, about 2 inches below the top edge. Use stitch markers or pins to hold them in place. Ensure they are spaced equally (roughly every 20 stitches apart).
- Sewing: Thread the long tail from each motif onto a yarn needle. Sew the motif securely to the bag body using a whip stitch or mattress stitch, going through both the motif and the bag fabric. Make sure your stitches are neat and secure, but not too tight that they pucker the fabric. Weave in the ends.
Part 4: Straps (Make 2)
The straps are simple, sturdy rectangles that will be folded and sewn into the bag.
- Foundation Chain: With MC (Lemon Yellow), ch 100.
- Row 1: Sc in the 2nd ch from the hook and in each ch across. (99 sc)
- Row 2: Ch 1, turn, sc in each sc across. Fasten off.
- Repeat: Make a second strap identically.
Part 5: Assembly and Finishing
- Create the Hem: Fold the top edge of the bag body down 1 inch (about 4-5 rows of sc) to the inside. Pin it in place. This creates a clean, finished edge and a casing for the straps.
- Sew the Hem: Using MC yarn and a yarn needle, sew the folded hem down with a slip stitch or whip stitch. Important: Leave two openings on opposite sides of the bag (about 1.5 inches wide each) where the straps will be inserted. Do not sew these shut.
- Insert the Straps: Take one strap and thread it through one opening, around the inside of the hem, and out the other opening. The strap should now form a loop that runs through the hem. Repeat with the second strap, inserting it through the same openings but from the opposite direction, so the straps cross or sit side-by-side. (For a classic tote, insert both straps through the same openings, so they lie flat against each other.)
- Secure the Straps: With a yarn needle and MC yarn, sew the ends of each strap securely to the inside of the bag, just below the hem. Make several strong stitches to ensure they can bear the weight of your belongings. Weave in all ends.
- Final Weave: Weave in any remaining loose ends from the bag body, motifs, and straps using your yarn needle. Trim any excess yarn.
Tips for Success
- Gauge Matters: Always check your gauge before starting. If your bag is too small or too large, adjust your hook size accordingly.
- Color Changes: When switching colors in the motifs, carry the unused yarn loosely up the side or cut and weave in ends. For a cleaner look, cut and rejoin for each round.
- Strap Strength: For extra durability, you can work the straps in a tighter stitch like slip stitch or use a smaller hook. Alternatively, line the straps with fabric for added strength.
- Customization: Feel free to adjust the strap length to your preference. For a crossbody bag, make the chains longer (e.g., 130-150 chains).
Your Handmade Summer Companion
And there you have it—your very own Sun-Kissed Citrus Tote! This bag is not just an accessory; it's a statement of handmade love and summer joy. The bright yellow body, the woven lemon slices, and the sturdy straps come together to create a piece that's both functional and beautiful. Whether you gift it to a friend or keep it for yourself, this tote is sure to bring smiles and sunshine wherever it goes.
I'd love to see your finished creations! Share your photos on social media with the hashtag #SunKissedCitrusTote and tag me so I can admire your work. Happy crocheting, and may your summer be as bright as your new favorite bag!