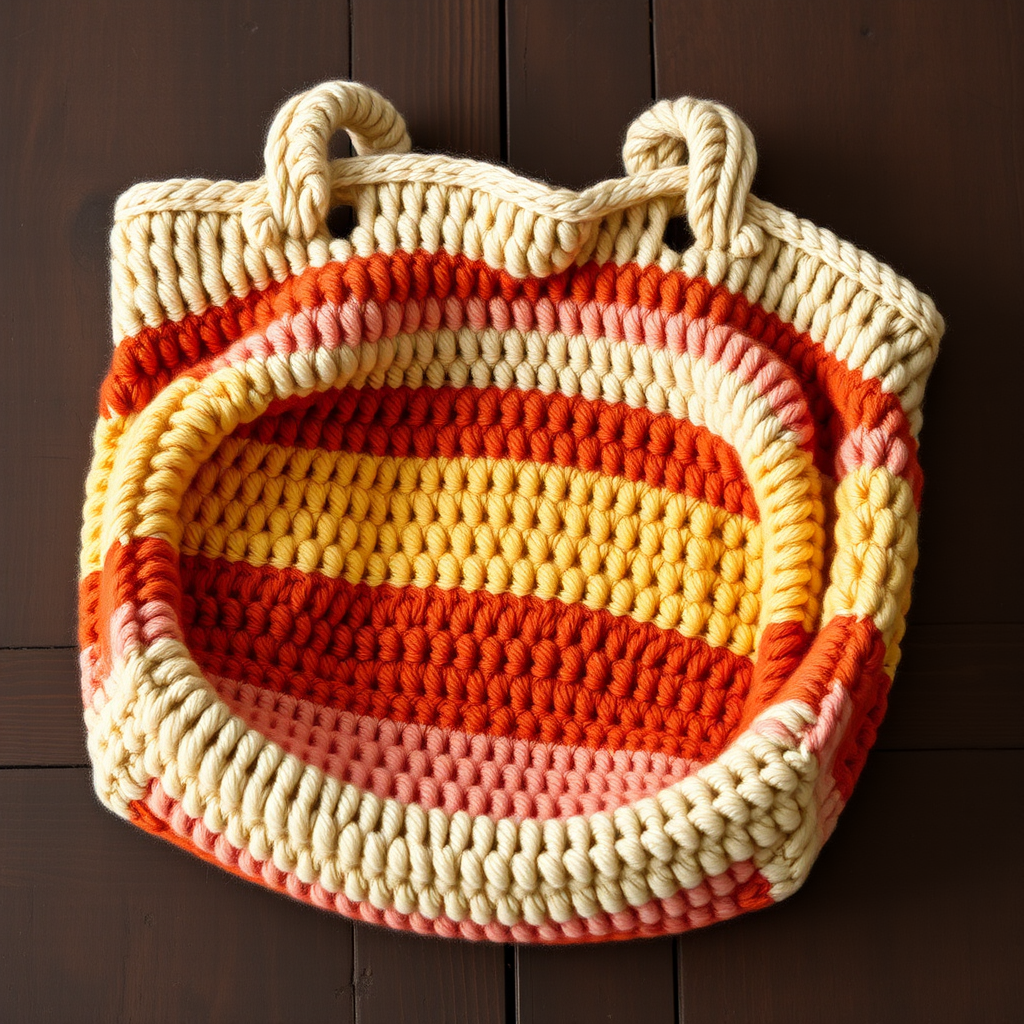
The Meadowmist Market Tote Free Pattern – A Crocheted Ode to Cloudy Skies and Wildflower Fields

The Meadowmist Market Tote Free Pattern – A Crocheted Ode to Cloudy Skies and Wildflower Fields
Imagine strolling through a sunlit meadow, the sky a soft canvas of clouds, and wildflowers swaying in the breeze. That's the feeling woven into every stitch of the Meadowmist Market Tote. This airy, textured bag blends soft gradient yarns with a dreamy puff grid stitch, creating a boho-chic accessory that's as practical as it is beautiful. Whether you're hauling fresh produce from the farmers' market, packing paperbacks for a beach day, or simply adding a handmade touch to your everyday carry, this sturdy cotton tote is your perfect companion.
Designed with beginners in mind, this pattern uses basic crochet techniques—single crochet, double crochet, and a simple puff stitch—to create a stunning textured fabric. The sturdy cotton blend ensures it carries everything from groceries to gym gear with ease, while the open, lacy stitch keeps it breathable and lightweight. Let's dive into this delightful project and create a bag that's truly a work of art.
Materials Needed
Before we begin, gather your materials. This project is all about soft, dreamy colors and a comfortable working rhythm.
- Yarn: Worsted weight cotton blend (e.g., Lion Brand 24/7 Cotton) in three colors:
- Color A (Cloud White): Approx. 100g
- Color B (Sage Green): Approx. 75g
- Color C (Dusty Lavender): Approx. 75g
- Hook: 5.0 mm crochet hook (US H-8)
- Other: Yarn needle for weaving in ends and sewing handles, scissors
Gauge: 14 dc x 8 rows = 4 inches (10 cm) in puff grid pattern. Be sure to check your gauge to ensure your bag comes out the right size.
Step-by-Step Instructions
This bag is worked in continuous rounds from the bottom up. The puff grid stitch is created by alternating puff stitches and chain spaces, giving the bag its signature cloud-like texture. Don't worry if you're new to puff stitches—we'll walk through it together.
Abbreviations
- ch = chain
- sc = single crochet
- dc = double crochet
- puff = puff stitch (yarn over, insert hook, pull up loop) 4 times, yarn over and pull through all loops on hook, ch 1 to close
- sl st = slip stitch
- st(s) = stitch(es)
Base (Worked in Color A - Cloud White)
We'll start with a flat, circular base that will give your tote a sturdy bottom.
- Round 1: Make a magic ring, ch 3 (counts as dc), work 11 dc into ring, join with sl st to top of ch-3. (12 dc)
- Round 2: Ch 3, dc in same st, 2 dc in each st around, join. (24 dc)
- Round 3: Ch 3, dc in same st, dc in next st, *2 dc in next st, dc in next st* repeat around, join. (36 dc)
- Round 4: Ch 3, dc in same st, dc in next 2 sts, *2 dc in next st, dc in next 2 sts* repeat around, join. (48 dc)
- Round 5: Ch 3, dc in same st, dc in next 3 sts, *2 dc in next st, dc in next 3 sts* repeat around, join. (60 dc)
- Round 6: Ch 3, dc in same st, dc in next 4 sts, *2 dc in next st, dc in next 4 sts* repeat around, join. (72 dc)
Body (Switch to Color B - Sage Green for first puff row)
Now we begin the beautiful puff grid pattern. This is where the magic happens! The puff stitches create a raised, bumpy texture that resembles fluffy clouds, while the chain spaces give the bag a breathable, lacy feel.
- Round 7: Ch 1, sc in same st, *ch 1, skip 1 st, puff in next st, ch 1, skip 1 st, sc in next st* repeat around, join with sl st to first sc. (18 puffs)
- Round 8: Ch 1, sc in first ch-1 space, *puff in next sc, sc in next ch-1 space* repeat around, join. (18 puffs)
- Round 9: Ch 1, sc in same st, *ch 1, skip 1 st, puff in next st, ch 1, skip 1 st, sc in next st* repeat around, join.
- Rounds 10-11: Repeat Round 8-9 pattern, but switch to Color C (Dusty Lavender) for Round 10 and back to Color B (Sage Green) for Round 11.
- Rounds 12-13: Continue alternating puff rows, using Color A (Cloud White) for Round 12 and Color B (Sage Green) for Round 13.
- Rounds 14-15: Use Color C (Dusty Lavender) for Round 14 and Color A (Cloud White) for Round 15.
- Rounds 16-17: Use Color B (Sage Green) for Round 16 and Color C (Dusty Lavender) for Round 17.
- Rounds 18-19: Use Color A (Cloud White) for Round 18 and Color B (Sage Green) for Round 19.
- Rounds 20-21: Use Color C (Dusty Lavender) for Round 20 and Color A (Cloud White) for Round 21.
- Rounds 22-23: Use Color B (Sage Green) for Round 22 and Color C (Dusty Lavender) for Round 23.
- Rounds 24-25: Use Color A (Cloud White) for Round 24 and Color B (Sage Green) for Round 25.
Tip: When changing colors, do so at the join of the round. Simply finish the last stitch of the round with the new color to create a seamless transition.
Top Edging (Color A - Cloud White)
Now we'll finish the top of the bag with a clean, sturdy edge that's ready for the handles.
- Round 26: Ch 1, sc in each st and ch-1 space around, join. (72 sc)
- Round 27: Ch 1, sc in each st around, join.
- Round 28: Ch 1, sc in each st around, but work 2 sc in every 6th st to increase slightly for handle attachment, join. (84 sc)
Handles (Make 2, Color A - Cloud White)
These sturdy straps are crocheted flat and then folded and sewn for extra strength.
- Row 1: Ch 60, sc in 2nd ch from hook and in each ch across, turn. (59 sc)
- Row 2: Ch 1, sc in each st across, turn.
- Row 3: Ch 1, sc in each st across, fasten off.
Assembly
Time to bring it all together! This step is crucial for a durable, long-lasting bag.
- Fold each handle in half lengthwise and sew the long edges together to create a sturdy strap. This double-layer construction ensures your handles can carry heavy loads without stretching.
- Attach one handle to the inside of the bag at opposite sides, spacing them about 6 inches apart. Position them so they sit comfortably on your shoulder.
- Sew securely using a yarn needle and Color A yarn, reinforcing with a few extra stitches. Make sure to catch both the handle and the bag's top edge firmly.
Finishing
Almost done! The final touches make all the difference.
- Weave in all ends carefully with your yarn needle, making sure they're secure and hidden within the stitches.
- Optional: Add a fabric lining for extra durability and to prevent small items from slipping through the lacy stitch. However, the bag is fully functional without it—the cotton yarn and tight stitch pattern keep your belongings safe.
And there you have it—your very own Meadowmist Market Tote! This bag is perfect for carrying your market finds, beach essentials, or everyday treasures. The soft gradient of cloud white, sage green, and dusty lavender creates a dreamy, boho aesthetic that pairs beautifully with any outfit.
We'd love to see your creation! Share your finished tote on social media with the hashtag #MeadowmistTote and tag us. Happy crocheting, and may your days be filled with cloudy skies and wildflower fields!