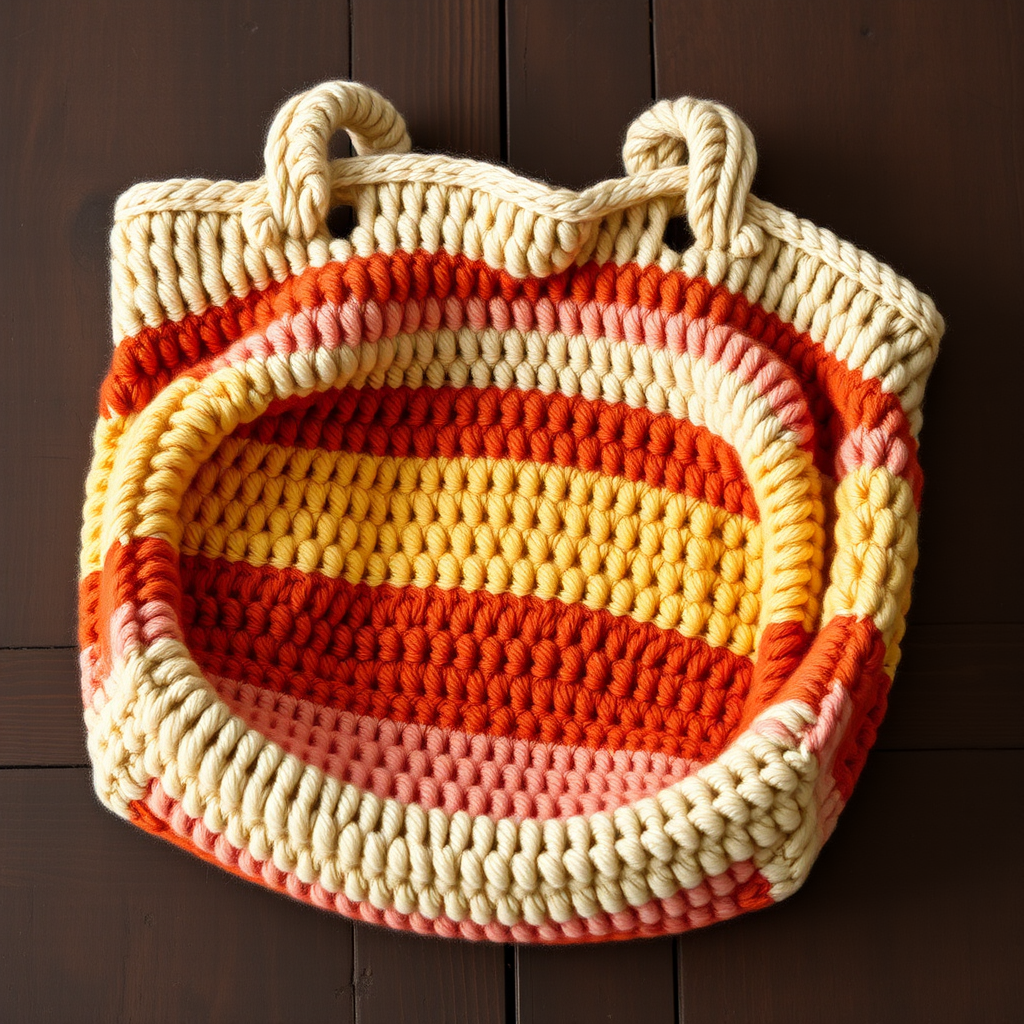
The Meadow Mosaic Market Tote: A Free Crochet Pattern for a Textured, Color-Blocked Bag

Carry a Piece of Spring: Introducing the Meadow Mosaic Market Tote
Imagine strolling through a sunlit meadow, the breeze carrying the scent of fresh grass and wildflowers. That feeling of earthy, vibrant tranquility is now something you can carry with you every day. The Meadow Mosaic Market Tote is more than just a bag; it's a wearable piece of art. Using a clever, beginner-friendly mosaic crochet technique, this pattern transforms simple stitches and a trio of nature-inspired colors into a rich, woven texture that is both stunningly beautiful and surprisingly sturdy. Whether you're heading to the farmer's market, the library, or the beach, this spacious tote is the perfect companion. Let's get started on creating your own little piece of the meadow.
Materials Needed
Before you begin, gather your supplies. This pattern is designed to be accessible, using common materials.
- Yarn: Worsted weight cotton yarn (e.g., Lily Sugar'n Cream) in 3 colors:
- Color A (Meadow Green): 2 skeins (approx. 200g / 340m)
- Color B (Buttercup Yellow): 1 skein (approx. 100g / 170m)
- Color C (Sky Blue): 1 skein (approx. 100g / 170m)
- Hook: Size H/8 (5.0 mm) crochet hook
- Notions: Yarn needle for weaving in ends, scissors, stitch markers (optional, but helpful)
- Gauge: 16 single crochet (sc) x 18 rows = 4 inches (10 cm) in single crochet. Matching gauge is important for the final size, but not critical for this project.
Step-by-Step Instructions
Important Notes: The bag is worked in the round from the bottom up. The mosaic pattern is created by working single crochet (sc) and chain stitches (ch) in a specific sequence. When changing colors, do not cut the yarn; carry the unused yarn loosely along the wrong side (inside of the bag) to be picked up later. This creates a neat, woven interior and saves you from weaving in dozens of ends.
Part 1: The Bottom of the Bag (Worked in Continuous Rounds)
We will create a flat, circular base. Do not join rounds; just keep working in a spiral. Use a stitch marker to mark the first stitch of each round.
With Color A (Meadow Green), make a magic ring.
- Round 1: Ch 1 (does not count as a stitch), work 8 sc into the ring. (8 sc)
- Round 2: Work 2 sc in each stitch around. (16 sc)
- Round 3: *Sc in next stitch, 2 sc in next stitch; repeat from * around. (24 sc)
- Round 4: *Sc in next 2 stitches, 2 sc in next stitch; repeat from * around. (32 sc)
- Round 5: *Sc in next 3 stitches, 2 sc in next stitch; repeat from * around. (40 sc)
- Round 6: *Sc in next 4 stitches, 2 sc in next stitch; repeat from * around. (48 sc)
- Round 7: *Sc in next 5 stitches, 2 sc in next stitch; repeat from * around. (56 sc)
- Round 8: *Sc in next 6 stitches, 2 sc in next stitch; repeat from * around. (64 sc)
- Round 9: *Sc in next 7 stitches, 2 sc in next stitch; repeat from * around. (72 sc)
- Round 10: *Sc in next 8 stitches, 2 sc in next stitch; repeat from * around. (80 sc)
- Round 11: *Sc in next 9 stitches, 2 sc in next stitch; repeat from * around. (88 sc)
- Round 12: *Sc in next 10 stitches, 2 sc in next stitch; repeat from * around. (96 sc)
Fasten off Color A. The bottom is complete. You should have a flat circle of 96 stitches.
Part 2: The Body of the Bag (Worked in Joined Rounds, Turning After Each Round)
Now we will build the sides. Each "round" is actually a joined round where you will turn your work at the end. This prevents the mosaic pattern from slanting. The pattern is a 2-round repeat.
Round 1 (Solid Row): Join Color B (Buttercup Yellow) with a slip stitch (sl st) in any stitch. Ch 1 (does not count as a stitch), sc in the same stitch and in each stitch around. Join with a sl st to the first sc. (96 sc)
Round 2 (Mosaic Row): Ch 1, sc in the same stitch, *ch 1, skip the next stitch, sc in the next stitch; repeat from * around, ending with ch 1, skip the last stitch. Join with a sl st to the first sc. (48 sc, 48 ch-1 spaces)
Round 3 (Solid Row): Ch 1, sc in the same stitch, *sc in the next ch-1 space, sc in the next sc; repeat from * around. Join with a sl st to the first sc. (96 sc)
Round 4 (Mosaic Row): Repeat Round 2.
Round 5 (Solid Row): Repeat Round 3. Fasten off Color B.
Round 6 (Mosaic Row): Join Color C (Sky Blue) with a sl st in any stitch. Repeat Round 2.
Round 7 (Solid Row): Repeat Round 3. Fasten off Color C.
Round 8 (Mosaic Row): Join Color A (Meadow Green) with a sl st in any stitch. Repeat Round 2.
Round 9 (Solid Row): Repeat Round 3. Fasten off Color A.
Repeat the Sequence: Now, repeat Rounds 1-9 (using Color B, then C, then A) until the bag body measures approximately 12 inches (30 cm) from the bottom edge. Important: End the body with a Round 3 (Solid Row) repeat. This ensures the top edge is neat.
Part 3: The Top Edging
With Color A (Meadow Green), join with a sl st in any stitch.
- Round 1: Ch 1, sc in each stitch around. Join with a sl st to the first sc. (96 sc)
- Round 2: Repeat Round 1.
- Round 3: Repeat Round 1.
Fasten off and weave in all ends securely.
Part 4: The Straps (Make 2)
With Color A (Meadow Green), ch 100.
- Row 1: Sc in the 2nd chain from the hook and in each chain across. (99 sc)
- Row 2: Ch 1, turn, sc in each stitch across. (99 sc)
Fasten off, leaving a long tail (approx. 20 inches) for sewing.
Attaching the Straps: Fold the bag flat. Measure approximately 4 inches (10 cm) from the center front and center back. Pin the ends of one strap to the inside of the bag at these two points. Using the long yarn tail, sew the strap securely to the bag, making sure to catch both the strap and the bag fabric. Repeat for the second strap on the opposite side.
Part 5: Finishing
Weave in all remaining ends with a yarn needle. If desired, lightly block your bag by wetting it and laying it flat to dry, shaping it to your preferred dimensions. This will help the stitches settle and the bag to hold its shape beautifully.
Congratulations! You've just created your very own Meadow Mosaic Market Tote. It's ready for its first adventure.