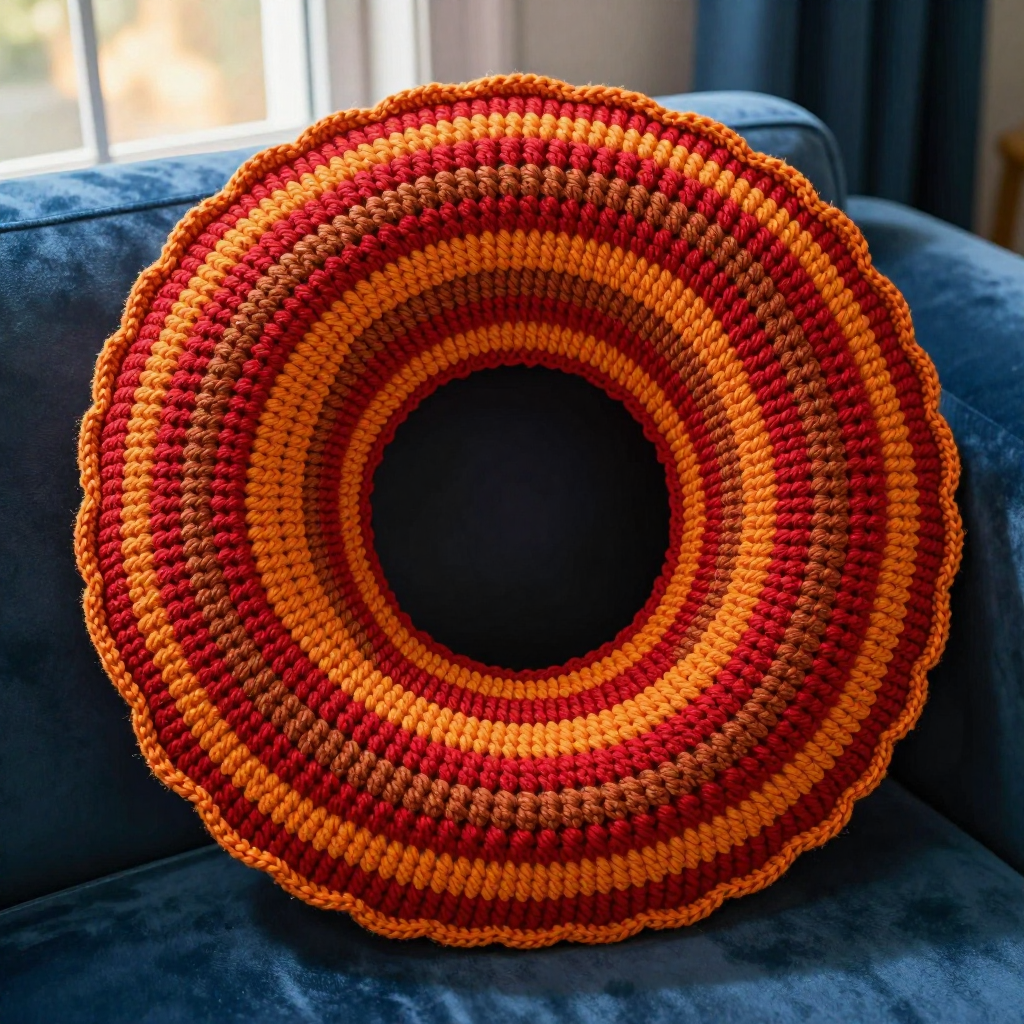
Spice Market Wreath Hoop Free Crochet Pattern: Harvest Gold & Maroon Mini Wall Hanging

Spice Market Wreath Hoop: A Beginner-Friendly Mini Crochet Wall Hanging
Introduction
If you have never held a crochet hook before, this little wreath is the perfect first project to fall in love with. It is a tiny stuffed ring worked in warm harvest gold, dressed with three plump maroon berries and a sweet crocheted chain bow, giving it that cozy retro 90s spice-market feel. The finished piece is about 4 inches (10 cm) across, soft and slightly puffy to the touch, with a lovely bumpy single crochet texture you can actually see and feel. Because it is small, forgiving, and made from just two colors of yarn, you can finish it in an evening and hang it on a hook, a nail, or a little shelf the very same day. It is a wonderful confidence-builder for a complete beginner, and a charming handmade gift for anyone who loves warm, vintage-inspired home decor.
Materials Needed
- Yarn: Worsted weight (category 4) acrylic yarn in harvest gold (about 25 yards / 23 meters) for the main ring, and maroon (about 12 yards / 11 meters) for the berries and bow.
- Stuffing: A small amount of polyester fiberfill, or scrap worsted yarn, to stuff the ring and berries.
- Crochet hook: G/6 (4.0 mm) — the "G/6" is the US size name and "4.0 mm" is the metric size; they are the same hook.
- Stitch marker: One removable stitch marker (or a small safety pin, or a short scrap of contrasting yarn) to mark the first stitch of each round.
- Tapestry needle: A large-eyed, blunt-tipped needle for sewing pieces together and weaving in ends.
- Scissors: Any sharp pair for trimming yarn.
- Finished size: The wreath ring measures about 4 inches (10 cm) in diameter and about 1 inch (2.5 cm) thick. Each berry is about 0.5 inch (1.3 cm) across. The bow tails hang about 1.5 inches (3.8 cm).
Abbreviations and Beginner Glossary
Every pattern is written in shorthand. Here is every abbreviation used in this pattern, explained as if you have never crocheted before. All terms are in US crochet terms.
- ch – chain. Make a loop of yarn on your hook, then pull the working yarn through that loop. Each one you make is a "chain stitch."
- sc – single crochet. Insert your hook into the next stitch, wrap the yarn over the hook and pull up a loop (you now have 2 loops on the hook), then wrap the yarn over again and pull it through both loops. That is one single crochet.
- sl st – slip stitch. Insert your hook into the stitch, wrap the yarn over, and pull it straight through both the stitch and the loop on your hook in one motion. It makes a tiny, flat joining stitch.
- sc2tog – single crochet 2 stitches together. This is a decrease (it turns 2 stitches into 1). Insert your hook into the next stitch, pull up a loop, insert your hook into the following stitch, pull up a loop (3 loops on hook), wrap yarn over and pull through all 3 loops. One stitch is now gone.
- st(s) – stitch or stitches.
- magic ring – an adjustable loop of yarn you make with your fingers, then crochet into. When you pull the short tail, the center closes up tight with no hole. (If you prefer, you can chain 2 and work your first stitches into the first chain instead.)
- 2 sc in next st – work two single crochets into the same stitch. This is an increase (it turns 1 stitch into 2).
- [ ] – brackets. Everything inside the brackets is repeated the number of times stated right after them.
- around – work all the way around the circle until you reach your stitch marker.
- fasten off – cut the yarn a few inches from your work, then pull the tail all the way through the last loop to lock it.
- continuous rounds – you work in a spiral, never joining at the end of a round. This is why you need a stitch marker.
Gauge
Gauge: 4 single crochet stitches x 4 rounds = 1 inch (2.5 cm) in continuous single crochet.
Why gauge matters: Gauge is simply how big your stitches come out. If your stitches are looser or tighter than mine, your wreath will be bigger or smaller than 4 inches. For a small ornament like this it is not a disaster, but checking first saves you from surprises.
How to make a gauge swatch: With your harvest gold yarn and G/6 (4.0 mm) hook, make a magic ring, then work 4 rounds of single crochet, increasing as needed so the circle stays flat (for example: 6 sc, then 12 sc, then 18 sc, then 24 sc). Lay a ruler across the middle of the circle. Four stitches side by side should measure about 1 inch, and four rounds from the center outward should also measure about 1 inch. If your circle is much larger, try a smaller hook; if much smaller, try a larger hook.
Beginner Tips Before You Start
- Use a stitch marker every single round. Because you are working in a spiral, the first stitch of each round is easy to lose. Clip your marker into the first stitch you make, and move it up each round.
- Do not pull your yarn too tight. Tension is the number one beginner struggle. Hold the yarn gently — snug, not strangling. Tight stitches make the hook hard to insert and make the ring stiff.
- Count out loud at first. Counting your stitches at the end of each round catches mistakes immediately, before they snowball.
- Stuff lightly. The ring must stay flexible enough to curve into a circle. Overstuffing makes it stiff and lumpy.
- Keep your magic ring tail long. A long starting tail gives you plenty of yarn to pull the center closed and to weave in later.
- It is okay to undo. Every crocheter rips out rows. Pull the yarn back, rewind it, and try again — nothing is ruined.
Step-by-Step Instructions
Note: The wreath ring is worked as a narrow tube in continuous single crochet rounds, then lightly stuffed and joined into a ring. Do not join rounds unless instructed; use a stitch marker to mark the first stitch of each round.
Part 1: Wreath Ring (make 1 in harvest gold)
Round 1: Make a magic ring, ch 1, work 6 sc into the ring. Pull the ring closed. (6 sc)
Round 2: Work 2 sc in each st around. (12 sc)
Round 3: [Sc in next st, 2 sc in next st] around. (18 sc)
Round 4: [Sc in next 2 sts, 2 sc in next st] around. (24 sc)
Rounds 5–10: Sc in each st around. (24 sc) — this is 6 identical rounds; work them one after another without increasing or decreasing.
Round 11: [Sc in next 2 sts, sc2tog] around. (18 sc)
Round 12: [Sc in next st, sc2tog] around. (12 sc)
Stuff now: Stuff the tube lightly and evenly with fiberfill or scrap yarn. Do not overstuff; the tube should stay flexible enough to curve into a ring.
Round 13: [Sc2tog] around. (6 sc)
Finish the tube: Fasten off, leaving a 10-inch (25 cm) tail. Thread the tail onto the tapestry needle and sew the open end closed. Bring the two ends of the tube together to form a ring and sew them firmly together with the same tail. Weave in the end.
Part 2: Berries (make 3 in maroon)
Round 1: Make a magic ring, ch 1, work 6 sc into the ring. Pull the ring closed. (6 sc)
Round 2: Work 2 sc in each st around. (12 sc)
Round 3: Sc in each st around. (12 sc)
Round 4: [Sc2tog] around. (6 sc)
Stuff and close: Stuff each berry lightly with a tiny pinch of fiberfill. Fasten off, leaving a 6-inch (15 cm) tail. Thread the tail onto the tapestry needle and sew the opening closed. Weave in the end. Repeat these 4 rounds two more times so you have 3 berries total.
Part 3: Chain Bow (make 1 in maroon)
Leave a 4-inch (10 cm) starting tail. Ch 18. Fasten off, leaving a 4-inch (10 cm) tail.
Form the bow: Tie the chain into a bow — form two loops and a center knot, then adjust the tails so they hang evenly. Secure the center knot with a few stitches using the tails and a tapestry needle. Do not cut the tails short; they become the bow streamers.
Assembly and Finishing
1. Place the berries. Arrange the three maroon berries evenly around the front of the harvest gold ring, spacing them about 1 inch (2.5 cm) apart. Lay the wreath flat on your table and nudge the berries until the spacing looks even.
2. Sew on the berries. Thread a berry's tail onto the tapestry needle. Push the needle through the berry and into the ring, then back through the berry again. Repeat several times, passing through both the berry and the ring, until the berry sits snug and does not wobble. Weave the end into the ring and trim. Repeat for all three berries.
3. Attach the bow. Position the maroon chain bow at the top center of the ring, between two berries. Sew the bow in place through the center knot and the back of the loops so it sits flat against the ring. Use the bow's own tails for this, then weave them in.
4. Weave in all ends. Thread each remaining tail onto the tapestry needle, run it back and forth through the inside of the work a few times (about 1 inch of travel), then trim close to the surface. Never knot and cut right at the edge — the end can work loose.
5. Add a hanging loop (optional). Cut a 6-inch (15 cm) length of harvest gold yarn. Fold it in half to make a loop, then tie or sew the loop securely to the back top of the wreath ring. Weave in the ends.
6. Shape and finish. Gently shape the ring with your fingers so it lies flat and the berries face forward. Trim any loose yarn ends. Your wreath is now ready to hang or display on a small hook or nail.
Pro Tips and Variations
- Change the colors: Swap harvest gold for cream, sage, or dusty rose, and maroon for rust or forest green. Any two worsted weight colors that please you will work — this is a great way to use up leftovers.
- Make it bigger or smaller: To enlarge the ring, add extra plain rounds (like Rounds 5–10) before you begin decreasing, and stuff a little more. To shrink it, remove a few of those plain rounds. Keep the increase and decrease rounds exactly as written so the tube stays smooth.
- Substitute yarn: Any worsted weight (category 4) yarn works, including cotton or a wool blend. Just check your gauge again, since different fibers behave differently, and adjust your hook size if needed.
- Add more berries or a tiny leaf: Four or five berries spaced evenly looks lovely, and a small green chain of 4–5 stitches sewn beside a berry makes a quick leaf accent.