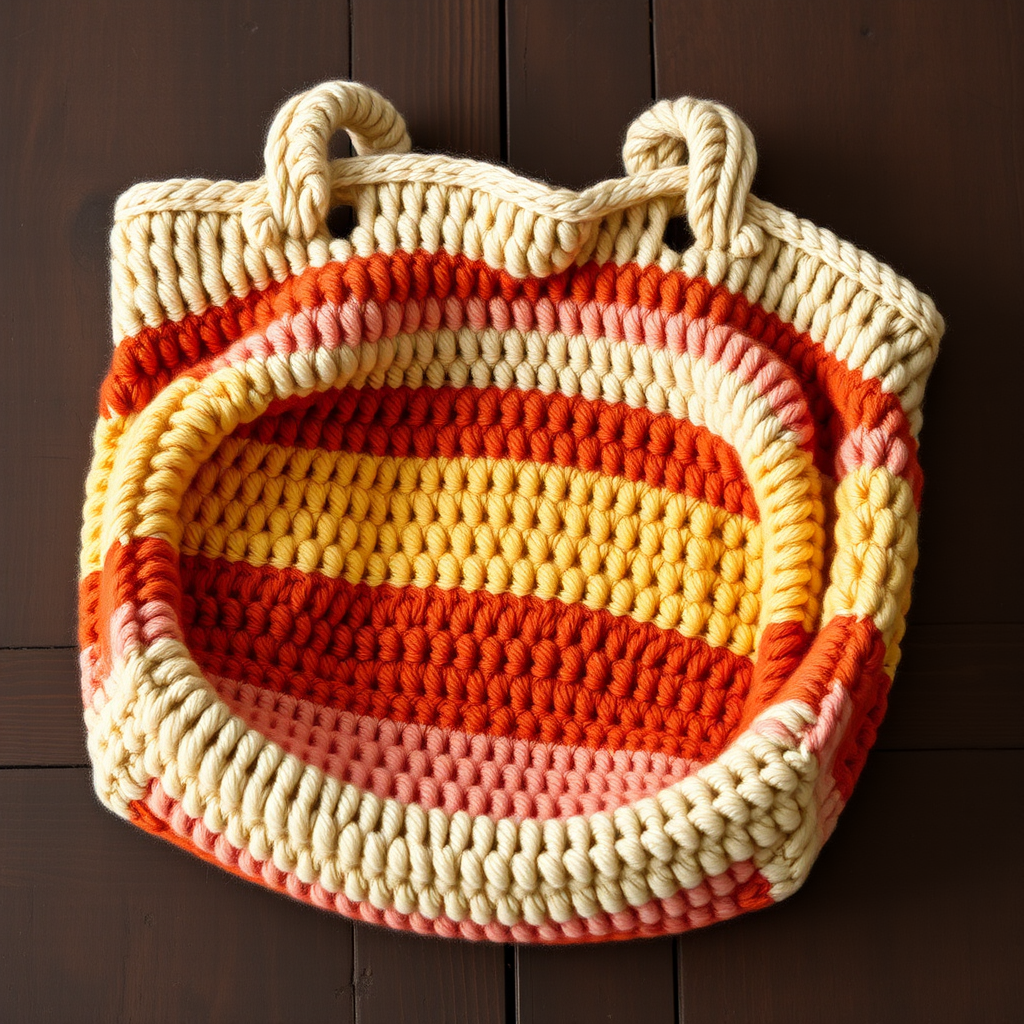
Slanted Puffs Summer Bag Free Pattern – A Textured Crochet Tote

Introducing the Slanted Puffs Summer Bag: A Textured Crochet Tote
Get ready to create a stunning, one-of-a-kind accessory with our Slanted Puffs Summer Bag Free Pattern. This crochet tote features a unique slanted puff stitch that creates a dynamic, woven-like texture, perfect for carrying all your summer essentials. Made with breathable cotton yarn, it's both stylish and sturdy for everyday use—whether you're heading to the beach, the farmer's market, or a casual brunch with friends.
The beauty of this pattern lies in its clever construction. By alternating the placement of the puffs in each row, you'll achieve a subtle chevron-like diagonal pattern that looks far more complex than it actually is. The warm, summery palette of soft sand beige and vibrant coral orange adds a pop of color that will brighten any outfit. Best of all, this pattern is beginner-friendly, using only basic crochet stitches and a simple special stitch that we'll walk you through step by step.
Materials Needed
Before you begin, gather the following materials to ensure a smooth and enjoyable crochet experience:
- Yarn: Worsted weight cotton yarn (e.g., Lion Brand 24/7 Cotton) in two colors:
- Main Color (MC): Sand – approximately 400 yards
- Contrast Color (CC): Coral – approximately 200 yards
- Hook: 5.5 mm (I-9) crochet hook
- Gauge: 14 sts x 10 rows = 4 inches in slanted puff stitch pattern
- Extras: Yarn needle for weaving in ends and sewing handles, scissors
Pro tip: Cotton yarn is ideal for this project because it holds its shape well, is durable, and breathes beautifully in warm weather. The worsted weight ensures your bag has enough structure to carry heavier items without stretching out of shape.
Special Stitch – Slanted Puff
Before we dive into the pattern, let's master the signature stitch that gives this bag its unique texture. The slanted puff is a variation of the classic puff stitch, but with a twist that creates the diagonal effect.
Slanted Puff (SP):
- Yarn over, insert hook into indicated stitch.
- Yarn over and pull up a loop (3 loops on hook).
- Yarn over, insert hook into same stitch.
- Yarn over and pull up a loop (5 loops on hook).
- Yarn over, insert hook into same stitch again.
- Yarn over and pull up a loop (7 loops on hook).
- Yarn over and draw through all 7 loops on hook.
- Chain 1 to close the puff stitch.
That's it! The chain 1 at the end secures the puff and creates a small space that adds to the texture. Practice this stitch a few times until it feels comfortable—you'll be using it throughout the pattern.
Step-by-Step Instructions
Bag Body (Worked in One Piece, Bottom Up)
This bag is worked from the bottom up in a single piece, which means minimal seaming and a clean, professional finish. Let's get started!
Foundation: Chain 46 with MC.
Row 1: Single crochet (sc) in the 2nd chain from hook and in each chain across. (45 sc) Turn.
Row 2: Chain 1, sc in first st, *skip next st, work slanted puff (SP) in next st, skip next st, sc in next st* repeat from * to * across. (11 puffs, 12 sc) Turn.
Let's break this down: You'll start with a single crochet in the first stitch, then skip one stitch, work your slanted puff in the next stitch, skip another stitch, and single crochet in the following stitch. This creates a pattern of sc, puff, sc, puff across the row. The skipped stitches between each puff give the puffs room to pop and create the open, airy texture.
Row 3: Chain 1, sc in each st across. (45 sc) Turn.
This row is a simple single crochet row that acts as a base for the next puff row. It helps stabilize the fabric and gives you a clean canvas for the next set of puffs.
Row 4: Chain 1, sc in first st, *work slanted puff in next st, skip next st, sc in next st* repeat from * to * across. (11 puffs, 12 sc) Turn.
Notice the difference? In Row 2, you skipped a stitch before the puff. In Row 4, you work the puff directly into the next stitch (which was a sc in the previous puff row), then skip the following stitch. This offset placement is what creates the slanted, diagonal effect. The puffs in Row 4 will sit between the puffs of Row 2, creating that beautiful chevron-like pattern.
Rows 5-30: Repeat Rows 2-4 alternately to create the slanted pattern. Here's the color sequence:
- Rows 5-14: Continue with MC, alternating Rows 2, 3, and 4.
- Row 15: Change to CC. Work Row 2 pattern with CC.
- Rows 16-21: Continue with CC, alternating Rows 3, 4, 2, 3, 4, 2.
- Row 22: Change back to MC. Work Row 3 pattern with MC.
- Rows 23-27: Continue with MC, alternating Rows 4, 2, 3, 4, 2.
- Row 28: Change to CC. Work Row 3 pattern with CC.
- Rows 29-30: Work Rows 4 and 2 with CC.
Color change tip: When changing colors, work the last yarn over of the final stitch of the old color with the new color. This creates a seamless transition without any knots. Weave in your ends as you go to keep your work tidy.
Fasten off at the end of Row 30.
Top Border
Now that your bag body is complete, it's time to add a clean, finished edge to the top opening.
Step 1: Attach MC to any top edge stitch with a slip stitch.
Step 2: Work 2 rounds of single crochet around the top opening. In each corner, work 3 sc in the same stitch to create a neat, rounded corner.
Corner detail: The 3-sc corner increase is essential for keeping the top edge flat and preventing it from curling. It also adds a bit of structure to the bag opening.
Step 3: Fasten off and weave in all loose ends.
Handles (Make 2)
These sturdy handles are simple to make and attach securely to your bag.
Step 1: With MC, chain 80.
Step 2: Row 1: sc in the 2nd chain from hook and in each chain across. (79 sc) Fasten off.
Handle length: 79 single crochets will give you a handle that's approximately 20 inches long when stretched slightly. This is a comfortable length for carrying over your shoulder or in the crook of your arm.
Step 3: Attach each handle to the inside of the bag, 4 inches from the side seams, using a whip stitch.
Attachment tip: To ensure your handles are secure, weave the yarn through the handle stitches and the bag's top border stitches multiple times. Make sure to attach them evenly on both sides so your bag hangs straight.
Finishing Touches
Once your handles are attached, give your bag a gentle blocking to even out the stitches and enhance the puff texture. Simply mist the bag with water, shape it gently, and let it dry flat. This will help the slanted puffs stand out beautifully.
Your Slanted Puffs Summer Bag is now complete! This textured tote is perfect for carrying your beach towel, a good book, and all your summer necessities. The breathable cotton yarn keeps it light and airy, while the sturdy construction ensures it will last for many seasons to come.
We'd love to see your finished creation! Share your photos on social media with the hashtag #SlantedPuffsBag and tag us so we can admire your handiwork. Happy crocheting!