Lumière Bloom Garland Free Pattern – Crochet a Glowing Garden of Light
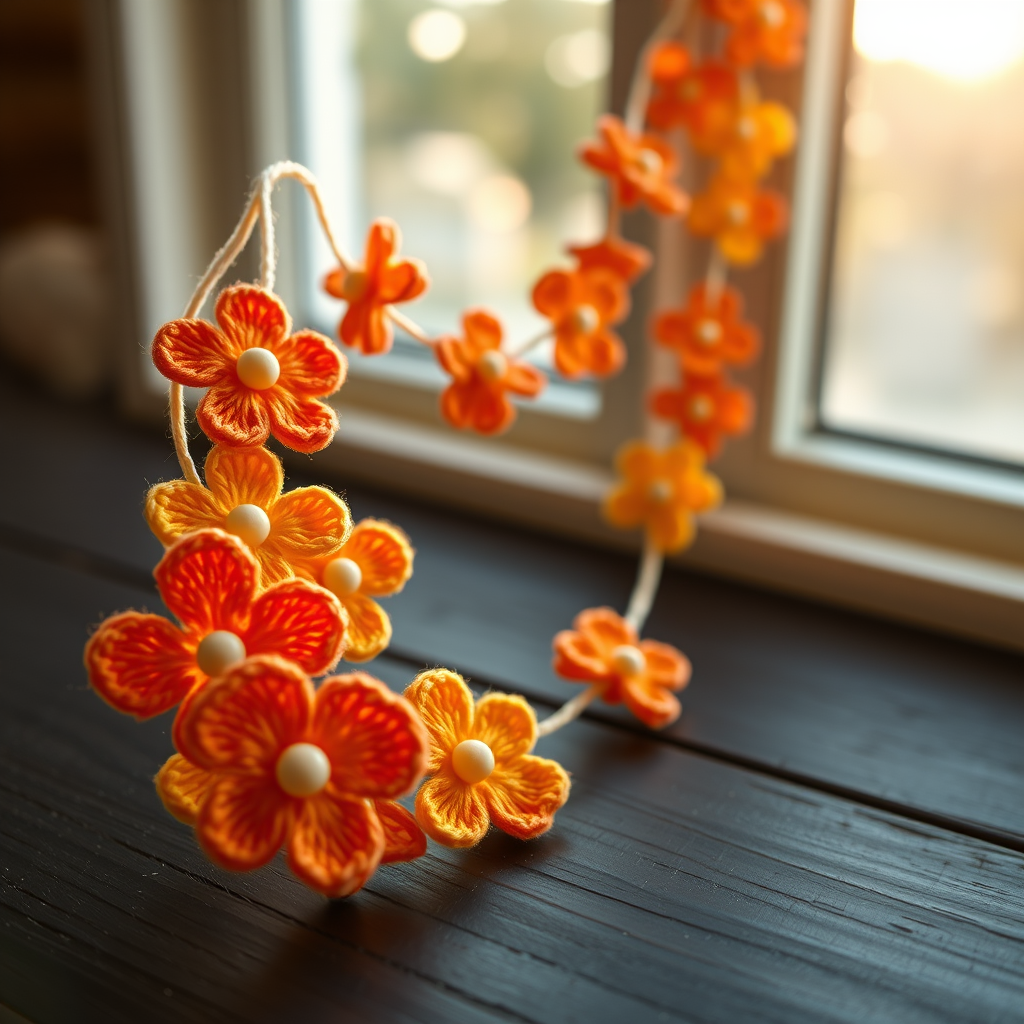
Bring a Soft, Ethereal Glow to Any Room with the Lumière Bloom Garland
Imagine a string of captured sunlight, draped gracefully across a window or mantelpiece. That's the magic of the Lumière Bloom Garland. This free crochet pattern offers a modern, luminous take on the classic Japanese flower, using delicate size 10 thread and a clever bead accent to create petals that catch the light like stained glass. Whether you're a seasoned crocheter looking for a quick, satisfying project or a beginner ready to tackle thread work, this pattern is designed to be both inspiring and achievable. The result is a boho-chic, ethereal home decor piece that adds a warm, glowing ambiance to any space.
In this comprehensive guide, we'll walk you through every step, from gathering your materials to stringing your final garland. Let's get started on creating your very own glowing garden of light.
Materials Needed for Your Luminous Garland
Before you begin, gather the following supplies. The quality of your thread and hook will directly impact the delicate, airy look of your flowers.
- Yarn: Size 10 crochet thread in a gradient of warm sunset colors (e.g., coral, amber, gold) and a single skein of cream for the centers. The gradient effect is key to the "luminous" look, so choose shades that transition beautifully.
- Hook: Steel crochet hook size 7 (1.65 mm) or size needed to obtain gauge. A steel hook is essential for working with fine thread.
- Gauge: First 4 rounds of flower = 2 inches (5 cm) in diameter. Always check your gauge to ensure your flowers are the correct size for a balanced garland.
- Additional Supplies: Small beads or buttons (one per flower), sturdy thread or thin cord for the garland base (e.g., 6 feet / 1.8 meters), a tapestry needle for sewing and assembly, and small scissors.
Step-by-Step Instructions: Crocheting the Lumière Flower
This pattern creates a single, stunning six-petaled flower. Repeat the process to make as many flowers as you desire for your garland. The instructions are detailed to ensure a flawless finish, even for beginners.
Flower (Make Multiple)
Round 1: With your chosen petal color, make a magic ring. Work 6 single crochet (sc) into the ring. Pull the tail tight to close the ring completely. Join with a slip stitch (sl st) to the first sc. (6 sc)
Round 2: Chain 1 (this does not count as a stitch). Work 2 sc in each sc around. Join with a sl st to the first sc. (12 sc)
Round 3: Chain 1. *Work 2 sc in the next sc, sc in the next sc; repeat from * around. Join with a sl st. (18 sc)
Round 4: Chain 1. *Work 2 sc in the next sc, sc in the next 2 sc; repeat from * around. Join with a sl st. (24 sc)
Round 5 (Creating the Petal Bases): *Chain 5. Skip the next sc, slip stitch in the following sc; repeat from * around. You will have created 12 chain loops. Join with a sl st to the first chain space. (12 chain loops)
Round 6 (Outer Petals): Slip stitch into the first chain space to position your hook. *Work the following cluster all into the same chain space: (sc, half double crochet (hdc), 3 double crochet (dc), hdc, sc). Then, slip stitch into the next chain space; repeat from * around. This creates the beautiful, layered petal shape. Fasten off and weave in all ends securely. (12 petals)
Creating the Flower Center
Center: With your cream thread, make a magic ring. Work 6 sc into the ring. Pull tight to close. Slip stitch to join. Fasten off, leaving a long tail (at least 12 inches) for sewing. Sew the cream center to the middle of the flower using the long tail. For the final luminous touch, sew a small bead or button into the very center of the cream circle, securing it firmly.
Assembly: Stringing Your Glowing Garden
Once you've crocheted all your flowers, it's time to bring your garland to life. Follow these steps for a professional, polished finish.
- Arrange Your Flowers: Lay out all your completed flowers on a flat surface. Play with the color gradient and spacing until you find a pleasing, balanced arrangement. This is your chance to design the overall look of the garland.
- Prepare the Base Cord: Cut a length of sturdy thread or thin cord (e.g., 6 feet / 1.8 meters) for the garland base. A natural cotton cord works beautifully and complements the boho aesthetic.
- Thread the Flowers: Using a tapestry needle, thread the cord through the back of each flower, just below the center. This will make the flowers hang facing forward. Space them about 4-6 inches apart, adjusting as needed based on your arrangement.
- Secure the Flowers: To keep each flower in its place, add a small knot or a bead on the cord between each flower. This prevents them from sliding and creates a lovely, rhythmic detail.
- Hang and Enjoy: Your Lumière Bloom Garland is complete! Hang it near a window, over a mirror, or intertwined with string lights to see the warm colors truly glow and catch the light.
This pattern is a wonderful way to practice thread crochet and create a stunning piece of decor that you'll cherish for years. The combination of the gradient thread, delicate petals, and sparkling bead centers makes this garland a true work of art. Happy crocheting!