Emberfall Dragon Wing Shawl Free Pattern – A Knitted Mythic Ember Wrap

Wrap Yourself in Myth: Introducing the Emberfall Dragon Wing Shawl
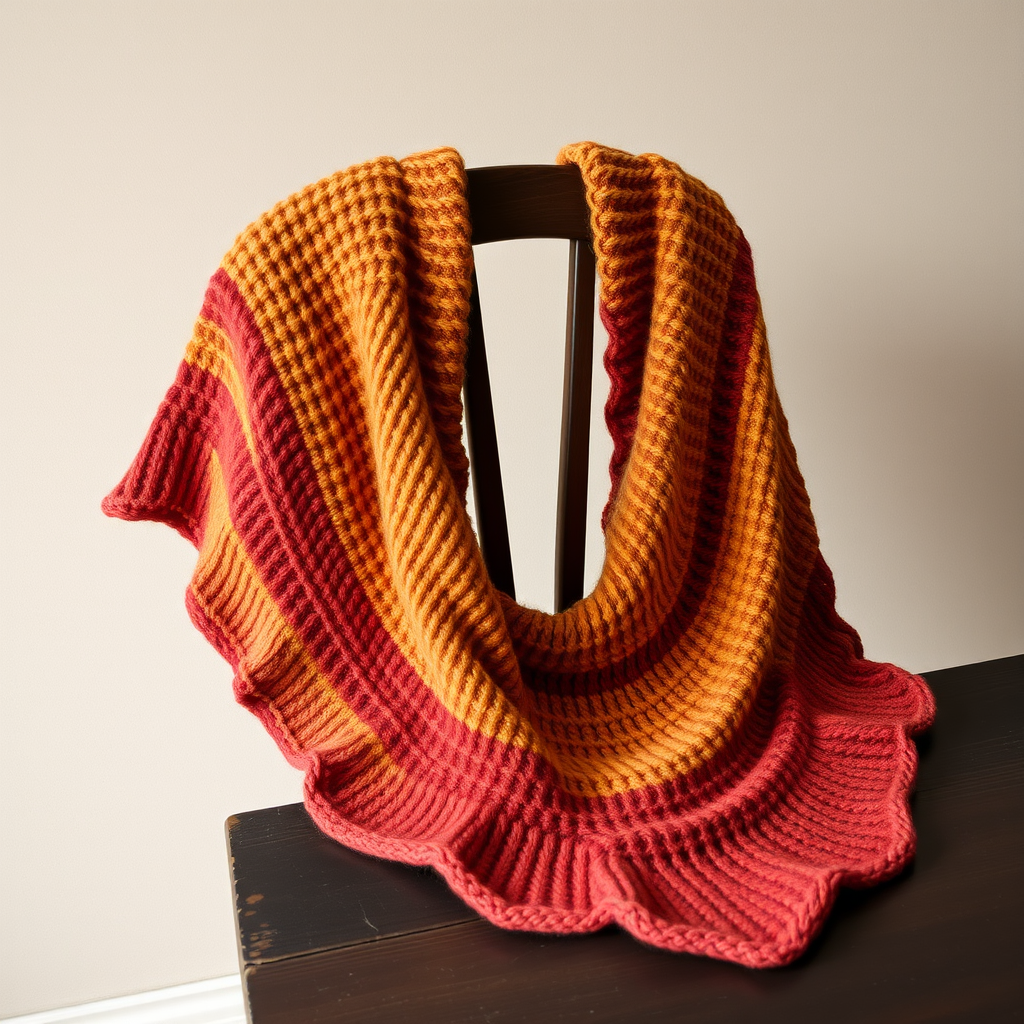
Have you ever wanted to knit something truly magical? Something that feels less like a simple accessory and more like a piece of wearable fantasy? Look no further than the Emberfall Dragon Wing Shawl. This isn't just a shawl; it's a statement. With its dramatic, wing-like crescent silhouette and a unique, dimensional scale stitch, this pattern transforms simple yarn into a fiery tapestry that looks like it was pulled straight from the pages of a fantasy novel.
Imagine wrapping yourself in the warm, cascading embers of a dragon's wing. The pattern uses a clever combination of dropped stitches and yarn overs to create raised, overlapping "scales" that give the shawl an incredible, almost reptilian texture. The color gradient—shifting from deep burgundy to burnt orange and golden amber—mimics the glow of a fading fire, making this piece as visually stunning as it is cozy. Best of all, this free pattern is surprisingly accessible. While the texture looks complex, the construction is logical and repetitive, making it a rewarding project for adventurous beginners and seasoned knitters alike.
In this comprehensive guide, I'll walk you through every step, from gathering your materials to the final blocking that will make your shawl truly soar. Let's get started on creating your very own mythic ember wrap.
Materials Needed: Gathering Your Hoard
Before you cast on, let's make sure you have everything you need. The beauty of this project is that it uses accessible, worsted-weight yarn, which means it works up quickly and is easy to handle.
Yarn
You will need worsted weight yarn in three shades to create the fiery gradient:
- Color A (Deep Burgundy): Approximately 300 yards. This is your base color for the beginning and the edging.
- Color B (Burnt Orange): Approximately 200 yards. This will be your first scale color.
- Color C (Golden Amber): Approximately 100 yards. This will be your second scale color.
Total yarn needed: Approximately 600 yards. Choose a soft, drapey worsted weight yarn for the best effect—a wool or wool-blend will block beautifully and show off the scale texture.
Needles & Notions
- Knitting Needle: US 8 (5 mm) circular knitting needle, 32 inches or longer. The long cable is essential to hold the growing number of stitches.
- Stitch Markers: At least 2, to help you keep track of your edges.
- Yarn Needle: For weaving in ends.
- Blocking Mats and Pins: To shape and set the final dimensions of your shawl.
Gauge
18 stitches and 24 rows = 4 inches in stockinette stitch (after blocking). While gauge isn't critical for a shawl, matching it will help you achieve the intended size and drape.
Step-by-Step Instructions: Weaving the Emberfall Magic
This shawl is worked from the top center down, increasing on each side to create the wing-like crescent shape. Don't be intimidated by the scale pattern—we'll break it down into simple, repeatable steps.
Abbreviations
- CO: Cast on
- K: Knit
- P: Purl
- YO: Yarn over
- K2tog: Knit two together (right-leaning decrease)
- SSK: Slip, slip, knit (left-leaning decrease)
- PM: Place marker
- SM: Slip marker
- RS: Right side
- WS: Wrong side
Special Stitch: Scale Drop (SD)
This is the magic that creates the dragon scales. It's a two-row process:
- On RS rows: Work as follows: K1, YO, K1 into the same stitch. This increases 2 stitches.
- On the following WS row: Purl these 3 stitches together (P3tog). This creates a raised, dimensional "scale" bump on the right side of the work.
Getting Started: The Setup
With Color A, let's create the foundation.
- CO 3 stitches.
- Row 1 (RS): K1, YO, K1, YO, K1. (You now have 5 stitches).
- Row 2 (WS): Purl all stitches.
- Row 3 (RS): K2, YO, K1, YO, K2. (You now have 7 stitches).
- Row 4 (WS): Purl all stitches.
The Increase Section: Building the Wing Base
Now we'll establish the simple increase rhythm that shapes the shawl's top edge.
- Row 5 (RS): K2, YO, knit to the last 2 stitches, YO, K2. (This adds 2 stitches).
- Row 6 (WS): Purl all stitches.
- Repeat Rows 5 and 6 until you have 31 stitches on your needle, ending with a WS row.
The Scale Pattern Section: Creating the Dragon's Hide
This is where the magic happens. We'll work an 8-row repeat, alternating colors every 8 rows to create the ember gradient. Your color sequence will be: B, C, B, A, B, C, etc.
Pro-Tip: Place a marker after the first 2 stitches and before the last 2 stitches. This will help you keep your edge increases consistent.
Row 1 (RS, Color B): K2, YO, *SD, K1; repeat from * to the last 2 stitches, YO, K2.
Row 2 (WS): Purl all stitches. (Remember to P3tog the SD stitches from the previous row).
Row 3 (RS): K2, YO, *K3, P1; repeat from * to the last 2 stitches, YO, K2.
Row 4 (WS): Purl all stitches.
Row 5 (RS): K2, YO, *K1, SD, K1; repeat from * to the last 2 stitches, YO, K2.
Row 6 (WS): Purl all stitches. (Again, P3tog the SD stitches).
Row 7 (RS): K2, YO, *K5, P1; repeat from * to the last 2 stitches, YO, K2.
Row 8 (WS): Purl all stitches.
Repeat these 8 rows, switching colors as noted, until the shawl measures approximately 28 inches from the center top. The shawl grows quickly, so keep an eye on the length. End with a WS row.
The Edge Finishing: A Fiery Border
With Color A, we'll add a delicate, lacy edge to complete the wing.
- Row 1 (RS): K2, YO, *K2tog, YO; repeat from * to the last 2 stitches, YO, K2.
- Row 2 (WS): Purl all stitches.
- Row 3 (RS): K2, YO, *K1, YO, K2tog; repeat from * to the last 2 stitches, YO, K2.
- Row 4 (WS): Purl all stitches.
- Bind off loosely on the next RS row: K2, *K2tog, pass the first stitch over the second; repeat from * to the end. This creates a stretchy, picot-like edge.
Blocking: Unleashing the Wing
Blocking is crucial for this project. It will open up the lace, define the scales, and give the shawl its dramatic shape.
- Soak the shawl in lukewarm water with a drop of wool wash for 20 minutes.
- Gently squeeze out excess water. Do not wring or twist.
- Lay the shawl flat on a blocking mat.
- Pin the top edge straight. Then, pin the bottom edge into gentle points, stretching the fabric to accentuate the wing-like scallops.
- Allow it to dry completely before unpinning.
And there you have it—your very own Emberfall Dragon Wing Shawl. This piece is more than just a knit; it's an experience. The rhythmic repetition of the scale stitch is meditative, and the reveal of the textured fabric is deeply satisfying. Whether you're a fantasy fan or simply love unique, textured knits, this shawl is sure to become a treasured piece in your wardrobe.
Happy knitting, and may your wings always catch the firelight!