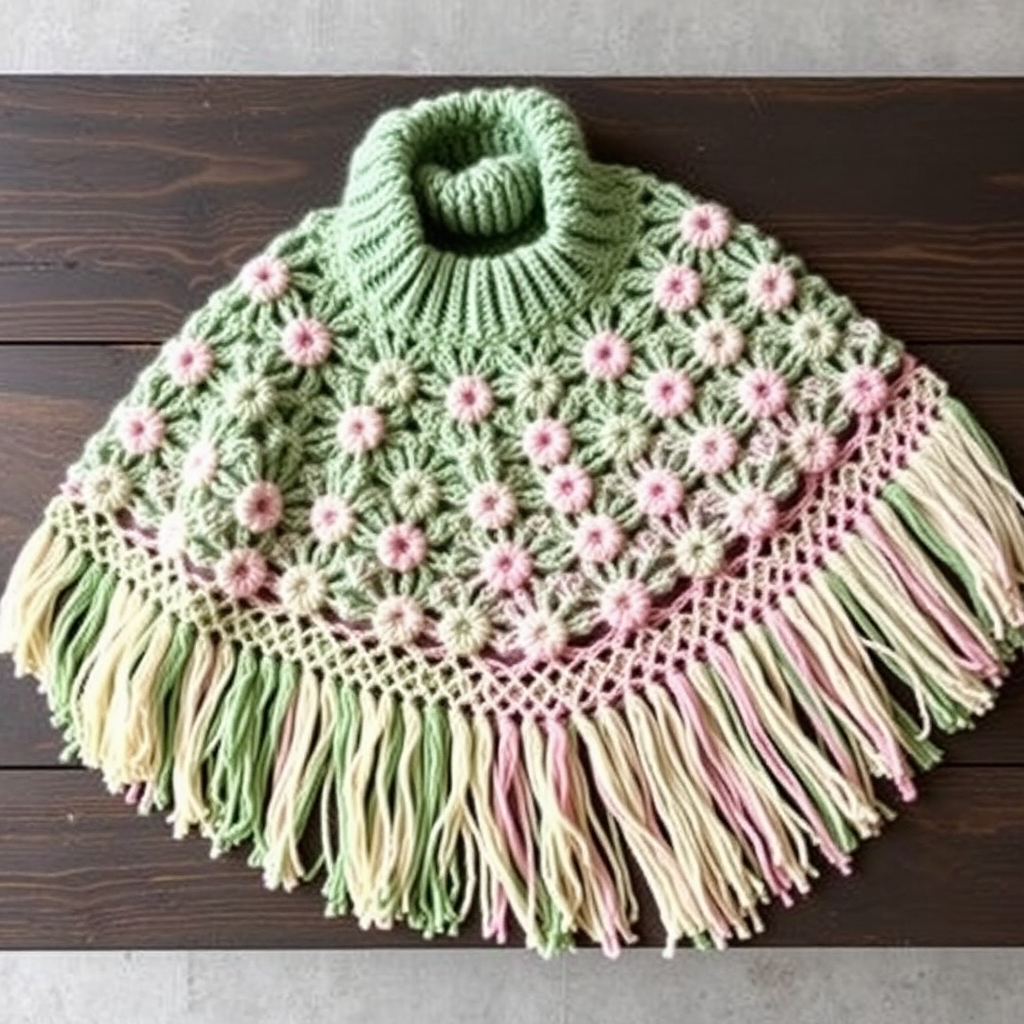
Aurora Dune Hairpin Lace Poncho Free Pattern – A Knitted Desert Mirage

Aurora Dune Hairpin Lace Poncho Free Pattern – A Knitted Desert Mirage
Wrap yourself in the shifting sands of sunset with this airy hairpin lace poncho, where undulating waves of warm terracotta and blush create a modern, sculptural silhouette. This free pattern blends vintage technique with contemporary design for a truly unique drape. The Aurora Dune Poncho is more than just a garment—it's wearable art that evokes the serene beauty of desert dunes at dusk. Whether you're a seasoned fiber artist or a curious beginner ready for a new challenge, this pattern offers a rewarding journey into the mesmerizing world of hairpin lace.
Why You'll Love This Pattern
Hairpin lace is a stunning, vintage technique that creates delicate, airy strips of fabric with long, flowing loops. When these strips are joined together, they form a fabric with incredible drape and movement. The Aurora Dune Poncho takes this classic technique and gives it a modern, boho twist with a warm desert sunset palette. The result is a lightweight, breathable poncho that's perfect for layering over summer dresses or adding a touch of bohemian elegance to your autumn wardrobe.
Materials Needed
Before you begin your crafting journey, gather the following materials. Having everything prepared will make the process smooth and enjoyable.
- Yarn: Worsted weight cotton or cotton-blend yarn in 3 colors:
- Color A (Terracotta) – approx. 200g
- Color B (Dusty Rose) – approx. 200g
- Color C (Cream) – approx. 200g
- Hairpin Lace Loom: Adjustable width, set to 3 inches
- Crochet Hook: Size H/8 (5mm)
- Tapestry Needle: For weaving in ends and finishing
- Scissors: For cutting yarn
- Steam Iron or Steamer: For blocking (optional but recommended)
Gauge Information
While gauge is not critical for this drapey garment, it helps to maintain consistency for the best result:
- Hairpin Lace Strips: 12 loops per 4 inches on each side
- Crochet Join: 3 single crochets per inch
Understanding Hairpin Lace
If you're new to hairpin lace, don't worry! It's a simple technique that produces stunning results. The loom consists of two parallel prongs connected by adjustable bars. You work a series of single crochet stitches in the center, while the yarn wraps around the prongs to create long loops on either side. These loops become the "lace" that gives the fabric its airy, open quality.
Step-by-Step Instructions
Part 1: Creating the Hairpin Lace Strips (Make 6)
Note: This poncho is constructed from 6 hairpin lace strips, each 60 inches long, then joined and shaped to form a flowing, open-front garment.
- Set Up Your Loom: Adjust your hairpin lace loom to a 3-inch width. Make a slip knot on the center post of the loom, leaving a 6-inch tail for weaving in later.
- Begin the Strip: Hold the loom with the center post facing you. Wrap the working yarn around the left prong from front to back, bringing it to the front again.
- First Center Stitch: Insert your crochet hook through the top loop on the left side of the loom (the loop you just created). Yarn over and pull through the loop, creating a new loop on your hook. Yarn over again and pull through both loops on the hook to complete a single crochet (sc).
- Rotate the Loom: Now, rotate the loom 180 degrees so the right prong is now on the left. Wrap the yarn around the new left prong (which was the right prong) from front to back.
- Continue the Pattern: Insert your hook through the top loop on the left side (the loop you just wrapped around the prong). Yarn over, pull through, yarn over, pull through both loops on the hook (sc). Rotate the loom again and repeat.
- Maintain Consistency: Continue this rhythm—wrap, insert hook, sc, rotate—until your strip measures 60 inches. This will be approximately 360 loops on each side. The key is to keep your tension even so the loops are uniform in size.
- Finish the Strip: When your strip reaches 60 inches, cut the yarn, leaving a 12-inch tail. Pull the tail through the last loop on your hook to fasten off. Carefully slide the strip off the loom. Repeat this process to create all 6 strips.
Part 2: Assembling the Strips into Panels
Now that you have 6 beautiful hairpin lace strips, it's time to join them together to create the poncho panels.
- Prepare Your Panels: Lay 3 strips side by side vertically on a flat surface. Make sure the strips are aligned at the top and bottom edges. You will create 2 panels, each with 3 strips.
- Join the Strips with Color C (Cream): Using your H/8 (5mm) crochet hook and Color C yarn, begin at the top of the first two strips. Insert your hook through one loop from the left strip and one loop from the right strip, catching both loops together.
- Single Crochet Join: Yarn over and pull through both loops on the hook. Yarn over again and pull through both loops on the hook to complete a single crochet. This joins the two strips together.
- Continue Joining: Work a loose, even join by continuing to sc through one loop from each strip, matching loop counts as you go. Work your way down the entire 60-inch length of the strips. The join should be flexible and not pull the strips tight.
- Complete the Panel: When you reach the bottom, fasten off and weave in the ends. Repeat this process to join the third strip to the second, creating a panel of 3 strips. Repeat the entire process to create a second panel of 3 strips.
- Check Your Panels: Each panel should now measure approximately 9 inches wide (3 strips x 3 inches) and 60 inches long.
Part 3: Shaping the Poncho
This is where the magic happens—transforming your flat panels into a wearable garment with beautiful drape.
- Create the Cross Formation: Place the two panels perpendicular to each other, forming a cross shape. The center overlap will become the back of the neck. Take a moment to visualize how the poncho will drape—the panels will form the front and back of the garment.
- Mark the Neck Opening: Identify the center 12 inches of each panel's edge. This will be the neck opening. You can mark this with stitch markers or a contrasting piece of yarn.
- Join the Panels with Color A (Terracotta): With Color A, single crochet the two panels together along the center 12 inches of each panel's edge. This creates the neck opening and secures the back of the poncho.
- Leave Openings for Armholes: Leave the remaining edges open. These will form the armholes and the front drape of the poncho. The open design allows for easy wearing and a relaxed, flowing fit.
- Create the V-Neck Drape: Fold the front panels down to create a V-neck drape. The natural drape of the hairpin lace strips will form a beautiful waterfall effect, cascading down the front of the poncho. Adjust the folds to achieve your desired look.
Part 4: Adding the Edging
The edging not only gives the poncho a polished finish but also helps stabilize the open edges and prevent stretching.
- Start the Edging with Color B (Dusty Rose): Attach Color B yarn to any point along the outer edge of the poncho with a slip stitch.
- Single Crochet Around: Work a round of single crochet around the entire outer edge of the poncho, including the bottom hem, front edges, and armholes. Work 2 single crochets in each corner to keep the corners flat and prevent curling.
- Continue Around: Continue working sc evenly around the entire edge. When you reach the starting point, join with a slip stitch to the first sc.
- Create the Picot Edge: For the next round, work a delicate picot edge: *sc in the next 3 stitches, chain 2, skip 1 stitch* repeat from * around the entire edge. This creates a lovely scalloped, decorative finish.
- Finish the Edging: When you've worked your way around, fasten off and weave in all loose ends with your tapestry needle.
Part 5: Finishing Touches
The final steps will transform your poncho from a collection of strips into a polished, professional-looking garment.
- Weave in All Ends: Using your tapestry needle, carefully weave in all remaining yarn tails from the strips, joins, and edging. Make sure to weave them in securely so they don't come loose with wear.
- Steam Block the Poncho: Gently steam block the poncho to open up the lace and even out the strips. This step is crucial for achieving the beautiful, airy drape. Use a steam iron held a few inches above the fabric, or a handheld steamer. Be careful not to press down on the lace, as this can flatten the loops.
- Lay Flat to Dry: After steaming, lay the poncho flat on a clean, dry towel or blocking mat. Gently shape it to your desired dimensions, ensuring the strips are straight and the edges are even. Allow it to dry completely before wearing.
Tips for Success
- Keep Your Tension Even: Consistent tension is key to creating uniform hairpin lace strips. Try to keep your single crochet stitches and loop sizes consistent throughout.
- Count Your Loops: Periodically count your loops on each side of the strip to ensure they're even. This will make joining much easier.
- Use Stitch Markers: When marking the neck opening, use stitch markers or contrasting yarn to clearly identify the 12-inch section you'll be joining.
- Blocking is Essential: Don't skip the steam blocking step! It transforms the fabric, opening up the lace and giving the poncho its beautiful, flowing drape.
Styling Your Aurora Dune Poncho
This versatile poncho can be styled in countless ways. Wear it over a simple tank top and jeans for a casual boho look, or layer it over a slip dress for an evening out. The open-front design makes it easy to throw on over any outfit. The warm terracotta, dusty rose, and cream colors complement a wide range of skin tones and wardrobe colors, making it a staple piece you'll reach for again and again.
Conclusion
Congratulations! You've just created a stunning piece of wearable art. The Aurora Dune Hairpin Lace Poncho is a testament to the beauty of traditional techniques applied with modern design sensibility. As you wear it, you'll appreciate not just its beauty, but also the time and care you invested in creating something truly unique. This pattern is perfect for gifting, and once you've mastered hairpin lace, you'll find yourself looking for more projects to apply this beautiful technique to.
Happy crafting, and may your days be filled with the warm, golden hues of the desert sunset!