Aurora Borealis Driftwood Shawl Free Pattern – A Knitted Gradient Wrap

Aurora Borealis Driftwood Shawl Free Pattern – A Knitted Gradient Wrap
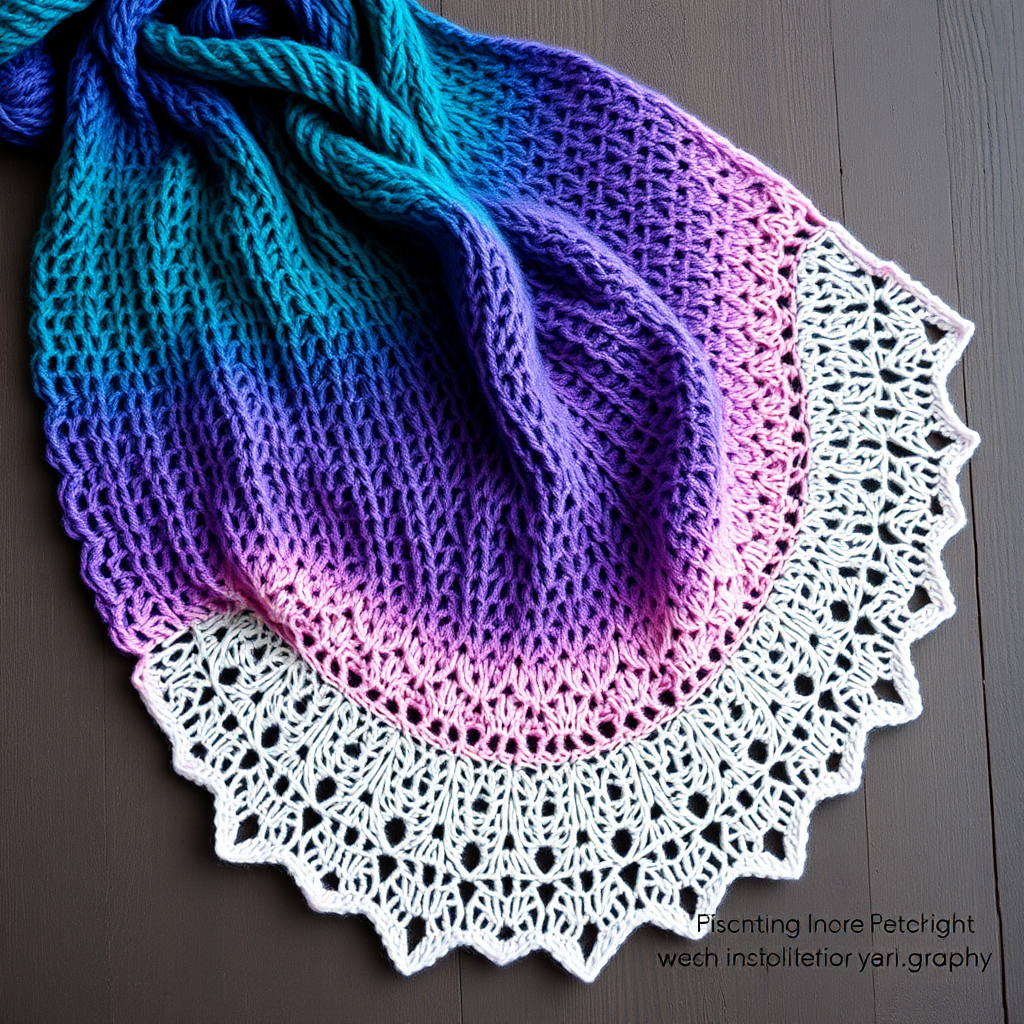
Wrap yourself in the ethereal beauty of the northern lights with this gradient knitted shawl, featuring a delicate lace edge and a soft, flowing drape. This pattern uses a simple garter stitch base with a striking color-shift yarn to create a truly unique, wearable piece of art. Whether you are a seasoned knitter or a confident beginner looking for a rewarding project, this shawl is a joy to create and an even greater joy to wear. The seamless color transitions and the airy lace border make this a standout piece in any wardrobe, perfect for cool evenings or as a thoughtful handmade gift.
Materials Needed
Before you begin, gather the following materials to ensure a smooth and enjoyable knitting experience. The quality of your yarn will greatly affect the final drape and feel of your shawl, so choose a soft, high-quality fingering weight yarn.
- Yarn: Fingering weight yarn in 3 colors (Color A: Deep Teal, Color B: Soft Turquoise, Color C: Pale Lavender) or a self-striping gradient yarn, approx. 800-900 yards total. If using solid colors, you will need roughly 300 yards of each color.
- Needle: US 6 (4.0 mm) circular knitting needle, 32 inches or longer. The long circular needle is essential to accommodate the growing number of stitches as the shawl expands.
- Notions: Stitch markers (optional but helpful), tapestry needle for weaving in ends, blocking mats and pins for the finishing touches.
- Gauge: 20 stitches and 28 rows = 4 inches in garter stitch (blocked). While gauge is important for size, the shawl is forgiving; a slightly different gauge will simply alter the final dimensions.
Step-by-Step Instructions
This shawl is knit from the top center down, increasing on each side to form a triangle. The construction is intuitive, and the repetitive increases make it a meditative project. Follow the steps carefully, and you will see your shawl take shape beautifully.
Abbreviations
- k = knit
- p = purl
- yo = yarn over
- k2tog = knit two together (right-leaning decrease)
- ssk = slip, slip, knit (left-leaning decrease)
- sl = slip
- pm = place marker
Setup
We begin with a simple cast-on and a few short rows to establish the center spine of the shawl. Take your time here to ensure your edges are neat.
- Cast on 3 stitches with Color A.
- Row 1 (WS): k3.
- Row 2 (RS): k1, yo, k1, yo, k1 (5 stitches). You have increased two stitches.
- Row 3 (WS): k2, p1, k2. The purl stitch marks the center spine.
- Row 4 (RS): k1, yo, k1, yo, k1, yo, k1, yo, k1 (9 stitches). You now have four increases.
- Row 5 (WS): k2, p5, k2.
Main Body (Garter Stitch with Increases)
Now we enter the main body of the shawl. You will be working in garter stitch, which means knitting every row. The increases are placed consistently to create a symmetrical triangle shape.
- Row 6 (RS): k1, yo, k to last 2 stitches, yo, k1, yo, k1. This row increases 3 stitches: one at the beginning, one before the last stitch, and one at the very end. You will notice the pattern creates a lovely, open edge.
- Row 7 (WS): k all stitches. This is a plain row with no increases.
- Repeat Rows 6-7 for the main body. After 20 rows (10 increase rows), switch to Color B. Knit another 20 rows with Color B, then switch to Color C. Continue this rhythm until the shawl measures approximately 24 inches from the cast-on edge, or until you have used most of your yarn. Always end with a WS row (a plain knit row) before moving to the lace edge.
Lace Edge
This is where the shawl transforms into a work of art. The lace edge adds delicate eyelets and a scalloped effect. Ensure you are using Color C for this section. The lace pattern builds on itself, adding more repeats as you go.
- Row 1 (RS): k1, yo, k2tog, yo, k to last 3 stitches, yo, k2tog, yo, k1. This establishes the eyelet pattern at both edges.
- Row 2 (WS): k all stitches.
- Row 3 (RS): k1, yo, k2tog, yo, k1, yo, k2tog, yo, k to last 5 stitches, yo, k2tog, yo, k1, yo, k2tog, yo, k1. Notice how we added one more "yo, k2tog" repeat on each side.
- Row 4 (WS): k all stitches.
- Row 5 (RS): k1, yo, k2tog, yo, k2, yo, k2tog, yo, k to last 7 stitches, yo, k2tog, yo, k2, yo, k2tog, yo, k1.
- Row 6 (WS): k all stitches.
- Continue in this pattern, adding one more 'yo, k2tog' repeat on each side every RS row. This means on the next RS row, you will have three repeats before reaching the center stitches. Continue until the lace edge measures about 6 inches deep from where you started the lace section.
Bind Off (Picot Edge)
The picot bind-off gives a beautiful, finished look with tiny decorative points. It is stretchy and complements the lace beautifully.
- Bind off loosely as follows: k2, *return both stitches to left needle, k2tog through back loop, k1, repeat from * until all stitches are bound off.
- This creates a series of small loops along the edge. Weave in all ends with your tapestry needle, being careful to secure them discreetly on the wrong side of the work.
Blocking
Blocking is crucial for this shawl to open up the lace pattern and achieve the correct drape. Do not skip this step!
- Soak the shawl in lukewarm water with a gentle wool wash for about 20-30 minutes.
- Gently squeeze out excess water. Do not wring or twist the fabric, as this can felt the wool.
- Lay the shawl flat on a blocking mat. Gently stretch it to the desired dimensions, paying special attention to the lace edge. Pin out each point of the lace to open up the eyelets and create a scalloped effect.
- Allow it to dry completely, which may take 24-48 hours depending on humidity. Once dry, unpin and enjoy your stunning Aurora Borealis Driftwood Shawl!
This pattern is a celebration of color and texture. The simple garter stitch body lets the gradient yarn shine, while the lace edge adds a touch of elegance. Whether you choose the suggested teal-to-lavender palette or your own color story, this shawl is sure to become a cherished piece in your handmade collection. Happy knitting!