Aurora Bloom Textured Pillow Free Knitting Pattern – Cozy Ombre Cushion

Aurora Bloom Textured Pillow Free Knitting Pattern – Cozy Ombre Cushion
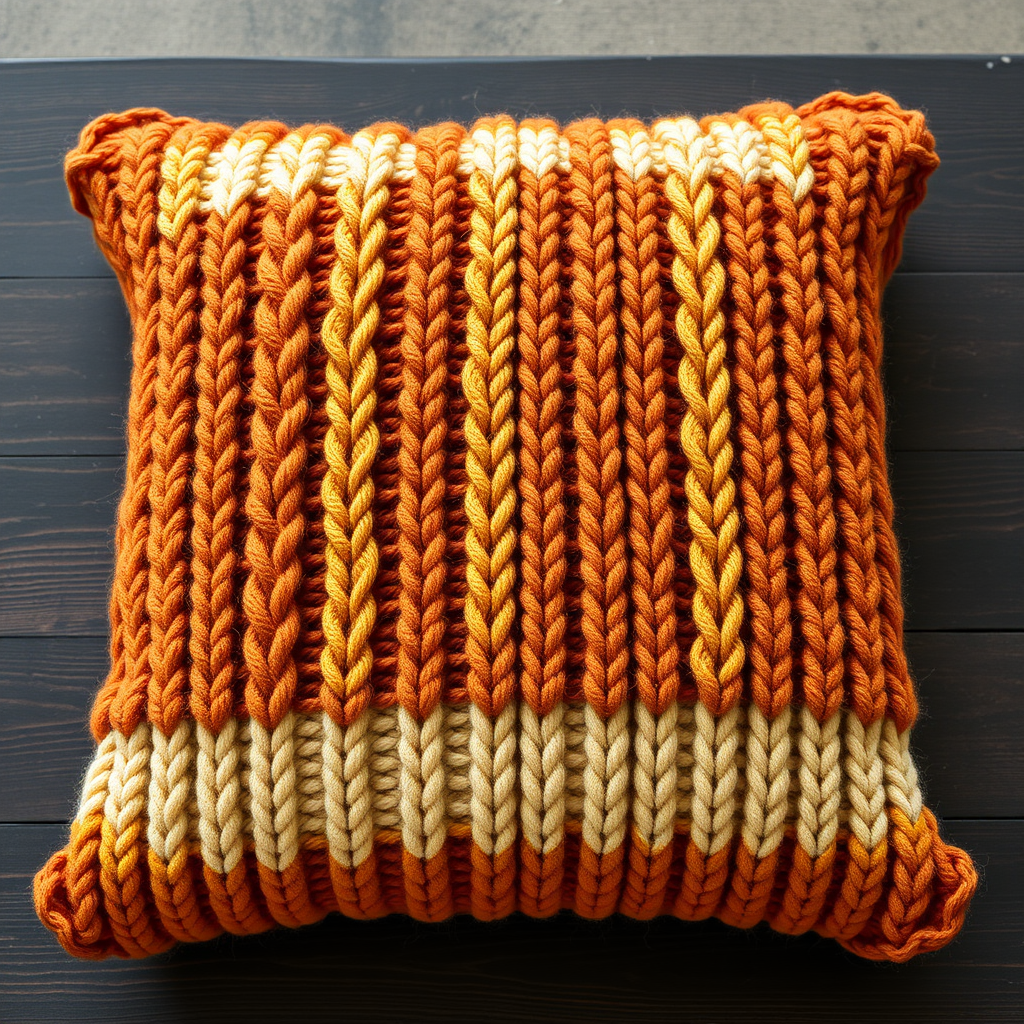
Wrap your living space in the soft, shifting hues of a twilight sky with this uniquely textured, ombre-knitted pillow. The dense, sculptural stitch pattern creates a plush, cozy cushion that invites you to sink in and unwind. This modern, handmade home decor piece is perfect for adding a touch of warmth and sophistication to any sofa, armchair, or bed. Best of all, it's a free pattern that's surprisingly beginner-friendly, using simple knit and purl stitches to create a stunning visual and tactile effect.
This pattern is designed to be knitted flat in two identical panels, then seamed together to create a beautiful, squishy 16-inch square cushion. The ombre gradient is achieved by knitting in stripes of three coordinating shades, with gradual transitions that mimic the colors of a sunset or aurora borealis. Whether you're a seasoned knitter looking for a quick weekend project or a beginner ready for a rewarding challenge, this pillow is the perfect way to elevate your home decor.
Materials Needed
Before you begin, gather the following materials to ensure a smooth and enjoyable knitting experience. All items are readily available at your local yarn store or online.
- Yarn: Worsted weight yarn in 3 shades of a color family (e.g., dusty rose, mauve, deep plum) – approximately 350g total (120g each shade). Choose a soft, durable yarn like a wool-acrylic blend for the perfect balance of coziness and structure.
- Needles: US 8 (5mm) circular knitting needles with a 24-inch cable. The circular needle is essential to accommodate the large number of stitches comfortably, even though you'll be knitting flat.
- Notions: A tapestry needle for weaving in ends and seaming, stitch markers (optional but helpful), and a 16-inch pillow form for the finished cover.
- Optional: A hidden zipper (12-14 inches) for a removable cover, or you can use the envelope closure method described in the finishing steps.
Gauge
To ensure your pillow turns out the correct size, it's crucial to check your gauge before starting. In stockinette stitch (knit one row, purl one row) after blocking, you should have 18 stitches and 24 rows = 4 inches. If your gauge is off, adjust your needle size accordingly. A tighter gauge will result in a firmer, more structured pillow, while a looser gauge will be softer and drapier.
Step-by-Step Instructions
This pillow is knitted flat in two identical panels. Follow these detailed instructions carefully, and you'll have two beautiful panels ready to seam together in no time. The pattern uses a simple 4-row repeat that alternates between smooth stockinette and ribbed sections, creating the beautiful textured ridges.
Panel 1 (Make 2)
Both panels are knitted identically. Take your time and enjoy the rhythmic repetition of the stitches.
Cast On & Ribbing
Cast on: With shade 1 (your lightest color), cast on 80 stitches using your preferred method. A long-tail cast-on works beautifully here.
Row 1 (RS): *K1, P1* repeat from * to end of row. (80 stitches)
Row 2 (WS): *P1, K1* repeat from * to end of row.
Repeat Rows 1 and 2 for 6 more rows (total 8 rows of ribbing). This creates a neat, stretchy edge that will frame your pillow beautifully.
Textured Pattern – Shade 1 (Lightest)
Now you'll begin the main textured pattern. This 4-row repeat creates the alternating smooth and ridged sections.
Row 9 (RS): With shade 1, knit all stitches.
Row 10 (WS): Purl all stitches.
Row 11 (RS): *K1, P1* repeat from * to end of row.
Row 12 (WS): *P1, K1* repeat from * to end of row.
Repeat Rows 9-12 for 4 more times (total 20 rows of shade 1). You should have a section that is 5 repeats of the 4-row pattern, or 20 rows total.
Transition to Shade 2 (Middle)
When you're ready to transition to your middle shade, simply start knitting with the new color. There's no need to cut the old yarn yet—you can carry it up the side if you plan to use it again, but since this is a one-way gradient, you can cut it and weave in the end later.
Row 29 (RS): With shade 2, knit all stitches.
Row 30 (WS): Purl all stitches.
Row 31 (RS): *K1, P1* repeat from * to end of row.
Row 32 (WS): *P1, K1* repeat from * to end of row.
Repeat Rows 29-32 for 8 more times (total 36 rows of shade 2). This is a longer section, creating a beautiful, wide band of the middle color.
Transition to Shade 3 (Darkest)
Now, transition to your darkest shade for the bottom of the pillow.
Row 65 (RS): With shade 3, knit all stitches.
Row 66 (WS): Purl all stitches.
Row 67 (RS): *K1, P1* repeat from * to end of row.
Row 68 (WS): *P1, K1* repeat from * to end of row.
Repeat Rows 65-68 for 8 more times (total 36 rows of shade 3).
Final Ribbing & Bind Off
Finish the panel with a ribbed border that mirrors the cast-on edge.
Row 101 (RS): With shade 3, *K1, P1* repeat from * to end of row.
Row 102 (WS): *P1, K1* repeat from * to end of row.
Repeat Rows 101-102 for 6 more rows (total 8 rows of ribbing).
Bind off: Bind off loosely in pattern (knit the knits and purl the purls). This loose bind-off ensures the edge remains stretchy and doesn't pucker.
Finishing
Once both panels are complete, it's time to bring your pillow to life. Follow these steps for a professional, polished finish.
- Blocking: Block both panels to the same dimensions (approximately 16 inches wide by 16 inches tall). Wet blocking or steam blocking will help even out the stitches and set the dimensions. Pin them to a blocking mat and allow them to dry completely.
- Seaming: With right sides together, sew three sides of the pillow together using a mattress stitch. This invisible seam creates a beautiful, professional finish. Leave one side open for inserting the pillow form.
- Insert Pillow Form: Carefully insert a 16-inch pillow form into the opening. Gently push the form into the corners to ensure a plump, even shape.
- Close the Opening: Sew the final side closed using a whip stitch, or insert a hidden zipper for a removable cover. For a zipper, sew it into the opening before you stuff the pillow, then simply zip it closed after inserting the form.
- Weave in Ends: Weave in all loose ends securely using your tapestry needle. Be sure to weave them in on the wrong side of the fabric so they're completely hidden.
Optional Embellishments
For a subtle, personalized touch, consider adding a few decorative buttons to the center of one panel. Sew them on securely before seaming the panels together. This adds a charming, handmade detail that makes the pillow uniquely yours.
Your Aurora Bloom Textured Pillow is now complete! Place it on your favorite chair, sofa, or bed and enjoy the cozy, modern elegance it brings to your home. The beautiful ombre gradient and rich texture make it a stunning statement piece that you'll be proud to say you made yourself. Happy knitting!