Y2K Floral Vintage Beanie - Free Pattern
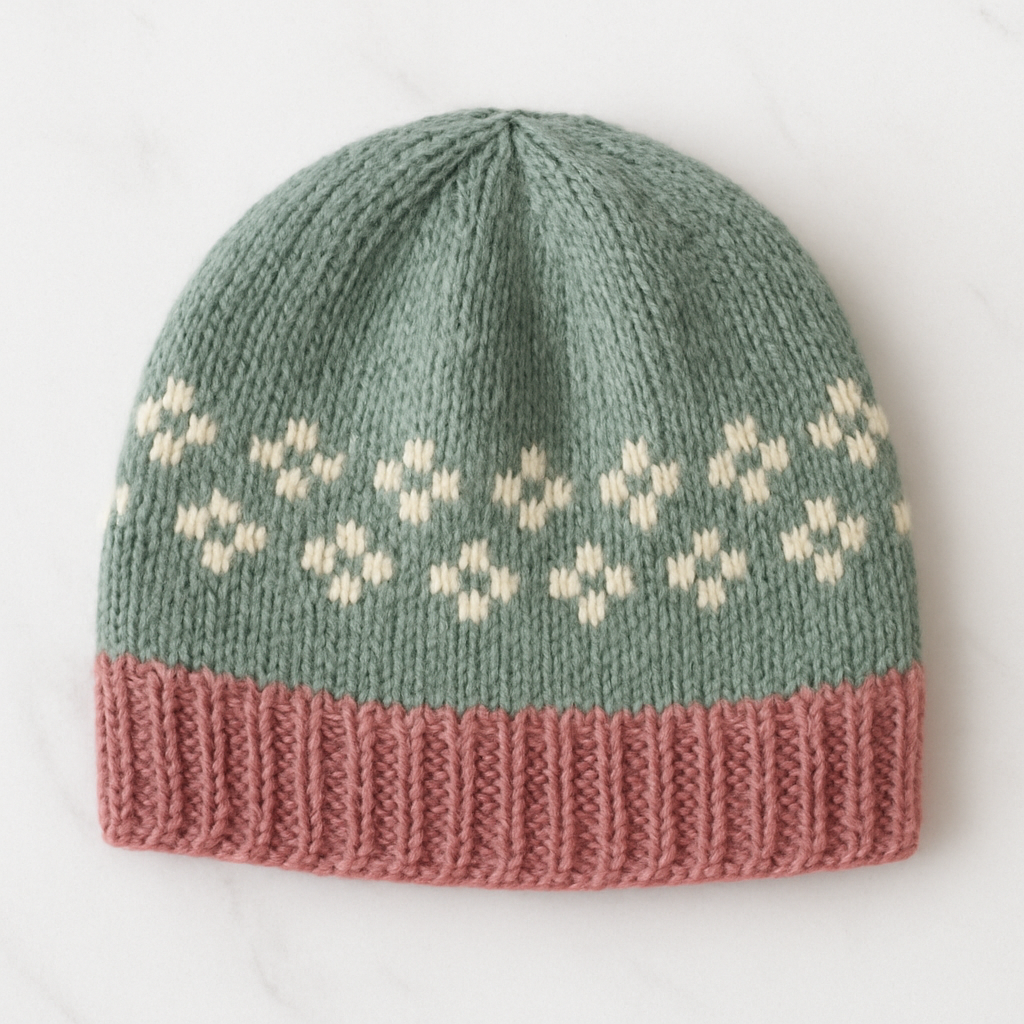
Y2K Floral Vintage Beanie - Free Pattern
Introduction
Dive into the Y2K nostalgia with this soft, muted vintage beanie featuring a charming floral motif. Perfect for adding a touch of retro flair to your wardrobe, this pattern is a must-try for knitters looking to embrace modern trends. Whether you're a beginner or an experienced knitter, this beanie is a delightful project that will keep you warm and stylish!
Materials Needed
- Yarn: DK weight yarn in soft muted vintage colors: dusty rose, sage green, and cream.
- Needles: US 6 (4mm) circular needles, 16-inch.
- Gauge: 22 stitches and 30 rows = 4 inches in stockinette stitch.
- Stitch Marker: To mark the beginning of the round.
- Scissors: For cutting yarn.
- Tapestry Needle: For weaving in ends.
Step-by-Step Instructions
1. Casting On
Begin by casting on 112 stitches using the long-tail cast-on method with the dusty rose yarn. Make sure to join in the round carefully, ensuring that the stitches are not twisted. Place a stitch marker to indicate the beginning of the round.
2. Ribbing
For the ribbed brim, work the following rounds:
- Rounds 1-8: *K2, P2* around.
3. Body of the Beanie
Switch to sage green yarn for the body of the beanie:
- Rounds 9-20: Knit all stitches (this is the stockinette stitch).
4. Floral Motif
Now, switch to cream yarn to create the floral motif:
- Round 21: *K5, (K1, P1, K1) into next stitch, K5* repeat around.
- Round 22: Knit all stitches.
- Round 23: *K4, (K1, P1, K1) into next stitch, K6* repeat around.
- Round 24: Knit all stitches.
- Round 25: *K3, (K1, P1, K1) into next stitch, K7* repeat around.
- Round 26: Knit all stitches.
5. Continue the Body
Continue in stockinette stitch with sage green yarn until the beanie measures 7 inches from the cast-on edge.
6. Crown Shaping
Now, we will shape the crown of the beanie:
- Round 1: *K12, k2tog* repeat around.
- Round 2: Knit all stitches.
- Round 3: *K11, k2tog* repeat around.
- Round 4: Knit all stitches.
- Round 5: *K10, k2tog* repeat around.
- Round 6: Knit all stitches.
- Round 7: *K9, k2tog* repeat around.
- Round 8: Knit all stitches.
- Round 9: *K8, k2tog* repeat around.
- Round 10: Knit all stitches.
- Round 11: *K7, k2tog* repeat around.
- Round 12: Knit all stitches.
- Round 13: *K6, k2tog* repeat around.
- Round 14: Knit all stitches.
- Round 15: *K5, k2tog* repeat around.
- Round 16: Knit all stitches.
- Round 17: *K4, k2tog* repeat around.
- Round 18: Knit all stitches.
- Round 19: *K3, k2tog* repeat around.
- Round 20: Knit all stitches.
- Round 21: *K2, k2tog* repeat around.
- Round 22: Knit all stitches.
- Round 23: *K1, k2tog* repeat around.
- Round 24: Knit all stitches.
- Round 25: *K2tog* repeat around.
7. Finishing
Once you have completed the crown shaping, cut the yarn, leaving a long tail. Thread the tail through the remaining stitches and pull tight to close the top of the beanie. Finally, weave in all ends securely using a tapestry needle.
Conclusion
Your Y2K Floral Vintage Beanie is now complete! Enjoy wearing your handmade creation or gift it to a friend. This beanie not only keeps you warm but also adds a stylish touch to any outfit. Happy knitting!


