Whispering Pines Cable Cuff Free Pattern – Knit a Cozy Forest-Inspired Wrist Warmer
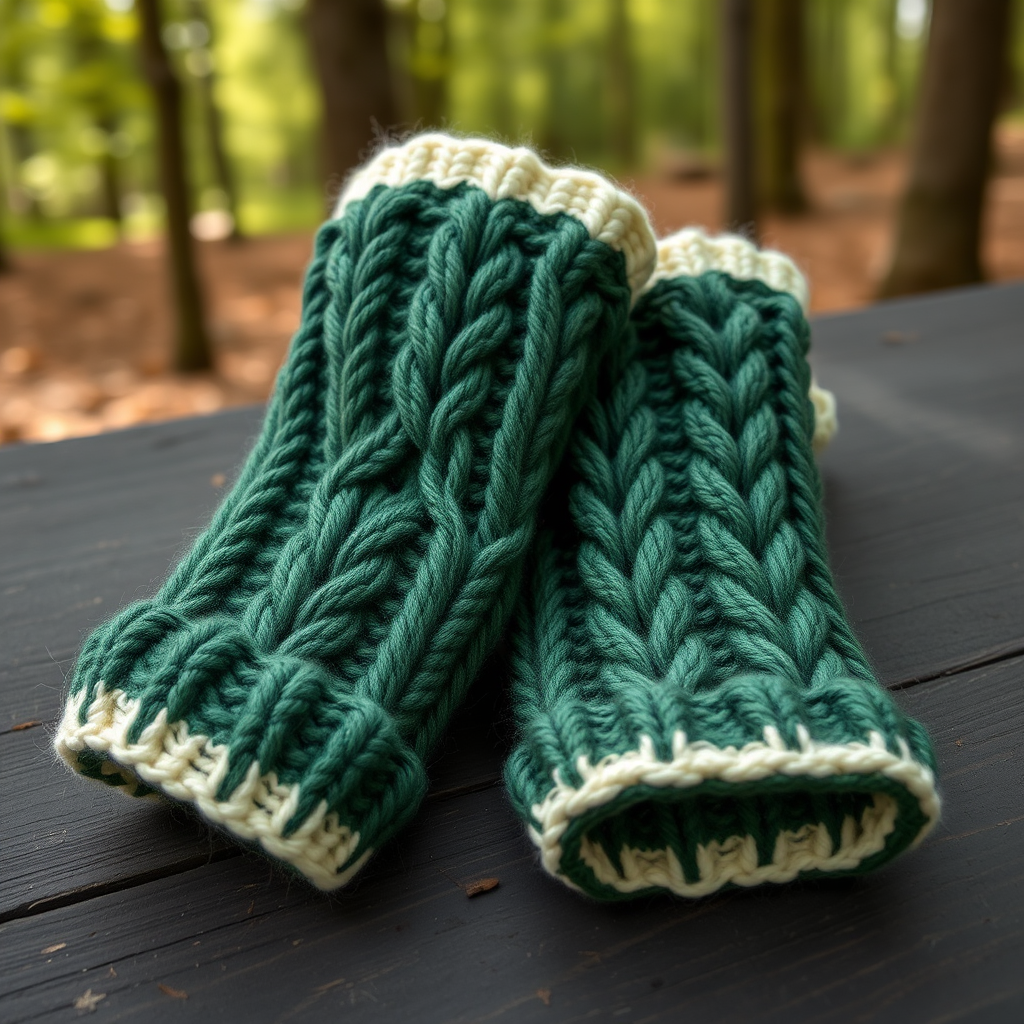
Whispering Pines Cable Cuff Free Pattern – Knit a Cozy Forest-Inspired Wrist Warmer
Wrap your wrists in the quiet comfort of a pine forest with this richly textured cable cuff. Knit flat and seamed, this pattern features a deep, dimensional cable that evokes the bark of ancient trees, finished with a soft, ribbed edge. Whether you're a seasoned knitter looking for a quick weekend project or a beginner ready to tackle your first cable, this wrist warmer is the perfect way to bring a touch of woodland magic to your handmade wardrobe. The contrasting cream ribbing adds a rustic elegance that pairs beautifully with the deep forest green body.
This free knitting pattern is designed to be accessible, with clear instructions and detailed explanations. The finished cuffs are not only functional but also make wonderful handmade gifts for nature lovers and cozy-craving friends. Let's dive into the soothing rhythm of cable knitting and create something beautiful together.
Materials Needed
Before you begin, gather the following supplies. Having everything ready will make your knitting experience smooth and enjoyable.
- Yarn: Worsted weight yarn (e.g., Cascade 220) in deep forest green (approx. 100 yards) and a small amount of cream for the contrasting ribbed edge.
- Needles: US 7 (4.5 mm) knitting needles. You can use straight needles or circular needles for flat knitting.
- Cable Needle: A small cable needle (or a double-pointed needle) to hold stitches while working the cable twists.
- Other Tools: Tapestry needle for weaving in ends and seaming, stitch markers (optional), scissors.
Gauge: 20 stitches and 26 rows = 4 inches in stockinette stitch. Always take time to check your gauge to ensure the correct fit.
Step-by-Step Instructions
This pattern is worked flat and then seamed, creating a seamless-looking tube. The cable pattern is a beautiful repeating braid that is easier than it looks. Follow the instructions carefully, and you'll be amazed at the texture you create.
Finished Size & Abbreviations
Finished Size: 7 inches circumference, 6 inches tall (easily adjustable by adding or removing pattern repeats).
Abbreviations:
- CO: Cast on
- K: Knit
- P: Purl
- C4F: Slip 2 stitches to cable needle, hold in front, knit 2, knit 2 from cable needle
- C4B: Slip 2 stitches to cable needle, hold in back, knit 2, knit 2 from cable needle
- BO: Bind off
The Cuff (Make 2)
With forest green yarn, CO 36 stitches.
Rows 1-6 (Ribbing): Work in K2, P2 ribbing across all stitches. This creates a stretchy, snug edge. Repeat these 6 rows to form the base of the cuff.
Row 7 (Right Side - Begin Cable Pattern): K4, P2, K4, P2, C4F, P2, K4, P2, K4, P2, K4. (36 stitches)
Tip: The C4F is your first cable twist. Slip 2 stitches onto your cable needle and hold it in front of your work. Knit the next 2 stitches from your left needle, then knit the 2 stitches from the cable needle. This creates a left-leaning twist.
Row 8 and all even rows (Wrong Side): Purl the knit stitches and knit the purl stitches as they appear (work in pattern). This means if you see a knit stitch, purl it; if you see a purl stitch, knit it. This maintains the ribbed texture between the cables.
Row 9: K4, P2, C4B, P2, K4, P2, K4, P2, C4F, P2, K4.
Tip: For C4B, hold the cable needle to the back of your work. This creates a right-leaning twist, giving the cable its braided effect.
Row 11: K4, P2, K4, P2, C4B, P2, K4, P2, K4, P2, K4.
Row 13: K4, P2, K4, P2, K4, P2, C4F, P2, K4, P2, K4.
Row 15: K4, P2, C4F, P2, K4, P2, K4, P2, C4B, P2, K4.
Row 17: K4, P2, K4, P2, C4F, P2, K4, P2, K4, P2, K4.
Row 19: K4, P2, K4, P2, K4, P2, C4B, P2, K4, P2, K4.
Row 21: K4, P2, C4B, P2, K4, P2, K4, P2, C4F, P2, K4.
Row 23: K4, P2, K4, P2, C4B, P2, K4, P2, K4, P2, K4.
Row 25: K4, P2, K4, P2, K4, P2, C4F, P2, K4, P2, K4.
Row 27: K4, P2, C4F, P2, K4, P2, K4, P2, C4B, P2, K4.
Row 29: K4, P2, K4, P2, C4F, P2, K4, P2, K4, P2, K4.
Row 31: K4, P2, K4, P2, K4, P2, C4B, P2, K4, P2, K4.
Rows 32-37 (Top Ribbing): Work in K2, P2 ribbing across all stitches. This mirrors the bottom edge and provides a finished look.
BO loosely in pattern (knit the knits and purl the purls as you bind off).
Finishing Touches
Now that your knitting is complete, it's time to bring the cuff together.
- Seaming: Fold the piece in half with the right sides together. Using a tapestry needle and the tail from your cast-on, sew the side seam using the mattress stitch. This creates an invisible, professional-looking seam.
- Thumb Hole (Optional): When seaming, leave a 1-inch opening at the bottom edge for your thumb. Simply stop seaming 1 inch from the bottom, then resume seaming above it. This creates a comfortable and functional thumb hole.
- Weave in Ends: Carefully weave in all loose ends with your tapestry needle to secure them.
- Blocking: Block gently to enhance the cable definition. Wet blocking or steam blocking will help the cables relax and pop beautifully. Lay flat to dry.
Repeat the entire process to make the second cuff. Once both are complete, you'll have a gorgeous pair of forest-inspired wrist warmers that are as cozy as they are stylish. Enjoy the quiet comfort of your very own whispering pines!


