The Whispering Woods Hooded Fox Cowl: A Free Knitting Pattern for a Cozy Woodland Animal Scarf
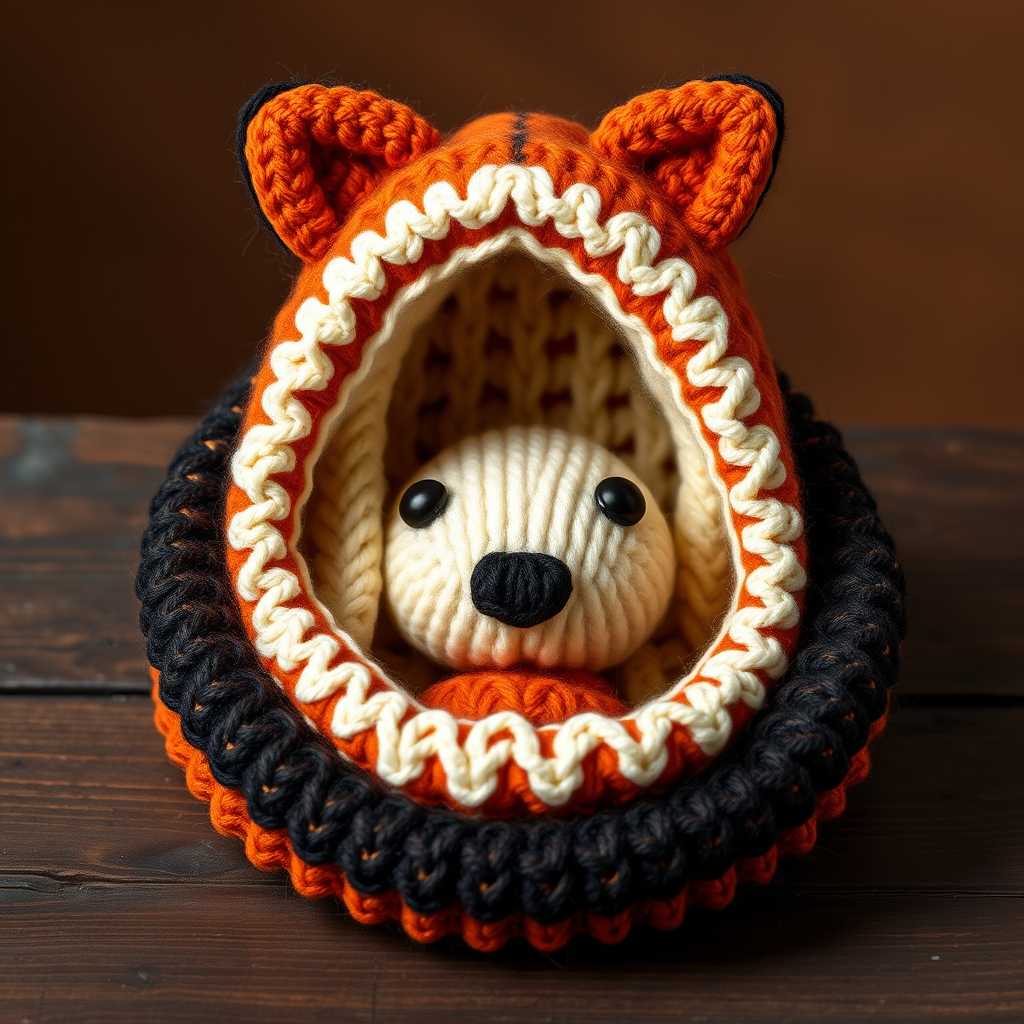
Wrap Yourself in Woodland Charm: The Whispering Woods Hooded Fox Cowl
Imagine stepping into a crisp autumn day, wrapped in a cozy knit that captures the magic of the forest. The Whispering Woods Hooded Fox Cowl is more than just a scarf—it's a wearable woodland companion. This free knitting pattern combines a textured hood with a sweet fox face and perky ears, all worked in simple cables and colorwork. Designed for adventurous beginners, this project uses worsted weight yarn and basic techniques to create a modern, whimsical accessory that will keep you warm and stylish all season long.
Materials Needed
Before you begin, gather these supplies to ensure a smooth knitting experience:
- Yarn: Worsted weight yarn in three colors:
- Main Color (MC) - Burnt Orange: approx 250 yards
- Contrast Color 1 (CC1) - Cream: approx 100 yards
- Contrast Color 2 (CC2) - Black: approx 30 yards
- Needles:
- US 8 (5 mm) circular needles with a 16-inch cord (for hood and cowl)
- US 8 (5 mm) double-pointed needles (for ears)
- Notions: Cable needle, stitch markers, tapestry needle for weaving ends, scissors
- Gauge: 18 stitches and 24 rows = 4 inches in stockinette stitch (adjust needle size if needed to match gauge)
Step-by-Step Instructions
Hood (Worked Flat, Then Seamed)
The hood is knitted flat from the bottom up, then folded and seamed at the top to create a rounded crown.
- Cast On and Ribbing: With MC, cast on 80 stitches. Work in K2, P2 ribbing as follows:
- Row 1 (RS): *K2, P2; repeat from * across.
- Row 2 (WS): *P2, K2; repeat from * across.
- Repeat rows 1-2 until piece measures 2 inches from cast-on edge, ending with a WS row.
- Increase Row: On the next RS row, knit across while increasing 10 stitches evenly. To do this, knit 8, then make 1 (M1) by picking up the bar between stitches and knitting it through the back loop. Repeat this pattern across—knit 8, M1—until you have 90 stitches total.
- Cable Pattern: Begin the textured cable pattern. All WS rows are purled across unless noted.
- Row 1 (RS): K5, *C4F (slip 2 stitches to cable needle, hold to front, knit next 2 stitches, then knit 2 from cable needle), K6; repeat from * to last 5 stitches, K5.
- Row 2 (WS): Purl across.
- Row 3 (RS): Knit across.
- Row 4 (WS): Purl across.
- Row 5 (RS): K5, *K6, C4B (slip 2 stitches to cable needle, hold to back, knit next 2 stitches, then knit 2 from cable needle); repeat from * to last 5 stitches, K5.
- Row 6 (WS): Purl across.
- Row 7 (RS): Knit across.
- Row 8 (WS): Purl across.
- Repeat rows 1-8 until piece measures 10 inches from cast-on edge, ending with a WS row (Row 8).
- Shape Hood Crown: Decrease stitches to round the top of the hood.
- Row 1 (RS): K1, ssk (slip slip knit—slip 2 stitches knitwise one at a time, then knit them together through back loops), knit to last 3 stitches, k2tog (knit 2 together), k1. (88 stitches remain)
- Row 2 (WS): Purl across.
- Repeat these 2 rows until 60 stitches remain. You will have worked 14 decrease rows total (7 RS rows).
- Bind off loosely on the next WS row. Cut yarn, leaving a 12-inch tail.
- Seam Hood: Fold the hood in half with right sides together, matching the cast-on edge. Using the tail, sew the top edge closed with a mattress stitch or whip stitch. Weave in ends.
Fox Face (Worked Flat in Stockinette Stitch)
The fox face is a separate piece that will be sewn onto the cowl. Use intarsia or duplicate stitch for the black details.
- Cast On and Knit: With CC1 (cream), cast on 20 stitches. Work in stockinette stitch (knit on RS, purl on WS) for 10 rows, ending with a WS row.
- Shape Ears (Top of Face): Decrease to create pointed ear shapes.
- Row 1 (RS): K1, ssk, knit to last 3 stitches, k2tog, k1. (18 stitches)
- Row 2 (WS): Purl across.
- Repeat rows 1-2 until 10 stitches remain (4 more decrease rows—2 RS rows).
- Bind off loosely. Cut yarn, leaving a 10-inch tail for sewing.
- Add Black Details: Using CC2 (black) and a tapestry needle, embroider the face:
- Nose: At the bottom center of the cream piece, work a small triangle using duplicate stitch or satin stitch. The nose should be about 3 stitches wide and 2 rows tall.
- Eyes: Place two black oval eyes about 4 stitches above the nose and 4 stitches apart. Each eye can be 2 stitches wide and 1 row tall, using duplicate stitch or a simple straight stitch.
- Weave in all ends on the wrong side.
Ears (Make 2)
These small triangular ears are knitted in the round on double-pointed needles.
- Cast On: With MC (burnt orange), cast on 6 stitches onto double-pointed needles. Distribute evenly across 3 needles (2 stitches per needle). Join in the round, being careful not to twist.
- Knit Body: Work in stockinette stitch (knit every round) for 4 rounds.
- Shape Ear:
- Round 5: K2tog, k2, k2tog. (4 stitches remain)
- Round 6: Knit around.
- Round 7: K2tog twice. (2 stitches remain)
- Finish: Cut yarn, leaving a 6-inch tail. Thread the tail through the remaining 2 stitches and pull tight to close the tip. Weave in the tail inside the ear. Repeat for the second ear.
Cowl (Worked in the Round)
The cowl is a seamless tube that will be folded for double-layer warmth.
- Cast On and Ribbing: With MC, cast on 120 stitches. Join in the round, placing a stitch marker to mark the beginning of the round. Be careful not to twist the stitches. Work in K2, P2 ribbing for 2 inches.
- Increase Round: Knit around while increasing 10 stitches evenly. To do this, knit 12, then M1 (make 1 by picking up the bar between stitches and knitting it through the back loop). Repeat this pattern—knit 12, M1—until you have 130 stitches.
- First Half of Cowl: Work in stockinette stitch (knit every round) for 6 inches.
- Fold Line: Purl 1 round. This creates a ridge that will be the fold line.
- Second Half of Cowl: Work in stockinette stitch for another 6 inches.
- Bind Off: Bind off loosely. Cut yarn, leaving a 12-inch tail.
Assembly
- Attach Fox Face: Fold the cowl at the purl ridge so the two stockinette sections align. The fold line should be at the bottom edge of the cowl. Center the fox face on the front of the cowl, about 1 inch above the fold line. Using the tail from the fox face, sew it securely to the cowl with a whip stitch. Weave in ends.
- Attach Hood: Position the hood so its back seam aligns with the center back of the cowl. The bottom edge of the hood should sit just above the fox face. Using MC yarn and a tapestry needle, sew the hood to the cowl with a whip stitch, working through both layers of the cowl (the fold will create a double layer). Ensure the hood is centered and secure.
- Sew on Ears: Position the ears on top of the hood, about 2 inches apart and 1 inch from the top edge. Using the tails from the ears, sew them securely to the hood. Weave in all remaining ends.
- Final Touches: Gently block the cowl if desired to even out stitches. Fold the cowl at the purl ridge so the fox face is visible on the outside. Your Whispering Woods Hooded Fox Cowl is ready to wear!
Enjoy your cozy woodland companion! Share your finished project on social media with #WhisperingWoodsFoxCowl.


