The Gilded Caramel Cloche: A Free Knitting Pattern for a Textured, 1920s-Inspired Hat
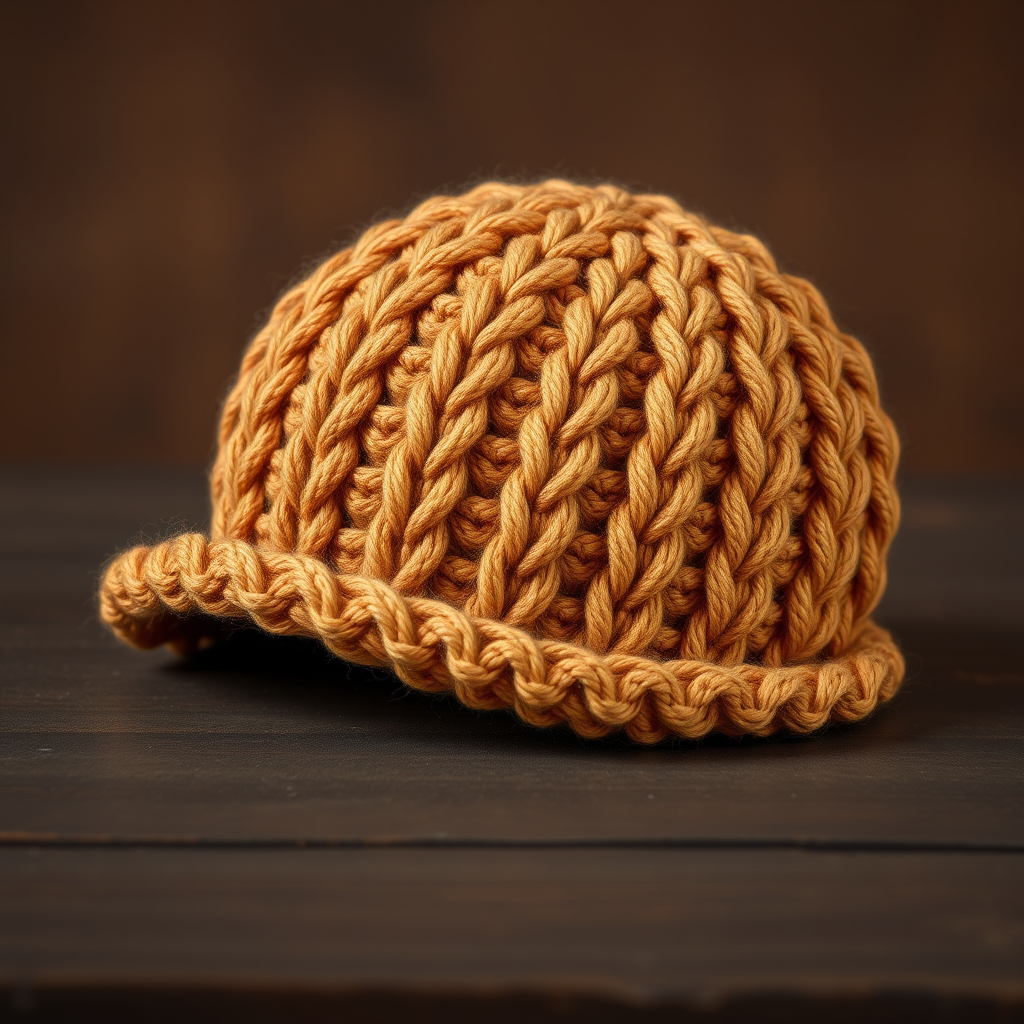
Step Back in Time: Knit the Gilded Caramel Cloche
Imagine the elegance of the 1920s Art Deco era, captured in a single, luxurious accessory. The Gilded Caramel Cloche is a free knitting pattern that brings vintage sophistication into your modern wardrobe. This textured hat features a unique combination of twisted stitches and a subtle, scalloped brim, all knit in a rich caramel hue that evokes warmth and timeless style. Whether you're a seasoned knitter or an adventurous beginner, this pattern offers a rewarding project that results in a stunning, close-fitting hat perfect for cool-weather outings.
Materials Needed
Before you begin, gather the following supplies to ensure a smooth knitting experience:
- Yarn: Aran weight (10 ply) yarn, approximately 200 yards. The sample uses a warm caramel color.
- Needles: US 7 (4.5 mm) 16-inch circular needle and double-pointed needles (DPNs), or size needed to obtain gauge.
- Notions: Stitch markers, cable needle, tapestry needle for weaving in ends.
- Gauge: 20 stitches and 28 rows = 4 inches in stockinette stitch, after blocking. Always check your gauge for best fit.
Step-by-Step Instructions
This pattern is written for three sizes: Adult Small (Medium, Large) to fit head circumference 20 (22, 24) inches. Follow the instructions for your chosen size throughout.
Abbreviations
- CO: Cast on
- K: Knit
- P: Purl
- K2tog: Knit two together (decrease)
- SSK: Slip, slip, knit (left-leaning decrease)
- M1L: Make one left (increase)
- M1R: Make one right (increase)
- St(s): Stitch(es)
- Rep: Repeat
- RS: Right side
- WS: Wrong side
- C4F: Slip next 2 stitches to cable needle and hold in front, knit 2, then knit 2 from cable needle.
- C4B: Slip next 2 stitches to cable needle and hold in back, knit 2, then knit 2 from cable needle.
Brim
CO 96 (104, 112) sts. Join in the round, being careful not to twist. Place a marker to indicate the beginning of the round.
Work in K2, P2 ribbing for 1 inch.
Body
Work the following 8-round pattern repeat until piece measures 5 (5.5, 6) inches from cast-on edge, ending with Round 8.
- Round 1: *K2, P2, K4, P2, K2, P2, K4, P2; rep from * around.
- Round 2: *K2, P2, K4, P2, K2, P2, K4, P2; rep from * around.
- Round 3: *K2, P2, C4F, P2, K2, P2, C4F, P2; rep from * around.
- Round 4: *K2, P2, K4, P2, K2, P2, K4, P2; rep from * around.
- Rounds 5-6: Rep Rounds 1-2.
- Round 7: *K2, P2, K4, P2, K2, P2, C4B, P2; rep from * around.
- Round 8: *K2, P2, K4, P2, K2, P2, K4, P2; rep from * around.
Crown Decreases
Switch to double-pointed needles when stitches become too few for the circular needle.
- Round 1: *K2, P2tog, K4, P2tog, K2, P2tog, K4, P2tog; rep from * around. (80, 88, 96 sts)
- Round 2: *K2, P1, K4, P1, K2, P1, K4, P1; rep from * around.
- Round 3: *K2, P1, K4, P1, K2, P1, C4F, P1; rep from * around.
- Round 4: *K2, P1, K4, P1, K2, P1, K4, P1; rep from * around.
- Round 5: *K2tog, P1, K4, P1, SSK, P1, K4, P1; rep from * around. (64, 72, 80 sts)
- Round 6: *K1, P1, K4, P1, K1, P1, K4, P1; rep from * around.
- Round 7: *K1, P1, K4, P1, K1, P1, C4B, P1; rep from * around.
- Round 8: *K1, P1, K4, P1, K1, P1, K4, P1; rep from * around.
- Round 9: *K1, P1, K2tog, K2, P1, K1, P1, K2tog, K2, P1; rep from * around. (48, 56, 64 sts)
- Round 10: *K1, P1, K3, P1, K1, P1, K3, P1; rep from * around.
- Round 11: *K1, P1, K3, P1, K1, P1, K3, P1; rep from * around.
- Round 12: *K1, P1, K2tog, K1, P1, K1, P1, K2tog, K1, P1; rep from * around. (32, 40, 48 sts)
- Round 13: *K1, P1, K2, P1, K1, P1, K2, P1; rep from * around.
- Round 14: *K1, P1, K2tog, P1, K1, P1, K2tog, P1; rep from * around. (24, 32, 40 sts)
- Round 15: *K1, P1, K1, P1, K1, P1, K1, P1; rep from * around.
- Round 16: *K2tog, P1, K2tog, P1; rep from * around. (12, 16, 20 sts)
- Round 17: *K2tog; rep from * around. (6, 8, 10 sts)
Cut yarn, leaving a 6-inch tail. Thread the tail through the remaining stitches, pull tight to close the top, and secure with a knot.
Finishing
Weave in all ends neatly. To shape the cloche silhouette, block the hat over a bowl or a balloon that matches your head size. Allow it to dry completely before wearing. This step ensures the hat holds its beautiful, bell-like shape and the textured stitches are defined.
Enjoy your new Gilded Caramel Cloche—a timeless accessory that adds a touch of vintage glamour to any outfit!


