The Coastal Driftwood Stripe Basket Free Pattern – A Knitted Chunky Yarn Storage Tote with Woven Sea-Glass Accents
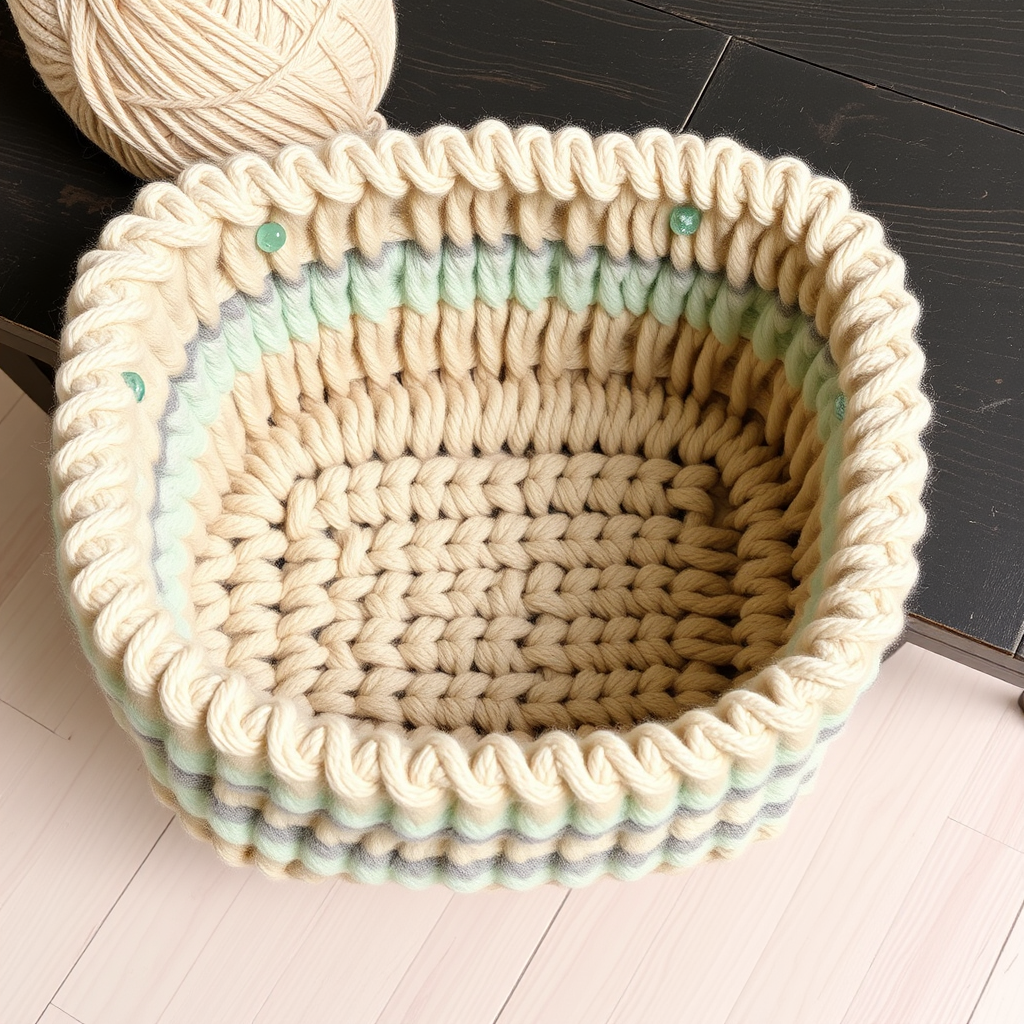
The Coastal Driftwood Stripe Basket: A Free Chunky Knitted Storage Tote Pattern
Bring the serene rhythm of the shore into your home with this chunky knitted basket, featuring soft sand-and-azure stripes and delicate woven sea-glass accents. Perfect for stashing yarn, toys, or cozy blankets, it’s as practical as it is beautiful. This free pattern is designed for beginners and experienced knitters alike, using simple knit and purl stitches to create a sturdy, stylish storage solution that evokes a breezy coastal home.
Materials Needed
Before you begin, gather the following materials. All yarn amounts are approximate and based on the finished size of approximately 12 inches wide, 10 inches tall, and 8 inches deep (before folding).
- Yarn: Super bulky weight yarn (approx. 250 yards in Sand (Color A), 200 yards in Seafoam (Color B), 100 yards in Driftwood Gray (Color C)).
- Needles: US 13 (9 mm) knitting needles (straight or circular for the base; circular or double-pointed for working in the round).
- Notions: Tapestry needle for weaving and sewing, scissors, stitch markers.
- Optional Accents: 6 small sea-glass beads or buttons (pale blue and green recommended) for the woven accents.
Gauge & Abbreviations
Gauge: 8 stitches and 12 rows = 4 inches in stockinette stitch. Always check your gauge to ensure the correct finished size.
Abbreviations:
- CO: Cast on
- K: Knit
- P: Purl
- St(s): Stitch(es)
- K2tog: Knit two stitches together (decrease)
- Rep: Repeat
Step-by-Step Instructions
Follow these detailed instructions to create your Coastal Driftwood Stripe Basket. The pattern is worked in two main parts: the flat base and the sides worked in the round.
Part 1: Knitting the Base (Worked Flat)
This creates a sturdy, rectangular foundation for your basket.
- With yarn A (Sand), CO 24 sts.
- Row 1: Knit all sts.
- Row 2: Purl all sts.
- Rep Rows 1-2 until the piece measures 8 inches from the CO edge. This forms the base. End with a purl row (Row 2) so you are ready to knit the next row.
Part 2: Knitting the Sides (Worked in the Round)
You will now pick up stitches around the entire perimeter of the base to begin working the sides seamlessly.
- Picking up stitches: With the right side facing you, pick up and knit 24 sts along each of the four edges of the base (total 96 sts). Place a stitch marker at the beginning of the round and join in the round, being careful not to twist the stitches.
- Round 1: Knit all sts.
- Round 2: Purl all sts. This purl round creates a natural fold line for the rim later.
- Stockinette section: Continue in stockinette stitch (knit every round) for 2 inches.
Part 3: Stripe Pattern
Now you will introduce the coastal color palette. Follow the stripe sequence carefully, changing colors at the end of each round.
- Rounds 1-4: Knit with yarn B (Seafoam).
- Rounds 5-6: Knit with yarn C (Driftwood Gray).
- Rounds 7-10: Knit with yarn A (Sand).
- Rounds 11-12: Knit with yarn B (Seafoam).
- Rounds 13-16: Knit with yarn C (Driftwood Gray).
- Rounds 17-20: Knit with yarn A (Sand).
- Rounds 21-22: Knit with yarn B (Seafoam).
- Rounds 23-26: Knit with yarn C (Driftwood Gray).
- Rounds 27-30: Knit with yarn A (Sand).
Part 4: Shaping the Top
After completing the stripe pattern, you will shape the top of the basket so it gently tapers inward.
- Knit 2 more rounds with yarn A (Sand).
- Decrease Round 1: *K2tog, rep from * to end (48 sts remain).
- Next round: Knit all sts.
- Decrease Round 2: *K2tog, rep from * to end (24 sts remain).
- Cut yarn, leaving a long tail (approx. 12 inches). Thread the tail through a tapestry needle, then thread it through the remaining 24 sts on your needle. Pull tight to close the top, and secure with a knot.
Part 5: Finishing & Creating the Rolled Rim
This step creates the beautiful, structured rim that gives the basket its polished look.
- Fold the top edge of the basket down along the purl row you created in Round 2 of Part 2. This creates a rolled rim.
- Using the tapestry needle and matching yarn (yarn A), sew the rim in place. Work from the inside of the basket, catching the folded edge and the body of the basket. Sew securely all the way around.
- Weave in all loose ends using the tapestry needle, hiding them within the stitches.
Part 6: Adding the Woven Sea-Glass Accents
These delicate accents are the signature detail of this design, catching the light and evoking the sea.
- Cut 6 lengths of yarn C (Driftwood Gray), each about 6 inches long.
- Thread one length through a sea-glass bead or button, then tie a knot to secure it to the yarn.
- Using the tapestry needle, weave the ends of each strand through the top rim of the basket, spacing them evenly around the circumference. Push the needle from the outside to the inside of the basket.
- Tie knots on the inside to secure each accent firmly.
- Trim the yarn ends to your desired length, leaving a small fringe if you like.
Care Instructions
To keep your basket looking its best, hand wash it in cold water with a mild detergent. Gently reshape it while damp and lay it flat to dry. Do not machine wash or tumble dry, as this can felt or distort the chunky yarn.
Enjoy your beautiful, handcrafted Coastal Driftwood Stripe Basket! It’s a wonderful project for using up super bulky yarn and adds a touch of seaside calm to any room.


