The Celestial Bloom Scrunchie Free Pattern – A Knitted Lace and Cable Hair Wrap
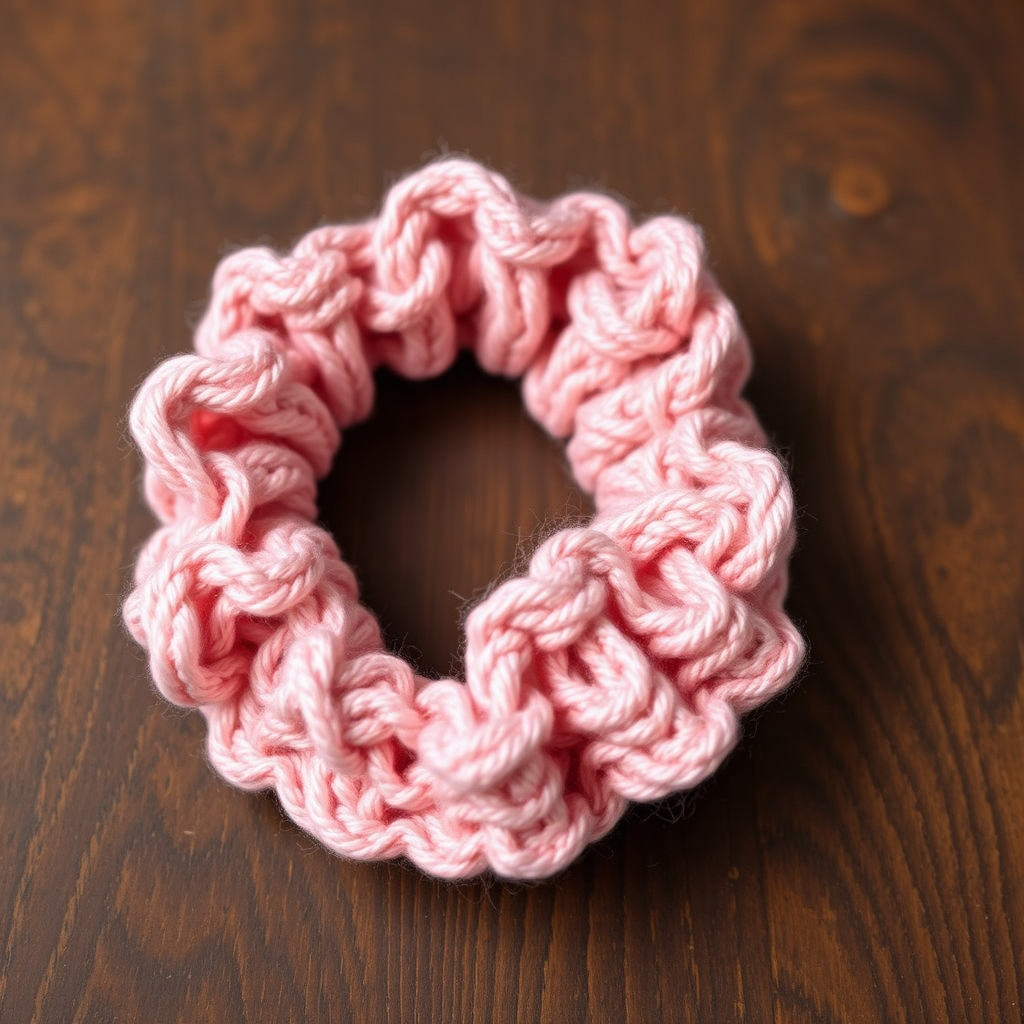
The Celestial Bloom Scrunchie: A Free Knitted Lace & Cable Hair Wrap Pattern
Are you ready to elevate your everyday ponytail into a statement of cozy elegance? Meet the Celestial Bloom Scrunchie—a handcrafted hair accessory that marries the plush texture of a braided cable core with the delicate, airy beauty of a lace petal border. This isn't just a hair tie; it's a blooming flower for your hair, knitted from soft, thick worsted weight yarn.
This free pattern is perfect for intermediate knitters looking to expand their skills with cables and lace, but with our detailed, step-by-step instructions, even a confident beginner can create this stunning piece. The result is a substantial, cozy scrunchie that adds a touch of handmade charm to any outfit. Let's dive into the craft and create your own celestial bloom.
Materials Needed
Before you begin, gather your supplies. This project is portable and quick to knit up, making it a perfect weekend craft.
- Yarn: 50g of worsted weight yarn in a soft blush pink (e.g., Lion Brand Heartland in 'Mount Rainier'). The softness and thickness of this yarn create the perfect plush texture.
- Knitting Needles: US 6 (4.0 mm) knitting needles. You will need to knit in the round, so a 16-inch circular needle is recommended.
- Notions: A tapestry needle for weaving in ends and sewing the seam.
- Elastic: One 1-inch wide elastic hair tie. This provides the structure and stretch for your scrunchie.
- Extras: A cable needle (for the C4B and C4F stitches) and a stitch marker to mark the beginning of your round.
Gauge & Abbreviations
Gauge: 20 stitches and 28 rows = 4 inches in stockinette stitch. While gauge isn't critical for a scrunchie, matching it ensures the correct size and drape.
Abbreviations:
- CO: Cast on
- K: Knit
- P: Purl
- YO: Yarn over
- K2tog: Knit two together (right-leaning decrease)
- SSK: Slip, slip, knit (left-leaning decrease)
- C4B: Cable 4 back (slip 2 stitches to cable needle, hold in back, knit next 2, then knit the 2 from cable needle)
- C4F: Cable 4 front (slip 2 stitches to cable needle, hold in front, knit next 2, then knit the 2 from cable needle)
- BO: Bind off
Step-by-Step Instructions
Follow these detailed instructions to create your Celestial Bloom Scrunchie. The pattern is divided into clear sections: the cable core, the lace border, and the assembly.
Step 1: Cast On & Join
Loosely cast on 60 stitches using your preferred method. We recommend a long-tail cast-on for a stretchy edge. Once cast on, carefully join in the round, ensuring your stitches are not twisted. Place a stitch marker on your right needle to mark the beginning of the round.
Step 2: The Cable Core (Rounds 1-8)
This section creates the plush, textured core that will wrap around the elastic. It's a simple 4-stitch cable with purl separators.
- Round 1: *K4, P2* repeat to end of round.
- Round 2: *C4B, P2* repeat to end of round. (This twists the cable to the right.)
- Round 3: *K4, P2* repeat to end of round.
- Round 4: *C4F, P2* repeat to end of round. (This twists the cable to the left.)
- Rounds 5-8: Repeat Rounds 1-4 once more. This completes the braided cable pattern, giving you a dense, cozy core.
Step 3: The Lace Petal Border (Rounds 9-24)
Now we transition to the delicate lace that flares out like flower petals. This section uses yarn overs (YO) and decreases (SSK) to create the ruffled edge. Note how the purl stitches are gradually consumed by the increases.
- Round 9: *K2, YO, SSK, P2* repeat to end. (This begins the lace pattern.)
- Round 10: *K3, YO, SSK, P1* repeat to end. (The purl stitch count decreases.)
- Round 11: *K4, YO, SSK* repeat to end. (The purl stitches are now gone, consumed by the lace.)
- Round 12: *K5, YO, SSK* repeat to end.
- Round 13: *K6, YO, SSK* repeat to end.
- Round 14: *K7, YO, SSK* repeat to end.
- Round 15: *K8, YO, SSK* repeat to end.
- Round 16: *K9, YO, SSK* repeat to end.
- Round 17: *K10, YO, SSK* repeat to end.
- Round 18: *K11, YO, SSK* repeat to end.
- Round 19: *K12, YO, SSK* repeat to end.
- Round 20: *K13, YO, SSK* repeat to end.
- Round 21: *K14, YO, SSK* repeat to end.
- Round 22: *K15, YO, SSK* repeat to end.
- Round 23: *K16, YO, SSK* repeat to end.
- Round 24: *K17, YO, SSK* repeat to end. (You will now have 120 stitches on your needles, forming a beautiful, ruffled lace edge.)
Step 4: Bind Off
Bind off all stitches loosely. A loose bind-off is crucial here to maintain the stretch and flare of the lace. Cut your yarn, leaving a long tail of about 12 inches for sewing.
Step 5: Assemble the Scrunchie
This is where the magic happens. Fold the knitted tube in half lengthwise. The cable core should be on the inside of the fold, and the lace petals should be on the outside, flaring away from the center.
Place your 1-inch elastic hair tie inside the fold, positioning it at the very center of the cable core. Using your tapestry needle and the long yarn tail, sew the two edges of the knitted tube together along the cable core. Use a whip stitch or mattress stitch to create a secure seam, completely encasing the elastic. Ensure the elastic is fully covered and the seam is snug but not too tight, allowing the scrunchie to stretch.
Step 6: Finishing Touches
Weave in all loose ends securely with your tapestry needle. Gently stretch the scrunchie to distribute the fabric evenly around the elastic. The lace petals will naturally flare out, creating a beautiful blooming effect. Your Celestial Bloom Scrunchie is now ready to adorn your hair!
This pattern is a wonderful way to practice cables and lace in a small, satisfying project. The contrast between the dense, twisted core and the open, airy petals is truly stunning. Whether you keep it for yourself or gift it to a friend, this scrunchie is sure to be a cherished handmade treasure. Happy knitting!


