The Blushing Bloom Gift Pouch Free Pattern – A Knitted Rose Petal Drawstring Bag
The Blushing Bloom Gift Pouch Free Pattern – A Knitted Rose Petal Drawstring Bag
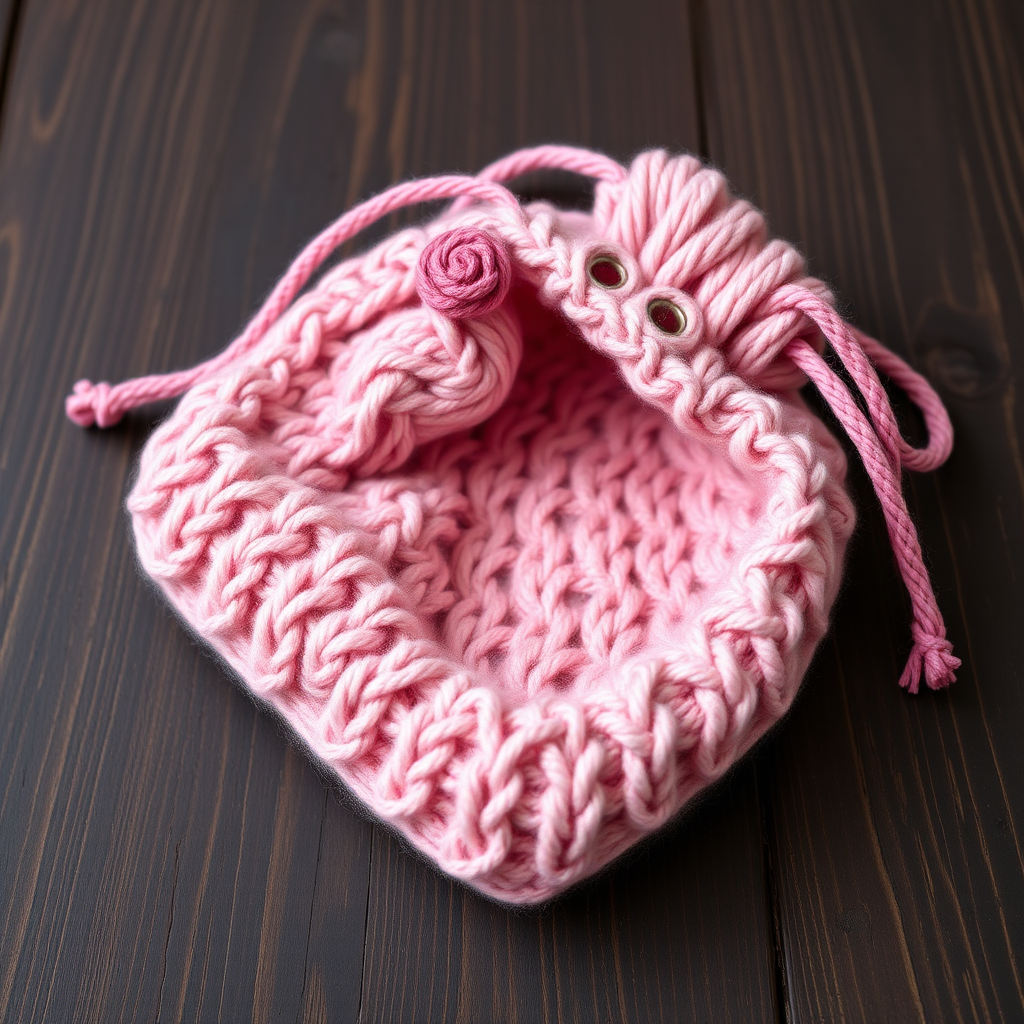
There’s something truly magical about giving a gift that comes wrapped in a handmade pouch—especially one that looks like a blooming rose. The Blushing Bloom Gift Pouch is a romantic, textured knitted bag designed to hold Valentine’s treats, jewelry, or small treasures. Its delicate petal stitch, created with simple yarn overs and decreases, mimics the soft layers of a rose in full bloom. The blush pink body paired with a deep rose drawstring and optional knitted rose accent makes this pouch a keepsake in its own right.
Whether you’re an experienced knitter looking for a quick weekend project or a beginner ready to try something new, this pattern is approachable, forgiving, and absolutely delightful to make. Let’s dive into everything you need to create this charming gift bag at home.
Materials Needed
Before you begin, gather the following supplies. All items are readily available at your local yarn shop or online.
- Yarn: Worsted weight cotton or cotton-blend yarn in two colors:
- Main Color (MC): Blush pink – approximately 100g
- Contrast Color (CC): Deep rose – approximately 100g (you’ll use less, but this ensures you have enough for the drawstrings and rose accent)
- Needles: US 7 (4.5mm) knitting needles
- Notions: Tapestry needle for seaming and weaving in ends, scissors
- Optional: Stitch markers to help keep track of pattern repeats
Gauge: 20 stitches and 28 rows = 4 inches in stockinette stitch. Gauge is important for achieving the correct finished size, so take a moment to knit a small swatch before starting.
Step-by-Step Instructions
This bag is knitted flat in two identical panels, then seamed together. The drawstring is made separately using the I-cord technique. Follow along carefully, and you’ll have a beautiful pouch in no time.
Panel (Make 2)
Each panel forms one side of the bag. The textured petal stitch is created with a simple 6-row repeat that includes yarn overs (yo), knit two together (k2tog), and slip slip knit (ssk) decreases.
Cast On: With MC, cast on 36 stitches.
Row 1 (Right Side): Knit all stitches.
Row 2 (Wrong Side): Purl all stitches.
Row 3 (RS): K1, *k2tog, yo, k1, yo, ssk, k1; repeat from * to the last stitch, k1.
Let’s break this down: You’ll knit 1 stitch, then repeat the sequence inside the asterisks across the row. The sequence is: knit 2 together (decrease), yarn over (increase), knit 1, yarn over (increase), slip slip knit (decrease), knit 1. This creates a lovely eyelet pattern that resembles petals. End the row with a final knit 1.
Row 4 (WS): Purl all stitches.
Row 5 (RS): Knit all stitches.
Row 6 (WS): Purl all stitches.
Row 7 (RS): K2, *yo, ssk, k1, k2tog, yo, k1; repeat from * to the last 2 stitches, k2.
This row is the offset version of Row 3, which staggers the petal pattern beautifully. Start by knitting 2 stitches, then repeat: yarn over, slip slip knit, knit 1, knit 2 together, yarn over, knit 1. Finish with knit 2.
Row 8 (WS): Purl all stitches.
Repeat Rows 3–8 until the piece measures approximately 6 inches from the cast-on edge, ending with a wrong-side row (Row 6 or Row 8).
Create the Casing for the Drawstring
Now you’ll shape the top of the bag where the drawstring will thread through.
Next Row (RS): Knit all stitches, decreasing 4 stitches evenly across the row. You should now have 32 stitches on your needle.
To decrease evenly: Knit 6, k2tog, knit 7, k2tog, knit 7, k2tog, knit 7, k2tog, knit 6. This distributes the decreases nicely.
Work 4 rows in stockinette stitch: Knit the right-side rows, purl the wrong-side rows. This creates a smooth fabric for the casing.
Eyelet Row (RS): K1, *yo, k2tog; repeat from * to the last stitch, k1.
This row creates the holes through which you’ll thread the drawstring. The yarn over adds a stitch, and the k2tog removes one, keeping the stitch count at 32.
Work 4 more rows in stockinette stitch (knit RS, purl WS).
Bind off loosely. A loose bind-off ensures the top edge isn’t too tight and allows the drawstring to cinch easily. You can use a larger needle to bind off if needed.
Repeat this entire process to make the second panel.
Finishing the Bag
Now it’s time to assemble your pouch.
Seam the Panels: Place the two panels with right sides together (the textured petal side facing inward). Using your tapestry needle and MC yarn, sew the side seams and the bottom seam, leaving the top open. Use a mattress stitch or whip stitch for a neat finish.
Turn Right Side Out: Carefully turn the bag so the right side faces outward. Gently push out the corners with a blunt tool or your fingers.
Drawstring (Make 2)
The drawstrings are knitted I-cords, which are simple tubes of knitting that create a sturdy, elegant cord.
Cast On: With CC, cast on 3 stitches.
Knit I-cord: Knit across the 3 stitches. Then, instead of turning the work, slide the stitches to the other end of the needle. Pull the yarn across the back and knit again. Repeat this process until the cord measures approximately 18 inches.
Tip: Keep the tension consistent by pulling the yarn snugly across the back each time.
Bind off. Cut the yarn, leaving a tail, and thread it through the remaining stitches to secure.
Make a second I-cord the same way.
Thread the Drawstrings: Take one cord and thread it through the eyelet row from one side of the bag. Use a tapestry needle or a safety pin to guide it through all the eyelets. Thread the second cord from the opposite side, so the two cords exit on opposite sides. Tie small knots at the ends of each cord to prevent them from slipping back through.
Rose Accent (Optional but Adorable)
This little knitted rose adds the perfect finishing touch. It’s quick to make and sewn onto the front of the bag.
Cast On: With CC, cast on 10 stitches.
Knit 2 rows (knit every row – this is garter stitch).
Next Row: *K1, k2tog; repeat from * across the row. You’ll have 7 stitches.
Knit 2 rows.
Next Row: *K1, k2tog; repeat from * to the last stitch, k1. You’ll have 5 stitches.
Knit 2 rows.
Next Row: K2tog, k1, k2tog. You’ll have 3 stitches.
Knit 2 rows.
Next Row: K2tog, k1. You’ll have 2 stitches.
Knit 2 rows.
Next Row: K2tog. You’ll have 1 stitch.
Cut the yarn, leaving a long tail. Thread the tail through the remaining stitch and pull tight. Now, starting from the cast-on edge, roll the knitted piece into a spiral to form a rose shape. Use the yarn tail to sew the layers together at the base, securing the rose.
Attach the Rose: Sew the rose onto the front of the bag, near the top edge, using the yarn tail. Weave in all loose ends.
Your Blushing Bloom Is Complete!
Fill your new pouch with chocolates, a heartfelt note, or a small piece of jewelry. The recipient will adore not just the gift inside, but the beautiful, handmade vessel it comes in. This pattern is perfect for Valentine’s Day, Mother’s Day, birthdays, or any occasion that calls for a little romance.
Happy knitting, and may your stitches always be even and your heart full of creativity!


