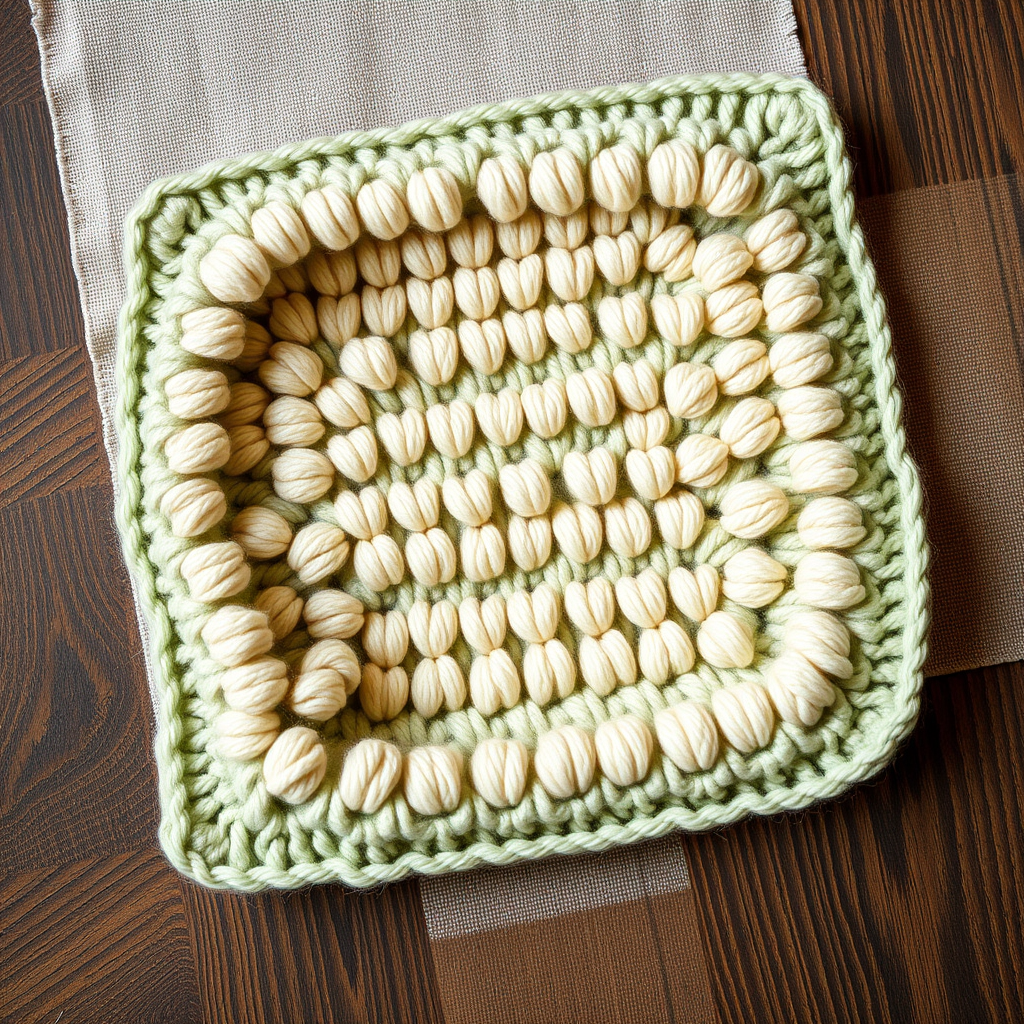
Mossy Pebble Spa Washcloth Free Pattern – Knit a Textured Stone-Inspired Essential

Mossy Pebble Spa Washcloth: A Beginner-Friendly Textured Knit
Imagine bringing the serene, grounding feeling of smooth river stones into your daily routine. That's exactly what the Mossy Pebble Spa Washcloth offers. This quick, mindful knit combines a rich, calming moss green with a beautifully textured slip-stitch pattern that mimics the look of a pebble bed. It's an eco-friendly, handmade essential that adds a touch of spa-like luxury to any bathroom—and it's the perfect project for beginners looking to expand their skills beyond basic garter stitch.
This washcloth isn't just functional; it's a sensory experience. The dense, nubby texture is perfect for gentle exfoliation, while the cotton yarn is highly absorbent and durable. Plus, it makes a wonderful, thoughtful handmade gift. Let's dive into this relaxing and rewarding project.
Materials Needed
Before you begin, gather these simple supplies. This project is wonderfully portable and requires minimal investment.
- Yarn: Worsted weight cotton yarn (e.g., Lion Brand Kitchen Cotton) in Moss Green. You'll need approximately 100g / 180 yards. Cotton is ideal for washcloths because it's absorbent, durable, and machine-washable.
- Knitting Needles: US 7 (4.5 mm) knitting needles. Straight or circular needles both work fine.
- Other Tools: A tapestry needle for weaving in ends, and a pair of scissors.
Gauge & Finished Size
- Gauge: 20 stitches and 28 rows = 4 inches in stockinette stitch (blocked). Gauge isn't critical for a washcloth, but it helps ensure the correct finished size.
- Finished Size: Approximately 10 x 10 inches (25 x 25 cm) after blocking.
Step-by-Step Instructions
This pattern is a wonderful introduction to slip stitches. Don't be intimidated—the technique is simple and creates a stunning result. Follow these detailed instructions carefully, and you'll have a beautiful, spa-worthy washcloth in no time.
Abbreviations
- CO: Cast on
- K: Knit
- P: Purl
- Sl: Slip stitch purlwise
- WYIF: With yarn in front
- WYIB: With yarn in back
- BO: Bind off
Pattern Notes
- The slip-stitch pattern creates a dense, textured fabric that is perfect for exfoliating and absorbing water.
- Always slip stitches purlwise (insert the right needle into the stitch as if to purl) to keep the yarn tension even and the stitch untwisted.
- The first and last 3 stitches of every row form a garter stitch border, which prevents the edges from curling and gives a neat, finished look.
Getting Started: Cast On & Border
Step 1: CO 46 stitches using your preferred method (long-tail cast on works well).
Step 2: Work Rows 1-4: Knit all stitches. This creates a 4-row garter stitch border at the bottom of your washcloth.
The Textured Body: Slip Stitch Pattern
Now you'll begin the main textured pattern. Pay close attention to the yarn position when slipping stitches—this is what creates the "pebble" effect.
Row 5 (Right Side): K3, *Sl 1 WYIF, K1; repeat from * to last 3 stitches, K3.
Explanation: Knit the first 3 border stitches. Then, bring the yarn to the front (WYIF), slip the next stitch purlwise, and bring the yarn to the back to knit the next stitch. Repeat this sequence across the row, ending with the 3 border stitches knit.
Row 6 (Wrong Side): K3, *P1, Sl 1 WYIF; repeat from * to last 3 stitches, K3.
Explanation: Knit the 3 border stitches. Then, purl the next stitch. Bring the yarn to the front (it's already there after purling), slip the next stitch purlwise, and keep the yarn in front as you move to the next stitch to purl it. Repeat this sequence, ending with 3 knit border stitches.
Row 7: K3, *K1, Sl 1 WYIF; repeat from * to last 3 stitches, K3.
Explanation: Knit the 3 border stitches. Knit the next stitch, then bring the yarn to the front, slip the next stitch purlwise, and bring the yarn to the back for the next knit stitch. Repeat across the row, ending with 3 knit border stitches.
Row 8: K3, *Sl 1 WYIF, P1; repeat from * to last 3 stitches, K3.
Explanation: Knit the 3 border stitches. Bring the yarn to the front, slip the next stitch purlwise, then purl the next stitch (the yarn is already in front). Repeat this sequence, ending with 3 knit border stitches.
Step 3: Repeat Rows 5-8 until the piece measures approximately 9.5 inches from the cast-on edge, ending with a Row 8 (a wrong-side row). This ensures your pattern is at a good stopping point.
Finishing the Top Border
Step 4: Work Rows 9-12: Knit all stitches. This creates a matching garter stitch border at the top of your washcloth.
Step 5: BO all stitches knitwise on the next row. To bind off knitwise, knit the first two stitches, then pass the first stitch over the second and off the needle. Knit the next stitch and repeat until one stitch remains. Cut the yarn, leaving a 6-inch tail, and pull it through the last loop to secure.
Finishing Touches: Weaving & Blocking
Step 6: Thread the tapestry needle with the yarn tail and weave it in and out of the stitches on the wrong side of the fabric. Do this for all loose ends, trimming any excess yarn.
Step 7 (Blocking): This step is crucial for evening out your stitches and enhancing the beautiful texture. Soak the washcloth in lukewarm water for about 15 minutes. Gently squeeze out the excess water—do not wring or twist. Lay the washcloth flat on a clean, dry towel, shaping it to a perfect 10x10 inch square. Allow it to dry completely.
And there you have it—your very own Mossy Pebble Spa Washcloth! This project is a joy to knit and a pleasure to use. The textured pattern is forgiving and meditative, making it a perfect way to unwind after a long day. Enjoy the process and the beautiful, functional result.