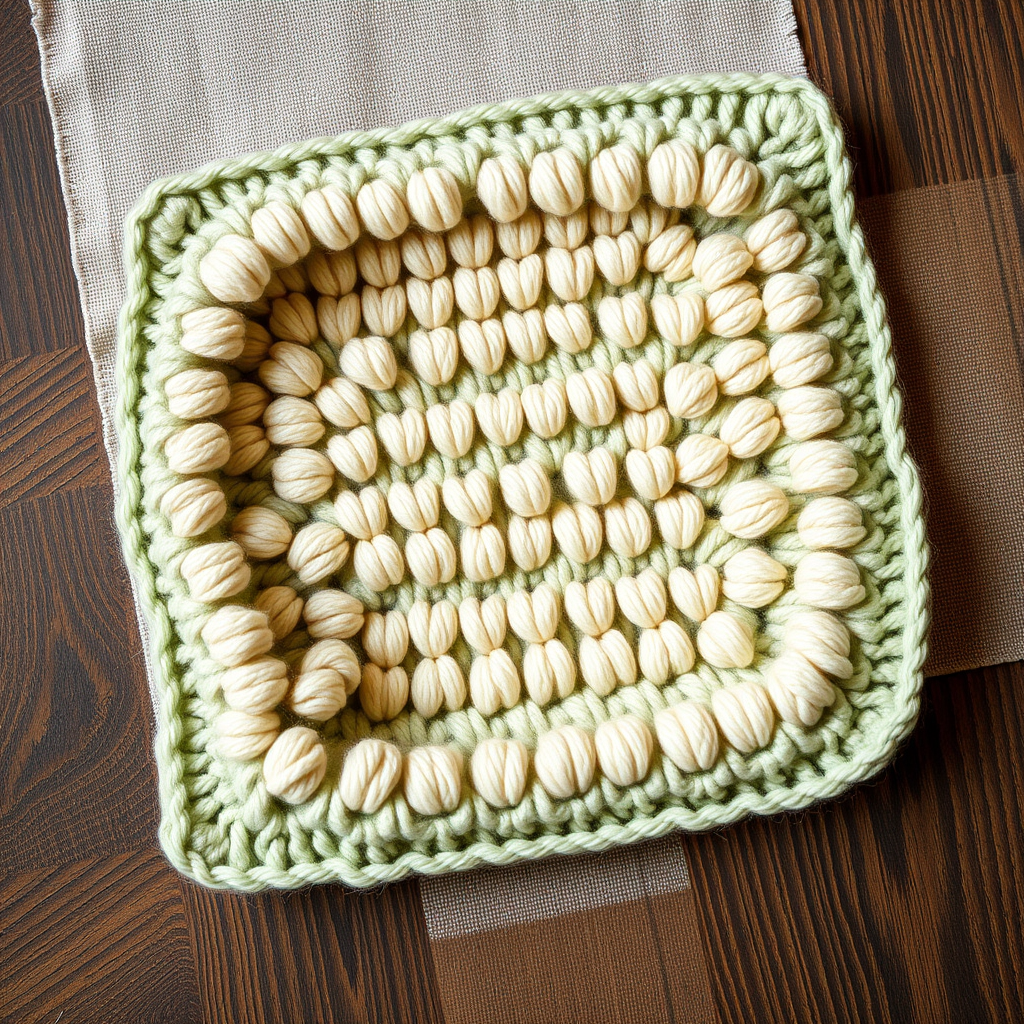
Stonewash Texture Knit Cloth Free Pattern

The Stonewash Texture Knit Cloth: A Free Beginner-Friendly Pattern
Elevate your kitchen or bath décor with this beautifully textured knit cloth. This free pattern features a subtle grid of slipped stitches that create a soft, nubby fabric—reminiscent of natural stone. It’s a quick, satisfying project that makes a wonderful handmade gift for housewarmings, holidays, or just because. Even if you're new to knitting, this pattern is designed to be accessible, using only knit, purl, and slip stitches to achieve a professional-looking result.
This two-tone design adds visual interest without complicated colorwork. The dense, firm fabric is perfect for scrubbing dishes or gentle exfoliation, and it holds its shape beautifully wash after wash. Let’s dive into creating your own Stonewash Texture Knit Cloth.
Materials Needed
Before you begin, gather the following supplies. This project is highly portable and requires minimal materials, making it ideal for on-the-go crafting.
- Yarn: Worsted weight cotton yarn (e.g., Lily Sugar'n Cream) in two contrasting colors. You will need approximately 50 yards of Color A (for the base and border) and 50 yards of Color B (for the texture stripes). The sample uses a soft sage green (Color A) and warm cream (Color B).
- Needles: US Size 7 (4.5 mm) knitting needles. Straight or circular needles both work fine for flat knitting.
- Gauge: 20 stitches and 28 rows = 4 inches in stockinette stitch. Exact gauge is not critical for a washcloth, but aim for a firm, dense fabric so the cloth is durable and absorbent.
- Other Tools: Tapestry needle for weaving in ends, scissors, and a ruler or measuring tape.
Step-by-Step Instructions
This pattern is worked flat, back and forth. The finished size is approximately 8 x 8 inches, but you can easily adjust the width by casting on more or fewer stitches (in multiples of 2).
Pattern Notes
- Slip Stitches: All slipped stitches are done purlwise with yarn in back (wyib). This means you insert the right needle into the stitch as if to purl, but simply transfer it to the right needle without knitting it, keeping the yarn behind the work. This creates a clean, elongated stitch.
- Reversible Fabric: The slipped stitch pattern creates a fabric that is visually interesting on both sides, though the texture is more pronounced on the right side.
- Color Changes: When switching colors, simply drop the old color and pick up the new one. Do not cut the yarn until the end, as you will be switching back and forth.
Getting Started: The Base
With Color A, cast on 40 stitches using your preferred method (a long-tail cast-on works well).
Work the following rows to create a solid base before the texture pattern begins:
- Row 1 (Right Side): Knit all stitches.
- Row 2 (Wrong Side): Purl all stitches.
- Row 3 (RS): Knit all stitches.
- Row 4 (WS): Purl all stitches.
This creates a small stockinette section that anchors the pattern.
The Texture Pattern
Now we begin the main body of the cloth. This 8-row repeat creates the distinctive "stonewash" grid texture.
- Row 5 (RS): With Color A, knit all stitches.
- Row 6 (WS): With Color A, purl all stitches.
- Row 7 (RS): Switch to Color B. *K1, slip 1 wyib; repeat from * to the end of the row. (Since you have 40 stitches, this will end with a K1).
- Row 8 (WS): With Color B, purl all stitches.
- Row 9 (RS): Switch to Color A. Knit all stitches.
- Row 10 (WS): With Color A, purl all stitches.
- Row 11 (RS): Switch to Color B. *Slip 1 wyib, K1; repeat from * to the end of the row. (This offsets the pattern from Row 7, creating the grid effect. The row will end with a slip 1).
- Row 12 (WS): With Color B, purl all stitches.
Repeat Rows 5 through 12 until the piece measures approximately 7.5 inches from the cast-on edge. It’s best to end after completing a Row 12 (a wrong-side row) to ensure your border starts cleanly on the right side.
Finishing Border
The garter stitch border gives the cloth a neat, flat edge and prevents curling.
- Switch back to Color A.
- Work in garter stitch (knit every row) for 6 rows.
Bind off all stitches knitwise on the next row. This creates a flexible, non-binding edge.
Final Touches
Cut your yarn, leaving a 6-inch tail. Thread the tail onto a tapestry needle and weave it through the bound-off edge stitches to secure it. Weave in all remaining loose ends carefully on the wrong side of the fabric. If desired, lightly block the cloth by wetting it and laying it flat to dry, gently shaping it to an 8x8 inch square. This helps even out the stitches and enhances the texture.
Your Stonewash Texture Knit Cloth is now complete! The dense cotton and textured grid make it as functional as it is beautiful. Enjoy using it in your kitchen, bathroom, or gift it to someone special. Happy knitting!