Sunlit Pebble Washcloth Free Pattern – A Knitted River Stone Spa Set
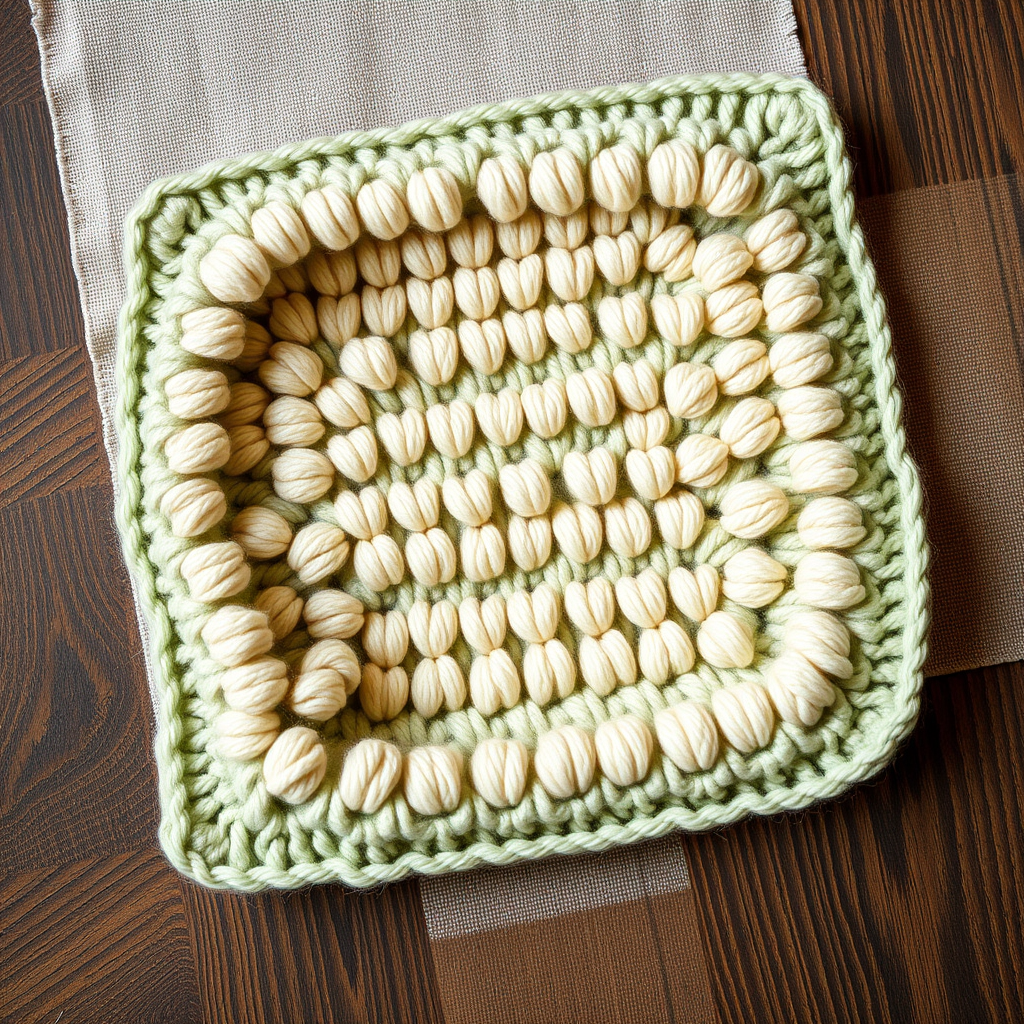
Sunlit Pebble Washcloth Free Pattern – A Knitted River Stone Spa Set
Bring the calm of a riverbed to your kitchen or bath with this textured knit washcloth, featuring a mosaic of slipped stitches that mimic smooth, sun-warmed pebbles. Each cloth is a quick, meditative project that uses up small yarn scraps beautifully. This pattern is perfect for beginners looking to expand their skills beyond basic knit and purl, and it makes a wonderful handmade gift for housewarmings, weddings, or simply to treat yourself to a little spa-like luxury at home.
The slipped stitch technique creates a dense, sturdy fabric that is both absorbent and gentle on the skin—ideal for washing your face, exfoliating in the shower, or adding a touch of rustic charm to your kitchen counter. The staggered, brick-like arrangement of the pebble shapes gives the cloth a sophisticated, organic texture that looks far more complex than it actually is to knit.
This pattern is a true stash-buster, requiring only about 90 yards of each color per cloth. You can easily mix and match colors to suit your decor or create a whole set of coordinating washcloths for a thoughtful, personalized gift. Let's dive into this relaxing and rewarding project!
Materials Needed
Before you begin, gather the following supplies. Using the recommended yarn weight and needle size will ensure your washcloth comes out the perfect size and texture.
Yarn
- Worsted weight cotton yarn (e.g., Lion Brand Kitchen Cotton) in two contrasting colors:
- Main Color (MC) – soft sage green (approximately 50g / 90 yards)
- Contrast Color (CC) – warm cream (approximately 50g / 90 yards)
Note: Cotton yarn is essential for washcloths because it is highly absorbent, durable, and becomes softer with each wash. Avoid acrylic yarn, which is not absorbent and can feel scratchy when wet.
Needles & Notions
- US Size 7 (4.5 mm) knitting needles (or size needed to obtain gauge)
- Tapestry needle for weaving in ends
- Scissors
Gauge
20 stitches and 28 rows = 4 inches in stockinette stitch. Gauge is not critical for this project, but a firm fabric is best for washcloths. If your stitches are loose, try going down a needle size; if they are very tight, go up a size.
Step-by-Step Instructions
This pattern creates a 9-inch square washcloth with a pebble-like texture using slipped stitches and simple knits and purls. The slipped stitches create vertical columns of color that pop against the background. Follow along carefully, and you'll have a beautiful, functional piece in no time.
Abbreviations
- K: knit
- P: purl
- Sl: slip stitch purlwise (unless noted)
- MC: Main Color (sage green)
- CC: Contrast Color (cream)
- RS: Right Side (the front of the work)
- WS: Wrong Side (the back of the work)
Getting Started: Cast On
With MC, cast on 45 stitches loosely. A long-tail cast-on works beautifully here. Be careful not to cast on too tightly, as this will make the edge of your washcloth curl and be less flexible.
Border (Worked in MC)
This garter stitch border frames the pebble pattern and prevents the edges from curling.
- Rows 1-4: Knit every row. (You will have 4 ridges of garter stitch on both sides.)
Main Pattern (Repeat 4 Times)
Now we begin the textured pebble pattern. This is an 8-row repeat. You will repeat these 8 rows a total of 4 times (or until the cloth is almost square, ending with a Row 8).
Row 1 (RS, MC): Knit all stitches.
Row 2 (WS, MC): Purl all stitches.
Row 3 (RS, CC): K3 (border), *Sl 3, K3* repeat from * to * until last 3 stitches, K3. (Slip the 3 stitches purlwise with yarn in back.)
Row 4 (WS, CC): K3 (border), *Sl 3, P3* repeat from * to * until last 3 stitches, K3. (Slip the 3 stitches purlwise with yarn in front.)
Row 5 (RS, MC): Knit all stitches.
Row 6 (WS, MC): Purl all stitches.
Row 7 (RS, CC): K6, *Sl 3, K3* repeat from * to * until last 6 stitches, K6. (This offsets the pebbles for a staggered, brick-like pattern.)
Row 8 (WS, CC): K6, *Sl 3, P3* repeat from * to * until last 6 stitches, K6.
Repeat these 8 rows 4 times total (or until the cloth is almost square, ending with a Row 8).
Finishing Border (Worked in MC)
After completing your final Row 8 of the main pattern, switch back to MC to create the bottom border.
- Rows 1-4: Knit every row. (This mirrors the top border.)
Bind Off
Bind off all stitches loosely in knit. A loose bind-off is crucial to keep the edge from pulling in and making the cloth curl. You can use a larger needle to bind off if you find your bind-off is too tight.
Weaving in Ends
Thread your tapestry needle with the yarn tails and weave them in securely along the edge of the work, being careful not to pull too tightly. Trim any excess yarn.
Blocking (Optional but Recommended)
Blocking helps even out the stitches and gives your washcloth a professional finish. Soak the cloth in lukewarm water with a drop of mild soap, gently squeeze out excess water (do not wring), lay it flat on a towel, and shape it into a perfect square. Allow it to dry completely.
Pro Tips for a Perfect Finish
- Color Changes: To change colors, simply drop the old color and pick up the new one at the beginning of the row. Carry the unused color up the side edge loosely, or cut and weave in ends for a cleaner look. For a neater edge, twist the yarns at the beginning of each row to avoid long floats.
- Slip Stitch Technique: When slipping stitches, always slip them as if to purl (purlwise) unless the pattern states otherwise. This keeps the stitch orientation correct and prevents twisted stitches.
- Yarn in Back vs. Front: On Row 3 (RS), you slip with the yarn in back because you are working on the right side. On Row 4 (WS), you slip with the yarn in front. This ensures the floats are hidden on the wrong side of the fabric.
- Customization: Feel free to adjust the size by casting on more or fewer stitches in multiples of 6 (plus 6 for the borders). You can also add more repeats of the 8-row pattern for a larger cloth.
Enjoy your knitting! This pattern is a joy to work up, and the result is a beautiful, functional piece that brings a touch of nature's serenity into your daily routine. Happy crafting!


