Amigurumi
Knitting Textured Cardigan Free Pattern
Anonymous
•
June 28, 2026
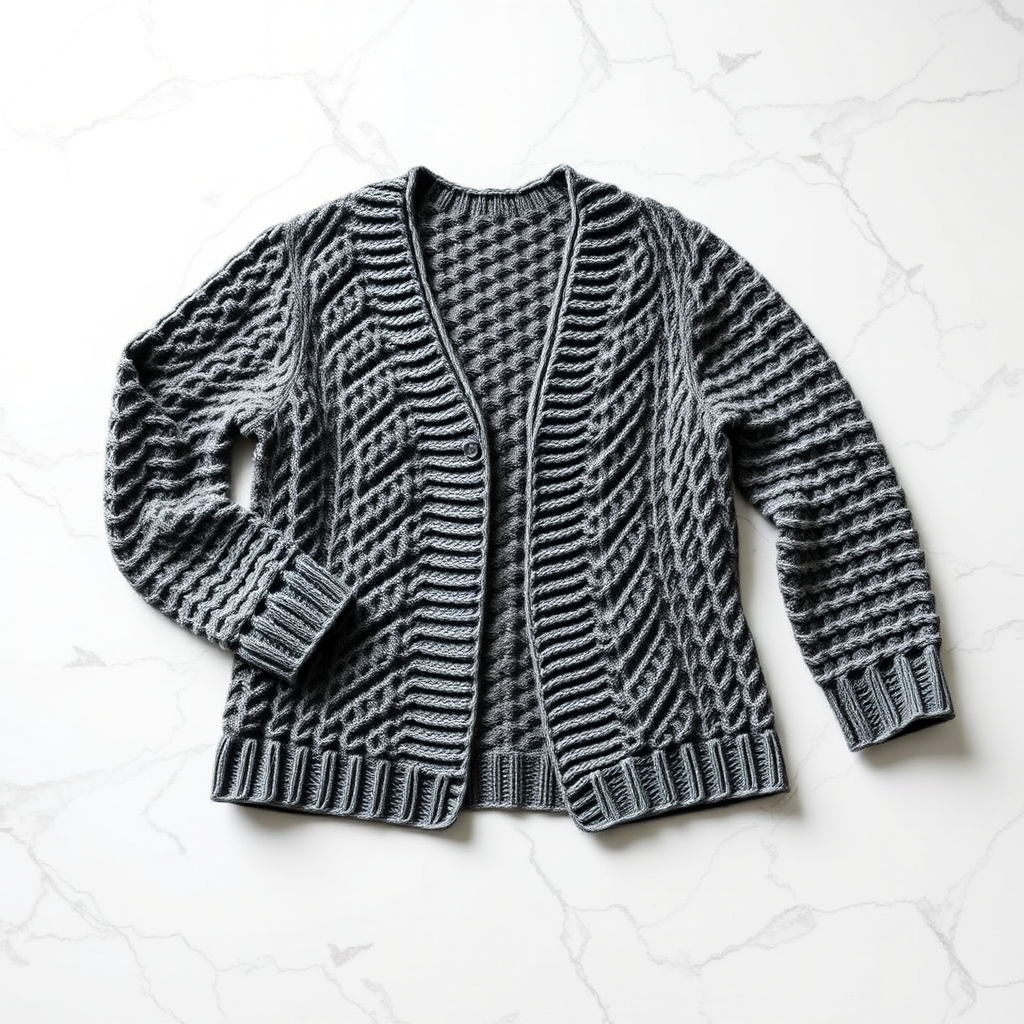
Knitting Textured Cardigan Free Pattern
Introduction
This cozy knitted cardigan features intricate textures and a relaxed fit, perfect for layering. The unique stitch patterns create a visually stunning piece that is both stylish and comfortable. Whether you're looking to add a new staple to your wardrobe or create a thoughtful gift, this cardigan is an excellent choice for knitters of all skill levels.
Materials Needed
- Yarn: Worsted weight yarn
- Needles: US 8 (5 mm) circular needles
- Gauge: 18 stitches and 24 rows = 4 inches in stockinette stitch
Step-by-Step Instructions
1. Back
- Cast on 90 stitches using your US 8 circular needles.
- Work in ribbing (knit 2, purl 2) for 2 inches. This creates a stretchy edge.
- After completing the ribbing, switch to the main stitch pattern. Alternate between a textured stitch and stockinette stitch for the next 20 inches. To achieve the textured stitch, you can use a simple pattern such as knitting 1 row and purling the next.
- Once you reach 20 inches, bind off all stitches loosely to maintain the elasticity of the edge.
2. Front Panels
- For each front panel, cast on 45 stitches.
- Work in ribbing (k2, p2) for 2 inches, just like the back.
- After the ribbing, switch to the same stitch pattern as the back. Continue knitting until the piece measures 20 inches from the cast-on edge.
- Bind off all stitches loosely.
3. Sleeves
- Cast on 40 stitches for each sleeve.
- Work in ribbing (k2, p2) for 2 inches.
- Switch to the textured stitch pattern and knit for 16 inches. This will give the sleeves a comfortable fit.
- Bind off all stitches loosely.
4. Assembly
- Begin by sewing the shoulder seams of the back and front panels together. Make sure to align them properly for a neat finish.
- Next, attach the sleeves to the armholes. Pin the sleeves in place before sewing to ensure they are evenly positioned.
- Finally, sew the side seams of the cardigan, connecting the front panels to the back. Make sure to keep the seams straight for a polished look.
5. Finishing
- Weave in all loose ends using a tapestry needle. This will give your cardigan a clean finish.
- Optionally, you can add buttons to the front for closure. Sew them on securely, spacing them evenly for a balanced look.
Congratulations! You've now completed your cozy textured cardigan. Enjoy wearing your handmade creation or gifting it to someone special!


