Jolly Elf Kitchen Apron Free Pattern – Knit a Festive Santa's Helper Apron
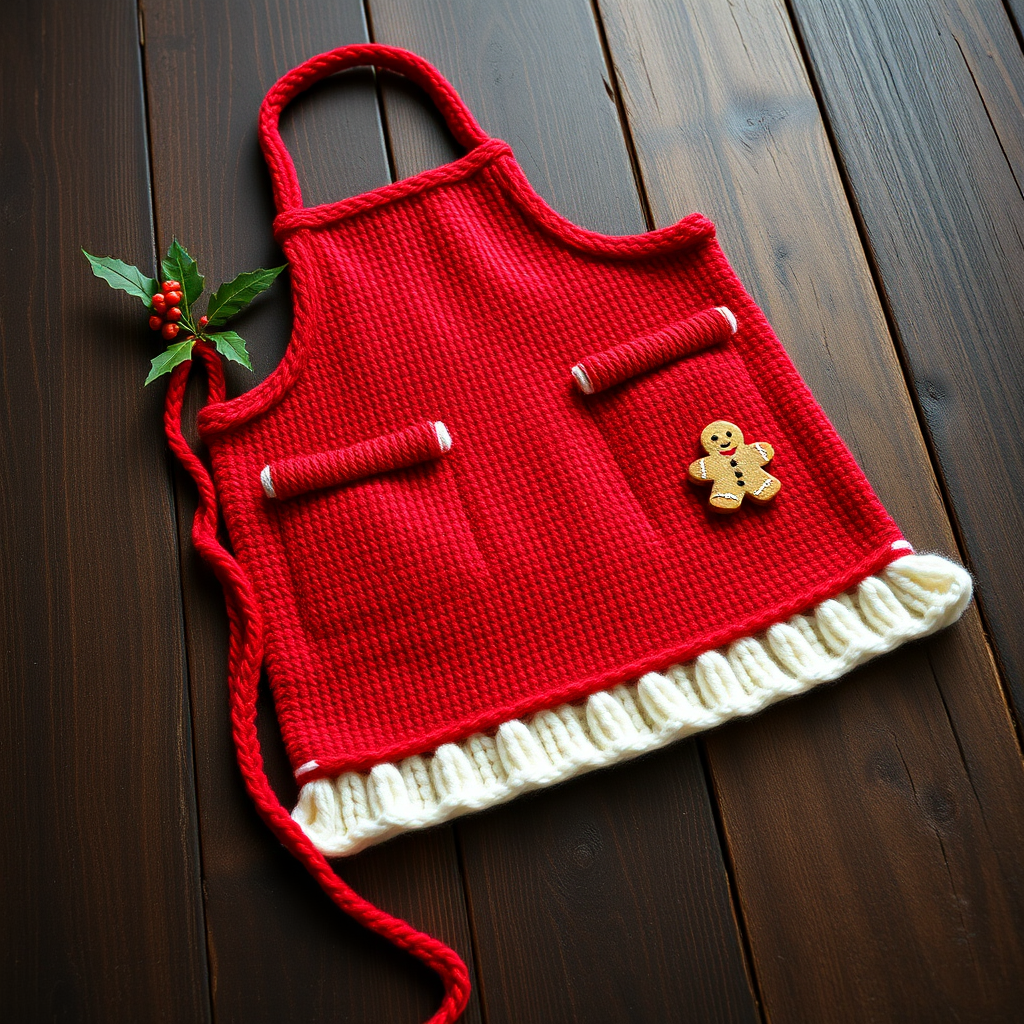
Bring Holiday Magic to Your Kitchen with the Jolly Elf Apron
There's something truly special about handmade holiday decor—especially when it's practical enough to use every day. The Jolly Elf Kitchen Apron is a charming knitting project that transforms your kitchen into a cozy North Pole workshop. With its vibrant cherry red body and fluffy white trim, this apron evokes the spirit of Santa's little helpers while keeping you stylishly covered during all your holiday baking marathons.
Whether you're a seasoned knitter looking for a quick festive project or a beginner ready to tackle your first wearable item, this pattern is designed to be approachable, rewarding, and undeniably adorable. The classic bib shape, comfortable neck strap, and waist ties make it as functional as it is festive. Let's get started!
Materials Needed
Before you cast on, gather these simple supplies:
- Yarn: Red Heart Super Saver in Cherry Red (Yarn A) and White (Yarn B), or any worsted weight yarn of your choice. You'll need approximately 2 skeins of red and 1 skein of white.
- Knitting Needles: US size 8 (5 mm) straight needles
- Tapestry Needle: For weaving in ends and sewing pieces together
- Scissors
Gauge: 18 stitches and 24 rows = 4 inches in stockinette stitch. Always check your gauge to ensure the apron fits as intended!
Step-by-Step Instructions
Sizes & Abbreviations
Size: One size fits most (approximately 24 inches wide x 18 inches long, excluding ties)
Abbreviations:
- K = knit
- P = purl
- K2tog = knit two together (decrease)
- Kfb = knit front and back (increase)
- St(s) = stitch(es)
- RS = right side
- WS = wrong side
Main Apron Body (Worked Bottom-Up)
Step 1: With Yarn A (red), cast on 90 stitches.
Step 2: Work in garter stitch (knit every row) for 6 rows. This creates a sturdy, non-curling edge at the bottom of the apron.
Step 3: Switch to stockinette stitch (knit on RS rows, purl on WS rows). Continue working in stockinette until the piece measures 14 inches from the cast-on edge, ending with a wrong-side row. This forms the main body of the apron.
Shape the Top (Bib Section)
Step 4: On the next right-side row, begin shaping the bib:
Row (RS): K2tog, knit to the last 2 stitches, K2tog. (You now have 88 stitches.)
Step 5: Repeat this decrease row on every right-side row until 40 stitches remain. This creates the tapered bib shape that narrows toward the top.
Step 6: Once you have 40 stitches, work even in stockinette stitch (no decreases) until the bib measures 6 inches from the beginning of the shaping, ending with a wrong-side row.
Neck Strap
Step 7: On the next right-side row, you'll divide for the neck opening:
Row (RS): K10, bind off the next 20 stitches, K10. (You now have 10 stitches on each side of the neck opening.)
Step 8: Work each side separately. Starting with the right side (first 10 stitches), continue in stockinette stitch for 8 inches. This forms the neck strap. Bind off all stitches.
Step 9: Repeat for the left side (remaining 10 stitches), working in stockinette for 8 inches, then bind off.
Ties (Make Two)
Step 10: With Yarn A, cast on 60 stitches.
Step 11: Work in garter stitch (knit every row) for 4 rows.
Step 12: Bind off all stitches. Repeat to make a second tie.
White Trim (Bottom Edge)
Step 13: With Yarn B (white), cast on 90 stitches.
Step 14: Work in garter stitch for 4 rows. This creates the fluffy, bumpy texture that mimics Santa's fur trim.
Step 15: Bind off all stitches. This piece will be attached to the bottom of the apron.
Assembly
Step 16: Using your tapestry needle and Yarn A, sew the white bottom trim to the bottom edge of the apron body. Place right sides together and use a whip stitch or mattress stitch for a clean finish.
Step 17: Attach the ties to the sides of the apron at the waist—approximately 8 inches up from the bottom edge. Sew securely using Yarn A.
Step 18: Weave in all loose ends with your tapestry needle to give your apron a polished, professional look.
Optional: Add a Pocket
Want extra functionality? Knit a 6x6 inch square in stockinette stitch with Yarn A. Sew it onto the front of the apron, leaving the top edge open to create a handy pocket for utensils, recipe cards, or a little holiday treat.
Final Thoughts
Your Jolly Elf Kitchen Apron is now ready to wear! This festive piece makes a wonderful gift for the baker in your life—or a delightful treat for yourself. The combination of smooth stockinette and bumpy garter stitch trim creates beautiful texture, while the classic red-and-white color scheme screams holiday cheer.
Pair it with a sprig of holly or a gingerbread cookie for a charming photo, and get ready to spread some handmade holiday magic. Happy knitting, and may your kitchen be filled with warmth, joy, and the sweet aroma of fresh-baked treats!


