Jolly Belt Buckle Ornament Free Pattern – Knit a Festive Santa Belt Keepsake
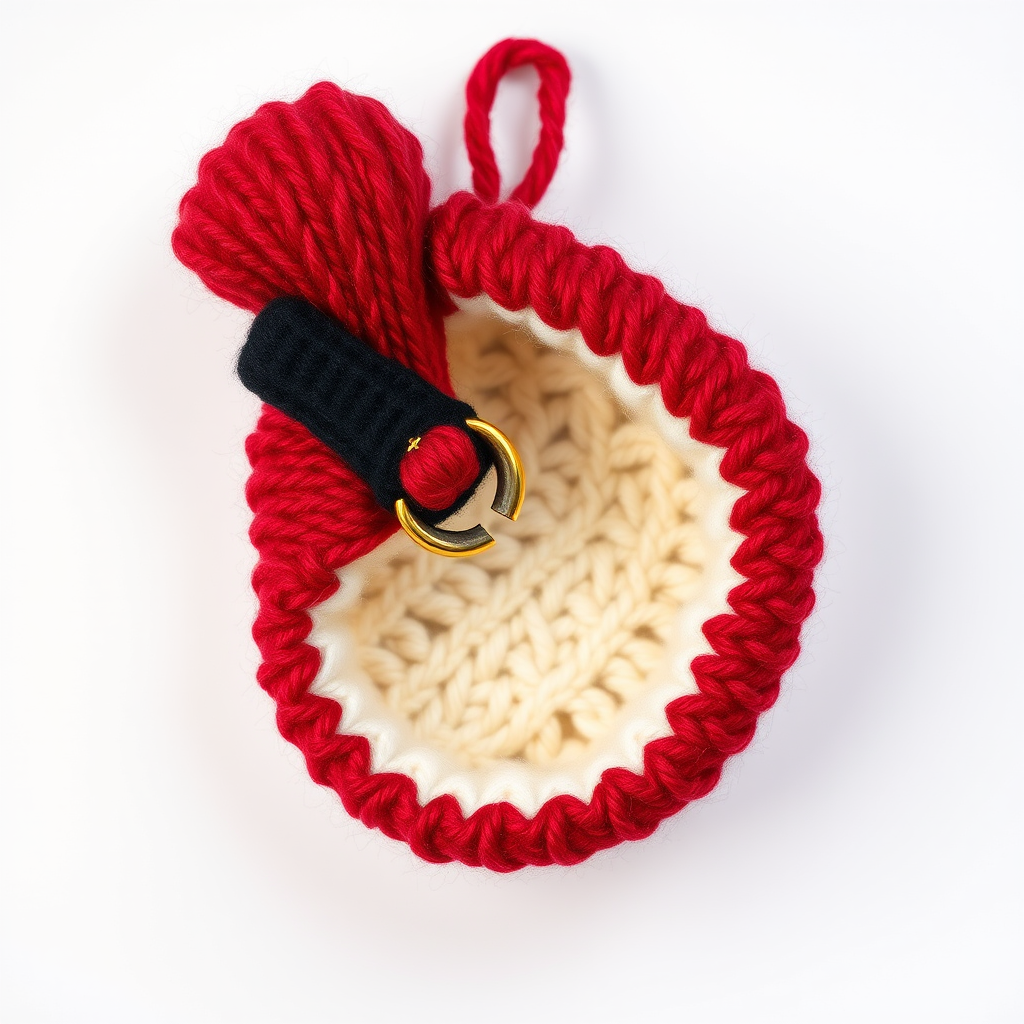
Knit a Jolly Santa Belt Ornament: A Festive Holiday Keepsake
Bring a touch of vintage charm to your Christmas tree this year with a handmade knitted Santa belt ornament. This quick and satisfying project adds a cozy, heirloom-quality feel to your holiday decor, and it's perfect for beginners looking to try something small and festive. Using rich crimson red yarn, a textured black and gold buckle, and a plush, lightly stuffed shape, this ornament is as delightful to make as it is to display. Whether you're crafting for your own tree or creating heartfelt gifts for friends and family, this pattern is a wonderful way to celebrate the season.
Materials Needed
Before you begin, gather the following supplies. This project uses simple, readily available materials, making it an ideal weekend craft.
- Yarn: Worsted weight yarn in red (e.g., Lion Brand Vanna's Choice in Crimson) for the belt, plus small amounts of black and gold yarn for the buckle details.
- Needles: US 6 (4.0 mm) knitting needles.
- Notions: Tapestry needle for seaming and weaving in ends, fiberfill stuffing, and scissors.
- Gauge: 20 stitches and 28 rows = 4 inches in stockinette stitch (though exact gauge is not critical for this small project, it ensures the correct size).
Step-by-Step Instructions
This ornament is knitted flat in two pieces—the belt and the buckle—then seamed, stuffed, and finished with a hanging loop. Follow these detailed instructions carefully for a flawless result.
Knitting the Belt (Make 1)
- Cast On: With the red yarn, cast on 12 stitches using your preferred method (long-tail cast on works well).
- Row 1 (Right Side): Knit all stitches across.
- Row 2 (Wrong Side): Purl all stitches across.
- Repeat Rows 1-2: Continue alternating knit and purl rows (stockinette stitch) until the piece measures 6 inches from the cast-on edge, ending with a wrong-side row (a purl row). This creates the main body of the belt.
- Shape the Tapered End: On the next right-side row, knit 2 stitches together across the entire row. You will now have 6 stitches on your needle.
- Next Row (Wrong Side): Purl all 6 stitches.
- Finish: Cut the yarn, leaving a long tail (about 12 inches). Thread the tail through a tapestry needle, then pass it through all 6 remaining stitches on the knitting needle. Slide the stitches off the needle, pull the yarn tight to gather the end, and secure with a knot. This forms the tapered point of the belt.
Knitting the Buckle (Make 1)
- Cast On: With the black yarn, cast on 6 stitches.
- Work in Stockinette: Knit one row (right side), then purl one row (wrong side). Repeat this pattern until the piece measures 1 inch from the cast-on edge, ending with a wrong-side row.
- Switch to Gold: Cut the black yarn, leaving a short tail. Join the gold yarn and continue in stockinette stitch (knit right-side rows, purl wrong-side rows) for 2 more inches, ending with a wrong-side row.
- Switch Back to Black: Cut the gold yarn, leaving a short tail. Join the black yarn again and work in stockinette stitch for 1 inch, ending with a wrong-side row.
- Bind Off: Bind off all 6 stitches loosely. Cut the yarn, leaving a tail for seaming.
- Form the Ring: Fold the knitted strip into a rectangle so the two black ends overlap slightly. Use the tapestry needle and the yarn tail to sew the short edges together, creating a ring. Weave in the ends securely.
Finishing and Assembly
- Seam the Belt: Fold the belt piece in half lengthwise, with the right sides (the smooth knit side) facing each other. Using the red yarn tail from the cast-on edge, sew the long open edge closed, leaving the tapered end open. Turn the belt right side out, using a blunt tool (like a knitting needle) to gently push out the tapered point.
- Stuff the Belt: Lightly stuff the belt with fiberfill. Do not overstuff—you want it plush but still flexible enough to hold its shape. Ensure the stuffing reaches the tapered end.
- Attach the Buckle: Slide the knitted buckle ring over the belt, positioning it about 1 inch from the tapered end. The buckle should sit snugly around the belt.
- Close the Open End: Sew the open end of the belt closed, tucking the raw edges inside. Use a whip stitch or mattress stitch for a neat finish. Weave in all loose ends.
- Embroider the Buckle Prong: Using the gold yarn and a tapestry needle, embroider a small 'X' or cross-stitch in the center of the buckle. This mimics the prong of a real belt buckle and adds a charming detail.
- Create a Hanging Loop: Cut a 6-inch piece of red yarn. Fold it in half to form a loop. Using the tapestry needle, sew the two ends of the loop to the top back of the belt (opposite the tapered end). Secure firmly and weave in the ends.
- Final Check: Give your ornament a gentle squeeze to shape it, and trim any stray yarn ends. Your jolly Santa belt ornament is now ready to hang on your tree or gift to a loved one!
This pattern is a wonderful way to practice basic knitting techniques while creating a charming, festive decoration. The combination of rich red, deep black, and shiny gold makes it a classic addition to any holiday setting. Enjoy the process, and happy knitting!


