Harvest Hearth Table Runner Free Pattern – Crochet a Rustic Autumn Centerpiece
Harvest Hearth Table Runner Free Pattern – Crochet a Rustic Autumn Centerpiece
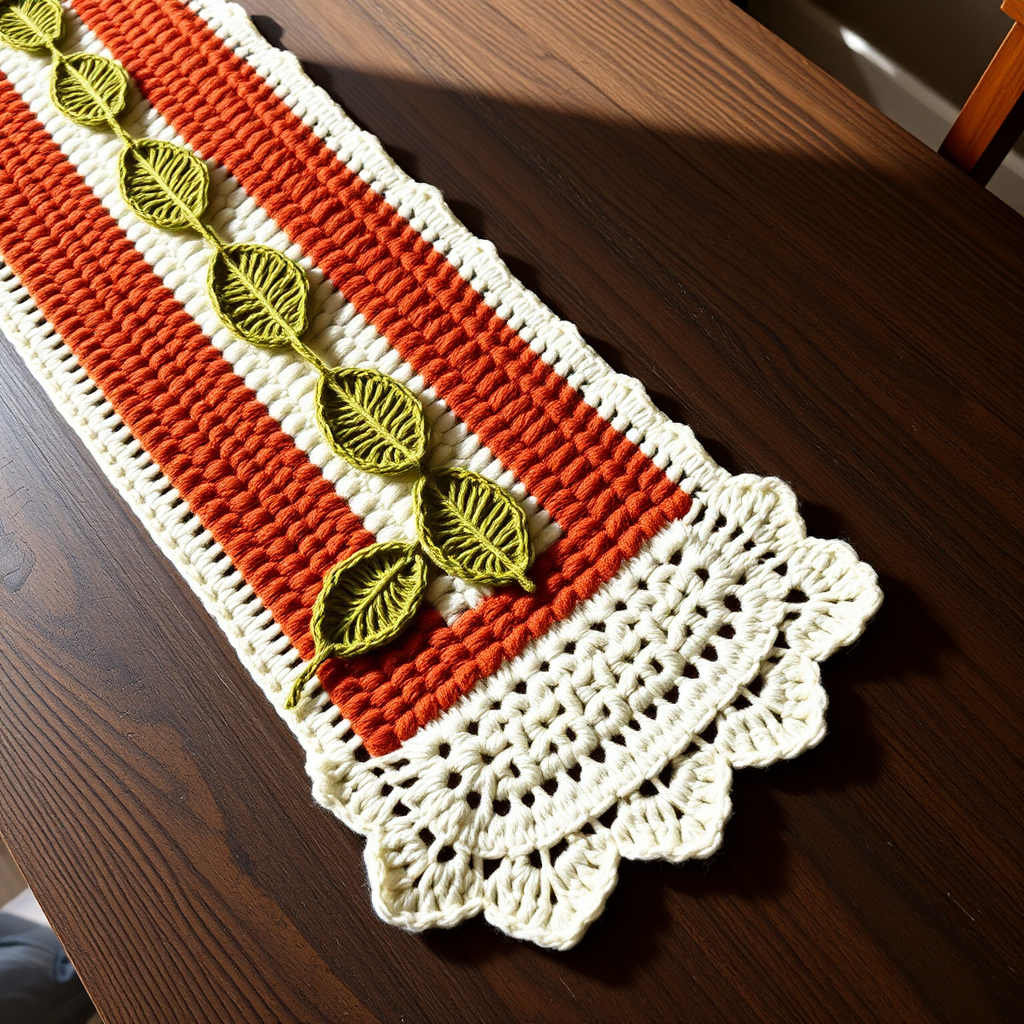
Bring the warmth of a countryside kitchen to your dining table with this textured, earthy-toned runner. Its woven-look stitches and leaf motifs create a cozy, handcrafted centerpiece for every meal. Whether you're hosting a festive gathering or simply enjoying a quiet breakfast, this runner adds a touch of rustic charm that transforms your space.
This pattern is perfect for intermediate crocheters looking to expand their skills, but beginners who are comfortable with basic stitches will also find it achievable. The combination of front post and back post double crochet creates a beautiful woven texture that mimics expensive fabric, while the crocheted leaf motifs add a whimsical, nature-inspired detail. Let's dive into this delightful project!
Materials Needed
Before you begin, gather the following supplies:
- Yarn: Worsted weight cotton yarn in three colors:
- Cream (Color A) – approximately 200g
- Terracotta (Color B) – approximately 100g
- Olive Green (Color C) – approximately 100g
- Hook: 5.0 mm (H-8) crochet hook
- Other: Yarn needle for weaving in ends and sewing motifs, scissors
Gauge: 14 dc x 8 rows = 10 cm (4 inches) in double crochet. Be sure to check your gauge to ensure your runner turns out the correct size.
Step-by-Step Instructions
This runner is worked in two sections: the main body with a repeating leaf-and-texture pattern, and a scalloped border. All stitches are standard US crochet terms. Let's get started!
Main Body (worked lengthwise)
Foundation: With Color A (Cream), chain 42.
Row 1: Dc in 4th ch from hook and in each ch across. (40 dc) Turn.
Row 2: Ch 3 (counts as dc), dc in next 2 sts, *fpdc around next st, bpdc around next st, dc in next 3 sts; repeat from * across. Turn.
Tip: Front post double crochet (fpdc) and back post double crochet (bpdc) create the woven texture. To make an fpdc, insert your hook from front to back to front around the post of the stitch below. For bpdc, insert from back to front to back.
Row 3: Ch 3, dc in next 2 sts, *bpdc around next st, fpdc around next st, dc in next 3 sts; repeat from * across. Turn.
Rows 4-5: Repeat Rows 2-3 with Color A (Cream).
Row 6: Switch to Color B (Terracotta). Ch 3, dc in next 2 sts, *fpdc around next st, bpdc around next st, dc in next 3 sts; repeat from * across. Turn.
Row 7: With Color B, Ch 3, dc in next 2 sts, *bpdc around next st, fpdc around next st, dc in next 3 sts; repeat from * across. Turn.
Rows 8-9: Repeat Rows 6-7 with Color B (Terracotta).
Row 10: Switch to Color C (Olive Green). Ch 3, dc in next 2 sts, *fpdc around next st, bpdc around next st, dc in next 3 sts; repeat from * across. Turn.
Row 11: With Color C, Ch 3, dc in next 2 sts, *bpdc around next st, fpdc around next st, dc in next 3 sts; repeat from * across. Turn.
Rows 12-13: Repeat Rows 10-11 with Color C (Olive Green).
Repeat Rows 2-13 until the runner measures approximately 90 cm (36 inches) from the foundation, ending with a Color A row. Fasten off.
Leaf Motifs (make 5)
These charming leaves add the perfect rustic touch. With Color C (Olive Green), make a magic ring.
Round 1: Ch 3 (counts as dc), 11 dc into ring. Join with sl st to top of ch-3. (12 dc)
Round 2: Ch 3, dc in same st, 2 dc in each st around. Join with sl st. (24 dc)
Round 3: Ch 3, dc in same st, dc in next st, *2 dc in next st, dc in next st; repeat from * around. Join with sl st. (36 dc)
Round 4: Ch 1, sc in same st, sc in next 2 sts, *ch 5, skip 3 sts, sc in next 3 sts; repeat from * around, ending with ch 5, skip 3 sts, sl st to first sc. Fasten off, leaving a long tail for sewing.
Note: The ch-5 spaces create the scalloped edge of the leaf. Each leaf should measure approximately 7-8 cm (3 inches) in diameter.
Assembly
Position the leaf motifs evenly along the center of the runner, spacing them about 15 cm (6 inches) apart. Start with one leaf near each end and distribute the remaining three evenly between them. Sew each leaf securely using the long tail and a yarn needle. Weave in any loose ends as you go.
Border
With Color A (Cream), attach yarn to any corner of the runner. Work sc evenly around the entire perimeter, working 3 sc in each corner. Join with sl st to first sc.
Next round: Ch 1, sc in same st, *skip 1 st, 5 dc in next st, skip 1 st, sc in next st; repeat from * around, adjusting as needed to fit corners. Join with sl st to first sc. Fasten off and weave in all ends.
Tip: When working around corners, you may need to adjust the pattern slightly. Simply work the 5 dc in the corner stitch to create a beautiful scalloped effect that turns the corner gracefully.
Finishing Touches
Once you've woven in all ends, gently block your runner to even out the stitches and help it lie flat. Lay it on a flat surface, mist with water, and pin to the desired dimensions. Allow it to dry completely before using.
Your Harvest Hearth Table Runner is now ready to grace your dining table! The earthy palette of cream, terracotta, and olive green pairs beautifully with wooden furniture, autumn decor, or farmhouse-style kitchens. This runner also makes a thoughtful handmade gift for housewarmings, weddings, or holiday celebrations.
We'd love to see your finished creation! Share your photos on social media with the hashtag #HarvestHearthRunner and tag us so we can admire your handiwork. Happy crocheting!


