Geometric Prism Pullover Free Pattern – Knitted Tessellated Triangle Sweater
Geometric Prism Pullover Free Pattern – Knitted Tessellated Triangle Sweater
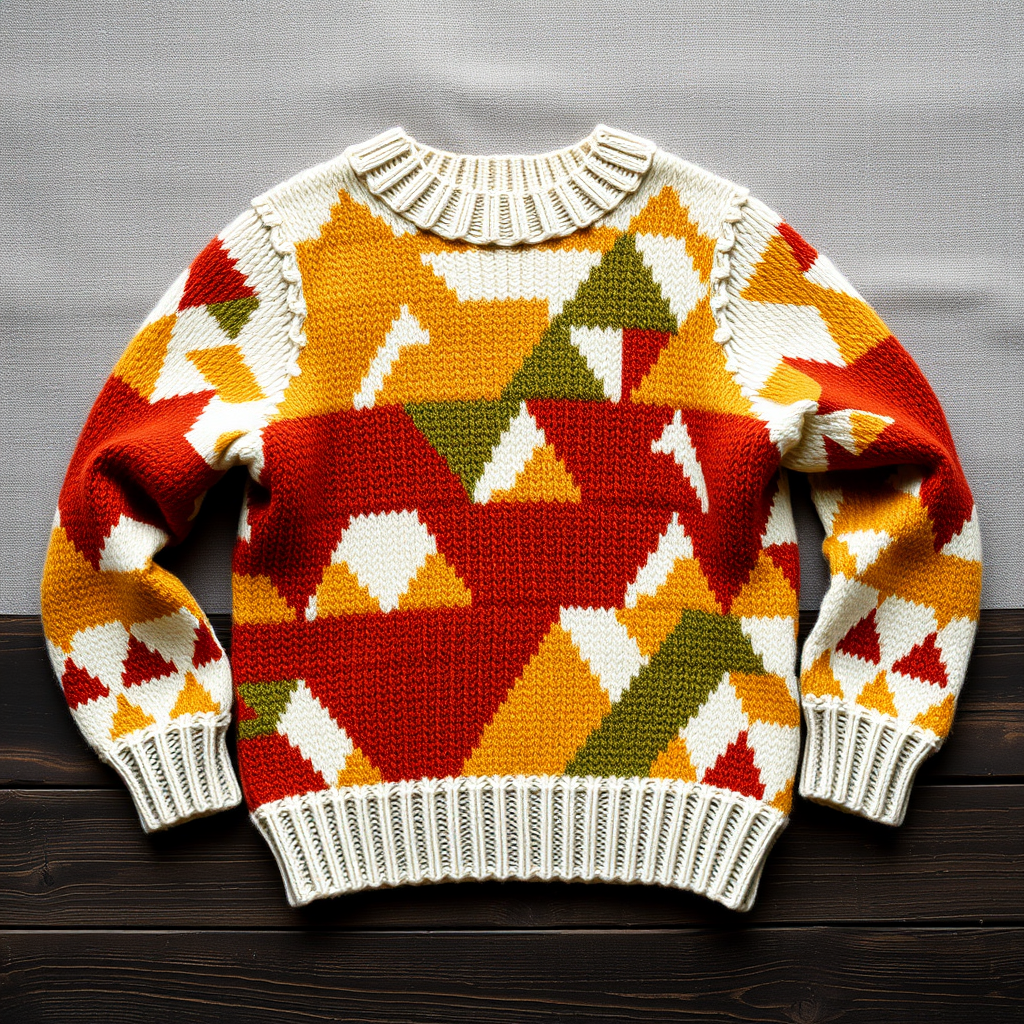
Wrap yourself in the modern mosaic of the Geometric Prism Pullover, a knitted sweater that transforms classic triangles into a stunning, wearable art piece. This pattern uses a clever combination of intarsia and slipped stitches to create a soft, textured geometric design that's both cozy and fashion-forward. The interlocking tessellated triangles in warm earthy tones—cream, terracotta, olive, and mustard—create a striking visual effect that's reminiscent of a woven tapestry. Whether you're a seasoned knitter looking for a new challenge or a confident beginner ready to expand your skills, this pattern offers a rewarding project that results in a truly unique garment.
Design Overview
The Geometric Prism Pullover features a relaxed, boxy fit with a ribbed crew neck, cuffs, and hem. The body is worked in the round from the bottom up, with the triangle pattern created through strategic decreases and increases in each color block. The sleeves echo the motif with smaller, two-tone triangles, maintaining the cohesive geometric theme. The slipped stitches within each triangle add a subtle texture that enhances the overall visual depth of the design.
Materials Needed
Before you begin, gather the following materials to ensure a smooth knitting experience:
- Yarn: Worsted weight yarn in 4 contrasting colors (e.g., Cream, Terracotta, Olive, Mustard) – approximately 1200 (1400, 1600, 1800) yards total
- Needles: US 7 (4.5 mm) circular knitting needles, 24-inch and 32-inch lengths, and double-pointed needles for sleeves
- Notions: Stitch markers, stitch holders, tapestry needle for weaving in ends, and blocking mats
Gauge
20 stitches and 26 rows = 4 inches in stockinette stitch. Always knit a gauge swatch before starting to ensure your finished sweater matches the intended measurements.
Sizes and Abbreviations
Sizes: XS (S, M, L) – Finished chest: 34 (38, 42, 46) inches
Abbreviations:
- k = knit
- p = purl
- k2tog = knit two together
- ssk = slip, slip, knit (decrease)
- st(s) = stitch(es)
- MC = Main Color (Cream)
- CC1 = Contrast Color 1 (Terracotta)
- CC2 = Contrast Color 2 (Olive)
- CC3 = Contrast Color 3 (Mustard)
- M1 = Make 1 (increase)
Pattern Notes
- Worked in the round from the bottom up.
- Use intarsia technique for color blocks; carry yarns loosely across the back.
- Slipped stitches create a subtle texture within each triangle.
Step-by-Step Instructions
Body
Cast On and Ribbing:
With MC and the long circular needle, cast on 170 (190, 210, 230) stitches. Join in the round, being careful not to twist. Place a marker for the beginning of the round. Work in k1, p1 ribbing for 2 inches.
Begin the Triangle Pattern:
Round 1: *With MC, k17 (19, 21, 23); with CC1, k17 (19, 21, 23); with CC2, k17 (19, 21, 23); with CC3, k17 (19, 21, 23); repeat from * to end of round.
Round 2: *With MC, k16 (18, 20, 22), ssk; with CC1, k16 (18, 20, 22), ssk; with CC2, k16 (18, 20, 22), ssk; with CC3, k16 (18, 20, 22), ssk; repeat from * to end of round. (You are decreasing 1 stitch in each color block)
Round 3: *With MC, k15 (17, 19, 21), ssk; with CC1, k15 (17, 19, 21), ssk; with CC2, k15 (17, 19, 21), ssk; with CC3, k15 (17, 19, 21), ssk; repeat from * to end of round.
Continue in this manner, decreasing 1 stitch in each color block every round, until each color block has 1 stitch left. (You will have 4 stitches per pattern repeat – one in each color)
Next Round: *With MC, k1; with CC1, k1; with CC2, k1; with CC3, k1; repeat from * to end of round. (Total stitches: 40 (44, 48, 52))
Begin Increasing for Next Row of Triangles:
Increase Round: *With MC, k1, M1; with CC1, k1, M1; with CC2, k1, M1; with CC3, k1, M1; repeat from * to end of round. (Double the stitches in each block)
Continue increasing in each color block every round until each block has 17 (19, 21, 23) stitches again. (Total stitches back to 170 (190, 210, 230))
Repeat the triangle pattern (decrease and increase) until the body measures 12 (13, 14, 15) inches from the cast-on edge, ending after a complete triangle set.
Divide for Armholes
Next Round: Work across the first 85 (95, 105, 115) stitches for the front, place the next 85 (95, 105, 115) stitches on a holder for the back. You will work the front and back separately.
Front
Continue working the triangle pattern back and forth in rows, maintaining the decreases/increases as established. Work until the armhole measures 7 (8, 9, 10) inches.
Shape Neck:
Work across the first 30 (34, 38, 42) stitches, place the next 25 (27, 29, 31) stitches on a holder for the neck, then work the remaining 30 (34, 38, 42) stitches.
Working each side separately, decrease 1 stitch at the neck edge every other row 5 times. (25 (29, 33, 37) stitches remain per shoulder)
Work even until armhole measures 9 (10, 11, 12) inches. Bind off all stitches.
Back
Return the back stitches to the needle. Work the triangle pattern as for the front, but continue straight (no neck shaping) until the armhole measures 9 (10, 11, 12) inches. Bind off all stitches.
Sleeves
With double-pointed needles and MC, pick up and knit 80 (90, 100, 110) stitches around the armhole.
Work in k1, p1 ribbing for 2 inches.
Then, work the triangle pattern in the round, but with only 2 colors (MC and CC1) to create smaller triangles. Decrease 1 stitch at the beginning and end of each color block every round until the sleeve measures 16 (17, 18, 19) inches from the underarm, or desired length.
Bind off all stitches.
Finishing
Weave in all ends using a tapestry needle.
Block the sweater to shape using blocking mats and pins, following the yarn's care instructions.
Sew the shoulder seams using a mattress stitch or your preferred seaming method.
Pick up stitches around the neckline and work 1 inch of k1, p1 ribbing. Bind off loosely to ensure the neckline retains its stretch.
Tips for Success
- Color Management: When working with multiple colors, use separate balls or bobbins for each color block to prevent tangling. Twist yarns at color changes to avoid holes.
- Consistent Tension: Pay attention to your tension when switching colors. Uneven tension can cause the fabric to pucker or the triangles to look distorted.
- Blocking: Blocking is essential for this pattern. It will even out the stitches, define the geometric shapes, and give the sweater a professional finish.
- Customization: Feel free to adjust the sleeve length or body length to suit your preferences. The pattern is easily adaptable.
The Geometric Prism Pullover is more than just a sweater—it's a statement piece that showcases your knitting skills and artistic flair. The combination of intarsia and slipped stitches creates a fabric that's both visually stunning and wonderfully cozy. As you watch the triangles interlock and shift, you'll see your creation transform into a wearable work of art. Happy knitting!


