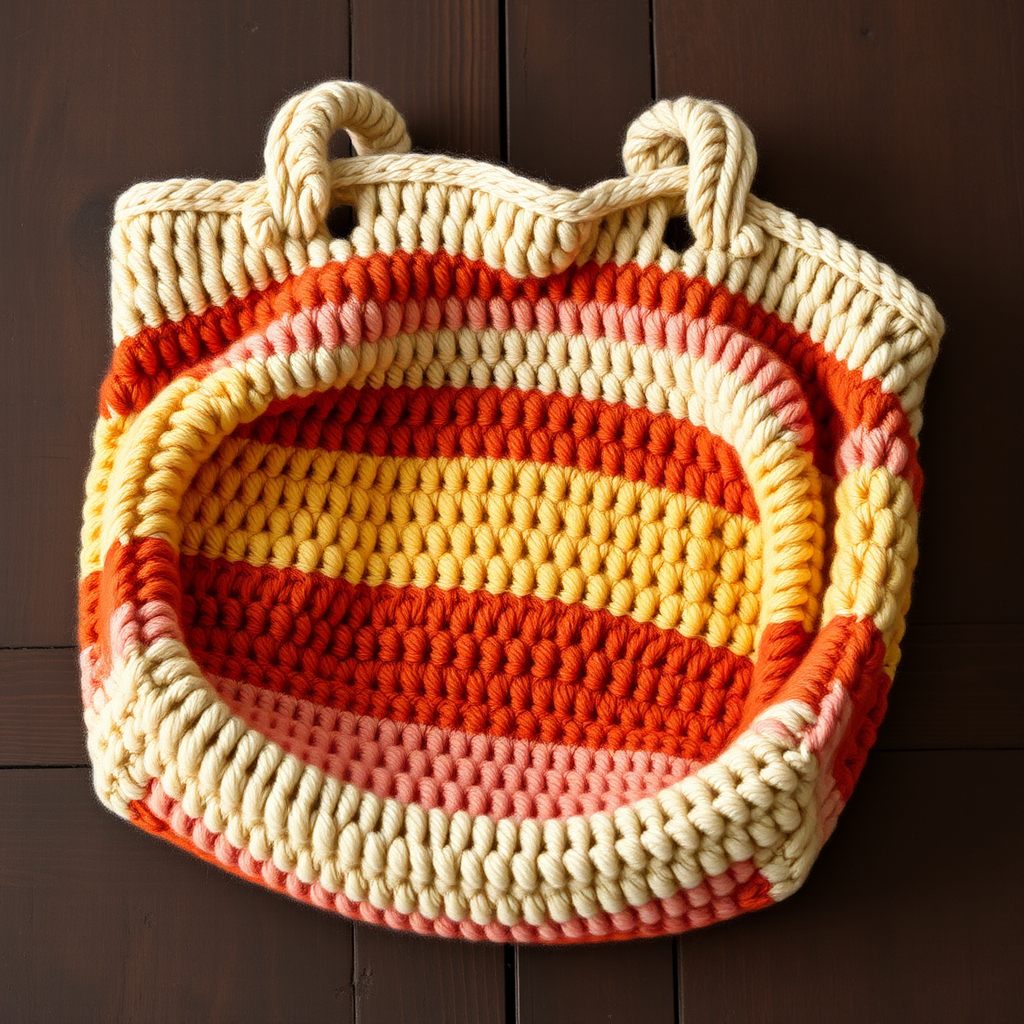
Free Pattern: The Driftwood Harbor Market Tote

The Driftwood Harbor Market Tote: A Free, Beginner-Friendly Crochet Pattern
Introduction
Welcome to the Driftwood Harbor Market Tote — a sturdy, coastal-inspired crochet bag that is genuinely perfect for someone who has just picked up a hook for the very first time. This project is built almost entirely from one simple stitch (single crochet), worked in a continuous circle, so you will get lots of relaxing practice without ever feeling lost. The finished bag looks and feels like something you would buy at a boutique: a dense, firm fabric with beautiful visible stitch texture, a warm sand/oatmeal body, a deep teal striped base and top edge, and two flat, reinforced handles sewn firmly in place. It stands up on its own, holds its shape, and is roomy enough for a farmers market haul, a beach towel, or your weekend errands. Best of all, you will finish it in just a handful of evenings — and you will be able to say, "I made that."
Materials Needed
- Yarn: Worsted weight (also called "Category 4" or "medium") cotton or cotton-blend yarn, approximately 400–450 yards total. The sample uses 2 skeins of a warm sand/oatmeal color (Color A) and 1 skein of a deep teal (Color B). Cotton is recommended because it is strong, does not stretch much, and gives the bag its firm, structured shape.
- Crochet hook: Size H/8 (5.0 mm). (The "H/8" is the US size name and "5.0 mm" is the metric size — they are the same hook.)
- Stitch markers: At least 4. These are small clips or loops of yarn you place in a stitch to mark your place. A scrap of contrasting yarn works too.
- Tapestry needle: A large, blunt-tipped sewing needle with an eye big enough for yarn. Used for sewing the handles on and weaving in ends.
- Scissors: Any sharp pair for cutting yarn.
- Optional: A piece of cotton fabric and matching sewing thread if you would like to add a lining (see the Optional Lining section at the end).
Finished size/dimensions: Approximately 11 inches (27.94 cm) wide and 13.5 inches (34.29 cm) tall including the top edging, before handles. The body alone measures about 10 inches (25.4 cm) tall from the base. Each handle is about 5 stitches wide and roughly 13–14 inches (33–36 cm) long before sewing.
Abbreviations and Beginner Glossary
Every abbreviation used in this pattern is listed below and explained as if you have never crocheted before. Read through this list once before you begin — it is your dictionary.
- ch — chain. Make a slip knot on your hook, then wrap the yarn over the hook and pull it through the loop on your hook. That is one chain. A row of chains is the foundation you build on.
- sc — single crochet. Insert your hook into the next stitch, wrap the yarn over the hook, pull up a loop (you now have 2 loops on the hook), wrap the yarn over again, and pull it through both loops on the hook. One single crochet made. This is the only stitch the whole bag uses.
- sl st — slip stitch. Insert your hook into the stitch, wrap the yarn over, and pull it through both the stitch and the loop already on your hook in one motion. It creates almost no height — it is used here to join the end of a round to its beginning.
- st / sts — stitch / stitches. One completed stitch, or several.
- 2nd ch from hook — Count the loop on your hook as "not counted," then count the chain bumps backward: the very next chain is the "2nd ch from hook." You work your first stitch into that chain.
- across — Work one stitch into every stitch (or chain) along the row, from one end to the other.
- around — Work one stitch into every stitch all the way around the circle until you return to where you started.
- turn — Flip your work over (like turning a page) so you can work back along the row you just made. Used only for the flat handles.
- join with sl st to first sc — After working all the way around, make a slip stitch into the very first single crochet of that round. This closes the circle so the round becomes a complete ring.
- fasten off — Cut the yarn a few inches from your work, then pull the tail all the way through the last loop on your hook and tighten. This locks the yarn so it will not unravel.
- join Color A / Color B with sl st — Make a slip knot in the new color on your hook, insert the hook into the indicated stitch, and pull the new color through to attach it. Then continue with the new color.
- color change on the last yarn over — When you are making the final stitch of the old color, do the last "yarn over and pull through" using the new color. This makes the change invisible.
- whip stitch — A simple sewing stitch: bring the needle up through both layers, over the edge, and back up again in small, evenly spaced stitches. Used to sew the handles on.
- weave in ends — Thread a yarn tail onto the tapestry needle and run it back and forth through the inside of the fabric for a few inches so it is hidden and secure.
- block — Gently wet or steam the finished piece and pat it into shape, then let it dry. This evens out the stitches.
- gauge — How many stitches and rows you get in a set measurement. Explained fully in the next section.
Gauge
Gauge: 40 single crochet stitches by 10 rows = 11 inches (27.94 cm) wide by 3.5 inches (8.89 cm) tall in single crochet pattern.
Why gauge matters: Gauge is simply how big your stitches turn out. If your stitches are bigger than the pattern's, your bag will come out larger than listed; if they are smaller, it will come out smaller. For this bag, gauge is not critical — a slightly different size will still make a perfectly lovely tote. However, a tighter gauge creates a sturdier bag that holds its shape and does not sag, so it is worth checking.
How to make a gauge swatch: Using your H/8 (5.0 mm) hook and Color A, chain 42. Single crochet in the 2nd chain from the hook and in each chain across (41 sc). Work 10 more rows of single crochet (ch 1, turn at the start of each row, then sc in every stitch across). Lay the swatch flat and measure the middle 40 stitches across and 10 rows up. If you have more stitches than 40 in 11 inches, your stitches are too small — try a larger hook. If you have fewer, your stitches are too big — try a smaller hook. Do not cut the swatch; you can unravel it and use the yarn in your bag.
Beginner Tips Before You Start
- Use a stitch marker in the first stitch of every round. Because this bag is worked in a spiral-like circle, it is very easy to lose track of where a round began. Clip a marker into the first single crochet of the round, and move it up each time you start a new round.
- Do not pull your yarn too tight. Beginners often tug every stitch snug, which makes the fabric stiff, hard to work into, and sore on the hands. Let the yarn rest comfortably on the hook — the stitch should slide off easily.
- Count your stitches at the end of every round. Every round of the body should have exactly 80 single crochet. If you are off by one or two, fix it right away rather than discovering it ten rounds later.
- Keep your tension even rather than fast. Speed comes later. Slow, consistent movements give you the dense, even fabric that makes this bag look store-bought.
- Work the foundation chain loosely. The very first row of chains is the hardest to work into. If your chains are tight, use a hook one size larger just for the chain, then switch back to the H/8 (5.0 mm).
- Change colors on the last yarn over of the previous stitch. This one habit makes your teal stripes look crisp and professional instead of jagged.
Step-by-Step Instructions
Pattern Notes (read first)
- The bag is worked in the round from the base up, then the handles are worked flat and sewn on.
- Ch 1 at the beginning of each round does not count as a stitch. It is just a small "lifter" to start the round.
- Use a stitch marker to mark the first stitch of each round.
- Color changes are made on the last yarn over of the previous stitch.
Base (worked in Color B — deep teal)
Round 1: Ch 41. Sc in the 2nd ch from hook and in each ch across (40 sc). Do not turn. Now continue working along the opposite side of the same foundation chain: sc in each ch across (40 sc). Join with sl st to the first sc. (80 sc)
Round 2: Ch 1. Sc in each st around. Join with sl st to first sc. (80 sc)
Round 3: Ch 1. Sc in each st around. Join with sl st to first sc. (80 sc)
Fasten off Color B. Join Color A (warm sand) with sl st to the first st of Round 3.
Body (worked in Color A — warm sand)
Round 4: Ch 1. Sc in each st around. Join with sl st to first sc. (80 sc)
Round 5: Ch 1. Sc in each st around. Join with sl st to first sc. (80 sc)
Round 6: Ch 1. Sc in each st around. Join with sl st to first sc. (80 sc)
Round 7: Ch 1. Sc in each st around. Join with sl st to first sc. (80 sc)
Round 8: Ch 1. Sc in each st around. Join with sl st to first sc. (80 sc)
Round 9: Ch 1. Sc in each st around. Join with sl st to first sc. (80 sc)
Round 10: Ch 1. Sc in each st around. Join with sl st to first sc. (80 sc)
Round 11: Ch 1. Sc in each st around. Join with sl st to first sc. (80 sc)
Round 12: Ch 1. Sc in each st around. Join with sl st to first sc. (80 sc)
Round 13: Ch 1. Sc in each st around. Join with sl st to first sc. (80 sc)
Round 14: Ch 1. Sc in each st around. Join with sl st to first sc. (80 sc)
Round 15: Ch 1. Sc in each st around. Join with sl st to first sc. (80 sc)
Round 16: Ch 1. Sc in each st around. Join with sl st to first sc. (80 sc)
Round 17: Ch 1. Sc in each st around. Join with sl st to first sc. (80 sc)
Round 18: Ch 1. Sc in each st around. Join with sl st to first sc. (80 sc)
Round 19: Ch 1. Sc in each st around. Join with sl st to first sc. (80 sc)
Round 20: Ch 1. Sc in each st around. Join with sl st to first sc. (80 sc)
Round 21: Ch 1. Sc in each st around. Join with sl st to first sc. (80 sc)
Round 22: Ch 1. Sc in each st around. Join with sl st to first sc. (80 sc)
Round 23: Ch 1. Sc in each st around. Join with sl st to first sc. (80 sc)
Round 24: Ch 1. Sc in each st around. Join with sl st to first sc. (80 sc)
Round 25: Ch 1. Sc in each st around. Join with sl st to first sc. (80 sc)
Round 26: Ch 1. Sc in each st around. Join with sl st to first sc. (80 sc)
Round 27: Ch 1. Sc in each st around. Join with sl st to first sc. (80 sc)
Round 28: Ch 1. Sc in each st around. Join with sl st to first sc. (80 sc)
Round 29: Ch 1. Sc in each st around. Join with sl st to first sc. (80 sc)
Round 30: Ch 1. Sc in each st around. Join with sl st to first sc. (80 sc)
Note: The bag body now measures approximately 10 inches (25.4 cm) tall from the base. If you would like a shorter or taller bag, simply work fewer or more rounds here — just make sure every round is worked as "Ch 1, sc in each st around, join with sl st to first sc." Do not fasten off. Continue to the top edging.
Top Edging (worked in Color B — deep teal)
Round 31: Join Color B with sl st to the first st. Ch 1. Sc in each st around. Join with sl st to first sc. (80 sc)
Round 32: Ch 1. Sc in each st around. Join with sl st to first sc. (80 sc)
Fasten off Color B. Weave in ends.
Handles (make 2, worked in Color A — warm sand)
Row 1: Leaving a long tail (about 20 inches / 50 cm) for sewing, ch 6. Sc in the 2nd ch from hook and in each ch across. (5 sc)
Row 2: Ch 1, turn. Sc in each st across. (5 sc)
Row 3: Ch 1, turn. Sc in each st across. (5 sc)
Row 4: Ch 1, turn. Sc in each st across. (5 sc)
Row 5: Ch 1, turn. Sc in each st across. (5 sc)
Row 6: Ch 1, turn. Sc in each st across. (5 sc)
Row 7: Ch 1, turn. Sc in each st across. (5 sc)
Row 8: Ch 1, turn. Sc in each st across. (5 sc)
Row 9: Ch 1, turn. Sc in each st across. (5 sc)
Row 10: Ch 1, turn. Sc in each st across. (5 sc)
Row 11: Ch 1, turn. Sc in each st across. (5 sc)
Row 12: Ch 1, turn. Sc in each st across. (5 sc)
Row 13: Ch 1, turn. Sc in each st across. (5 sc)
Row 14: Ch 1, turn. Sc in each st across. (5 sc)
Row 15: Ch 1, turn. Sc in each st across. (5 sc)
Row 16: Ch 1, turn. Sc in each st across. (5 sc)
Row 17: Ch 1, turn. Sc in each st across. (5 sc)
Row 18: Ch 1, turn. Sc in each st across. (5 sc)
Row 19: Ch 1, turn. Sc in each st across. (5 sc)
Row 20: Ch 1, turn. Sc in each st across. (5 sc)
Row 21: Ch 1, turn. Sc in each st across. (5 sc)
Row 22: Ch 1, turn. Sc in each st across. (5 sc)
Row 23: Ch 1, turn. Sc in each st across. (5 sc)
Row 24: Ch 1, turn. Sc in each st across. (5 sc)
Row 25: Ch 1, turn. Sc in each st across. (5 sc)
Row 26: Ch 1, turn. Sc in each st across. (5 sc)
Row 27: Ch 1, turn. Sc in each st across. (5 sc)
Row 28: Ch 1, turn. Sc in each st across. (5 sc)
Row 29: Ch 1, turn. Sc in each st across. (5 sc)
Row 30: Ch 1, turn. Sc in each st across. (5 sc)
Row 31: Ch 1, turn. Sc in each st across. (5 sc)
Row 32: Ch 1, turn. Sc in each st across. (5 sc)
Row 33: Ch 1, turn. Sc in each st across. (5 sc)
Row 34: Ch 1, turn. Sc in each st across. (5 sc)
Row 35: Ch 1, turn. Sc in each st across. (5 sc)
Row 36: Ch 1, turn. Sc in each st across. (5 sc)
Row 37: Ch 1, turn. Sc in each st across. (5 sc)
Row 38: Ch 1, turn. Sc in each st across. (5 sc)
Row 39: Ch 1, turn. Sc in each st across. (5 sc)
Row 40: Ch 1, turn. Sc in each st across. (5 sc)
Fasten off, leaving a long tail (about 20 inches / 50 cm) for sewing. Make a second handle exactly the same way.
Assembly and Finishing
- Mark the handle positions. Lay the bag flat on a table. Along the top opening, measure 3 inches (7.6 cm) inward from each side edge and place a stitch marker at those two points on the front panel. Flip the bag over and place two more markers in the same spots on the back panel. These four markers are where the handle ends will be sewn.
- Pin the first handle. Take one handle and pin one end to a front marker and the other end to the other front marker, making sure the handle is not twisted — the flat side should lie smoothly against the bag. The handle should form a gentle arch above the opening.
- Sew the handle on. Thread the long tail onto your tapestry needle. Using a whip stitch (bring the needle up through both the handle and the bag, over the edge, and back up again in small, evenly spaced stitches), sew firmly around the entire end of the handle, going back and forth across it two or three times for strength. Repeat at the other end of the same handle.
- Repeat for the back panel. Pin and sew the second handle to the two back markers in exactly the same way.
- Weave in all ends. Thread each remaining yarn tail onto the tapestry needle and run it back and forth through the inside of the fabric for about 3 inches (7.6 cm), changing direction once or twice so it cannot work loose. Trim the excess yarn close to the fabric.
- Block lightly (optional but recommended). Lightly mist the bag with water or hold a steam iron a few inches above it (never touch the iron to the yarn). Pat the bag into its rectangular shape, stand it upright, and let it dry completely. This evens out the stitches and helps the bag hold its structure. Do not iron directly on the yarn.
Optional Lining
Cut a piece of cotton fabric to the same dimensions as the bag body plus 1/2 inch (1.27 cm) seam allowance on all sides. Sew the side seams with a straight stitch, turn the lining right side out, and insert it into the bag. Fold the top edge under by 1/2 inch and whip stitch it to the inside of the bag just below the top teal edging.
Pro Tips and Variations
- Change the color story. Swap the deep teal for navy, mustard, or dusty rose, or work the entire bag in one color for a minimalist look. You can also add extra stripes by working 2 rounds of Color B every 10 rounds of Color A — just remember to change color on the last yarn over of the previous stitch.
- Adjust the size. For a taller bag, add more body rounds (each round adds about 1/4 inch / 0.6 cm of height). For a wider bag, add more chains to the foundation — every 2 extra chains adds 2 stitches to each side, so add them in pairs to keep the stitch count even. Just keep every round at "Ch 1, sc in each st around, join with sl st to first sc."
- Substitute the yarn. Cotton or a cotton-blend gives the firmest, most structured bag. A acrylic or wool worsted will work but will be softer and stretchier. If you substitute, check your gauge swatch and adjust your hook size so the fabric stays dense.
- Reinforce the handles. For a bag that will carry heavy loads, work the handles 6 stitches wide instead of 5 (ch 7 to start, then sc in the 2nd ch from hook and in each ch across for 6 sc per row), and sew each end down with a small square of stitching rather than a single line.