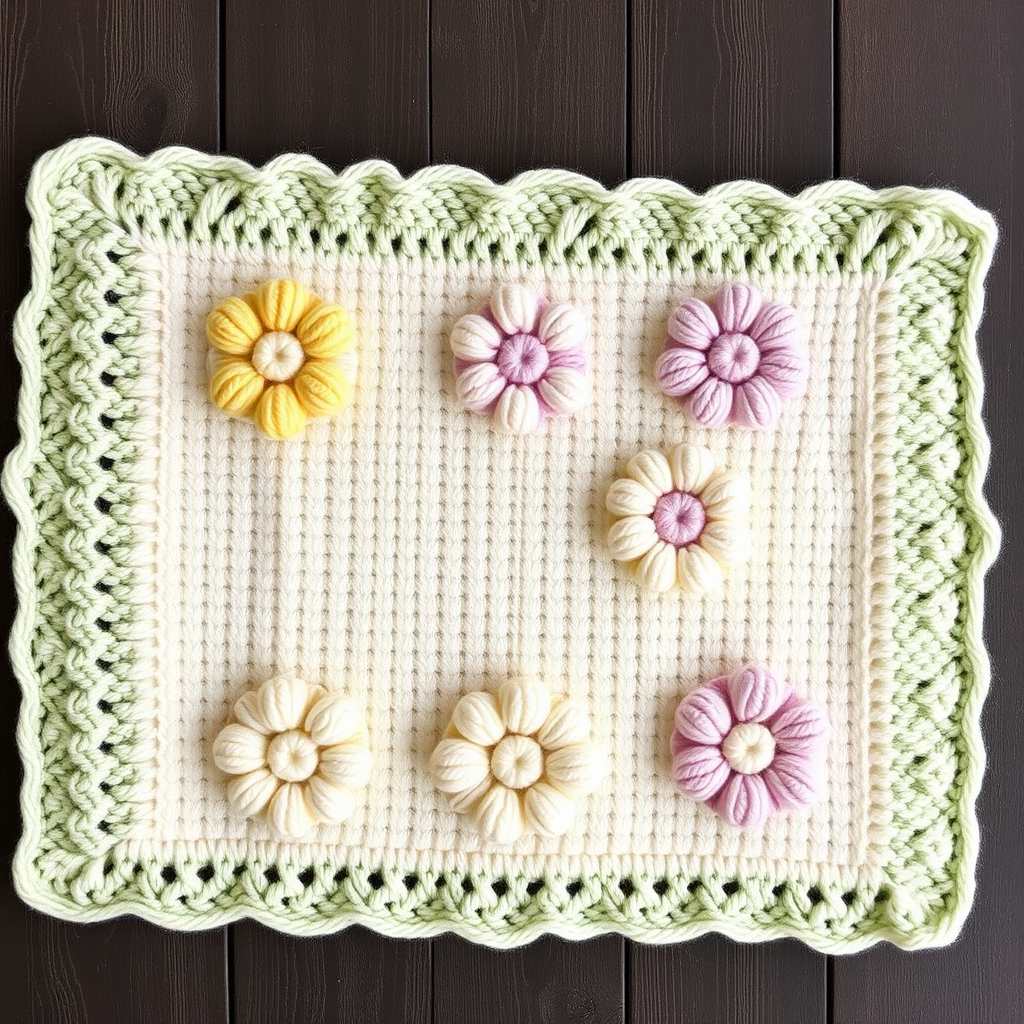
Enchanted Meadow Baby Blanket Free Pattern – A Knitted Wildflower Garden

Enchanted Meadow Baby Blanket Free Pattern – A Knitted Wildflower Garden
Wrap your little one in a soft, textured meadow of bobbles and lace with this enchanting knitted blanket. The alternating panels of delicate eyelets and plush bobbles create a sensory-rich heirloom piece that will be treasured for generations. This free pattern is perfect for intermediate knitters looking to expand their skills, and the repetitive nature of the panels makes it a relaxing, meditative project. The finished blanket measures approximately 30 x 36 inches (76 x 91 cm), making it ideal for strollers, cribs, or as a beautiful nursery décor piece.
The design features a soft sage green main color with cream bobble accents, creating a nature-inspired aesthetic that feels both modern and timeless. The garter stitch border keeps edges neat and prevents curling, while the lace panels open up beautifully after blocking to reveal delicate floral eyelets. Whether you're knitting this for your own baby or as a thoughtful handmade gift, this pattern delivers professional-looking results with clear, easy-to-follow instructions.
Materials Needed
Before you begin, gather the following supplies to ensure a smooth knitting experience:
Yarn
- Main Color (MC): DK weight (light worsted) yarn in soft sage green – approx. 800g
- Contrast Color (CC): DK weight (light worsted) yarn in cream – approx. 400g
Total yarn required: approximately 1200g. Choose a soft, machine-washable yarn for baby items – cotton blends or superwash merino work beautifully for this project.
Needles & Notions
- US 6 (4.0mm) circular knitting needle, 32-inch cable (or straight needles if preferred)
- Stitch markers (optional, for tracking pattern repeats)
- Tapestry needle for weaving in ends
- Blocking mats and pins (for finishing)
Gauge
20 stitches and 28 rows = 4 inches (10 cm) in stockinette stitch (blocked). Always knit a gauge swatch before starting to ensure your finished blanket matches the intended size. Adjust needle size if necessary to achieve gauge.
Step-by-Step Instructions
Abbreviations
- k = knit
- p = purl
- yo = yarn over
- k2tog = knit two together (right-leaning decrease)
- ssk = slip, slip, knit (left-leaning decrease)
- MB = make bobble (k1, p1, k1, p1, k1 into same stitch, then pass the 4 extra stitches over the first – or use your preferred bobble method)
- rep = repeat
- st(s) = stitch(es)
- RS = right side
- WS = wrong side
Pattern Notes
- The blanket is worked flat, back and forth in one piece – no seaming required.
- There is a 6-stitch garter stitch border on each side throughout the entire blanket. This keeps edges flat and creates a clean, finished look.
- The main body consists of alternating panels: lace panels in MC and bobble panels in CC.
- Always slip the first stitch of each row knitwise for a neater edge (optional but recommended).
- Blocking is essential to open up the lace pattern and achieve the final dimensions.
Getting Started: Cast On & Border
With MC, cast on 150 stitches. Use a long-tail cast on for a stretchy, neat edge.
Rows 1-6: Knit all stitches. (This creates a 6-row garter stitch border at the bottom of the blanket.)
After completing the border, you'll begin the main body of the blanket. The first two rows establish the stockinette base with garter borders:
Row 7 (RS, MC): K6 (border), k138, k6 (border). (Knit all stitches across.)
Row 8 (WS, MC): K6, p138, k6. (Knit the first 6 border stitches, purl the next 138 stitches, knit the last 6 border stitches.)
Panel 1 – Lace Pattern (MC)
This lace panel creates delicate eyelet flowers. The 16-row repeat is worked twice for this first panel.
Row 9 (RS): K6, *yo, k2tog, k3, ssk, yo, k1; rep from * to last 6 sts, k6.
Explanation: After the 6 border stitches, work the sequence in brackets across the row. Each repeat uses 7 stitches. The yarn overs create eyelets, while the decreases (k2tog and ssk) balance the stitch count.
Row 10 (WS): K6, purl to last 6 sts, k6.
Explanation: Knit the 6 border stitches, purl all stitches until 6 remain, then knit those last 6 border stitches.
Row 11 (RS): K6, *k1, yo, k2tog, k1, ssk, yo, k2; rep from * to last 6 sts, k6.
Row 12 (WS): K6, purl to last 6 sts, k6.
Row 13 (RS): K6, *k2, yo, k2tog, ssk, yo, k3; rep from * to last 6 sts, k6.
Row 14 (WS): K6, purl to last 6 sts, k6.
Row 15 (RS): K6, *k3, yo, ssk, k2tog, yo, k2; rep from * to last 6 sts, k6.
Row 16 (WS): K6, purl to last 6 sts, k6.
Repeat Rows 9-16 once more (total 16 rows of lace pattern for Panel 1).
Panel 2 – Bobble Pattern (CC)
Switch to CC yarn. This panel features raised bobbles that create a plush, textured polka-dot effect. The 8-row repeat is worked twice.
Row 17 (RS, CC): K6, *k4, MB, k4; rep from * to last 6 sts, k6.
Explanation: Knit 4 stitches, make a bobble in the next stitch, knit 4 stitches. Repeat across the row, maintaining the 6-stitch border on each side.
Row 18 (WS, CC): K6, purl to last 6 sts, k6.
Row 19 (RS, CC): K6, *k2, MB, k3, MB, k2; rep from * to last 6 sts, k6.
Explanation: This row staggers the bobbles, creating a diamond-like offset pattern. Knit 2, make a bobble, knit 3, make a bobble, knit 2 – repeat across.
Row 20 (WS, CC): K6, purl to last 6 sts, k6.
Row 21 (RS, CC): K6, *k4, MB, k4; rep from * to last 6 sts, k6.
Row 22 (WS, CC): K6, purl to last 6 sts, k6.
Row 23 (RS, CC): K6, *k1, MB, k5, MB, k1; rep from * to last 6 sts, k6.
Row 24 (WS, CC): K6, purl to last 6 sts, k6.
Repeat Rows 17-24 once more (total 16 rows of bobble pattern for Panel 2).
Continuing the Pattern Sequence
Now that you've completed the first lace and bobble panels, you'll continue alternating panels to create the full meadow effect. Here's the complete sequence:
Panel 3 – Lace (MC): Repeat Rows 9-16 twice (32 rows of lace pattern).
Panel 4 – Bobble (CC): Repeat Rows 17-24 twice (32 rows of bobble pattern).
Panel 5 – Lace (MC): Repeat Rows 9-16 twice (32 rows of lace pattern).
Panel 6 – Bobble (CC): Repeat Rows 17-24 twice (32 rows of bobble pattern).
Panel 7 – Lace (MC): Repeat Rows 9-16 twice (32 rows of lace pattern).
Remember to switch between MC and CC yarn at the start of each panel. When changing colors, leave a 6-inch tail to weave in later. You can carry the unused yarn up the side of the work, but for a cleaner finish, it's better to cut and rejoin at each panel change.
Final Border & Bind Off
After completing Panel 7, you'll finish with a matching garter stitch border to mirror the bottom edge.
With MC, work the following rows:
Rows 1-6: Knit all stitches. (This creates the top garter stitch border.)
Bind off loosely (knitwise): Knit the first stitch, then knit the next stitch. Use the left needle to lift the first stitch over the second and off the needle. Continue this pattern across the row, knitting one stitch and passing the previous stitch over it. Bind off all 150 stitches.
Tip: To ensure a stretchy bind-off that matches the cast-on edge, use a needle one size larger for the bind-off row, or use a stretchy bind-off method like the "Jeny's Surprisingly Stretchy Bind-Off."
Finishing Touches
Weave in all ends: Using a tapestry needle, carefully weave in all yarn tails on the wrong side of the blanket. Make sure to weave in at least 2-3 inches of yarn to secure the ends properly. Trim any excess.
Blocking: This step is crucial for the lace pattern to open up and for the blanket to reach its final dimensions.
- Fill a basin with lukewarm water and add a small amount of gentle wool wash.
- Submerge the blanket and let it soak for 15-20 minutes. Do not agitate or wring.
- Carefully remove the blanket and press out excess water (never twist or wring). Roll it in a clean towel to remove additional moisture.
- Lay the blanket flat on blocking mats. Gently stretch it to the finished measurements of 30 x 36 inches (76 x 91 cm).
- Use blocking pins to secure the edges, paying special attention to the lace panels – gently pull the eyelets open to reveal the floral pattern.
- Allow to dry completely (this may take 24-48 hours depending on humidity).
Once dry, remove the pins and your Enchanted Meadow Baby Blanket is ready to gift or use! The bobbles will be plush and dimensional, while the lace panels will have a beautiful, airy quality.
Tips for Success
- Count your stitches regularly: The lace pattern can be easy to miscount. Place stitch markers every 24 stitches (after the 6-stitch border) to help track your repeats.
- Use a lifeline: If you're new to lace knitting, thread a piece of contrasting waste yarn through the stitches after each completed pattern repeat. If you make a mistake, you can easily rip back to the lifeline without losing your work.
- Practice the bobble: If you're unfamiliar with making bobbles, practice on a swatch first. The k1, p1, k1, p1, k1 method creates a 5-stitch bobble that's plush and round. Make sure to work the bobble loosely so it doesn't pucker the fabric.
- Choose the right yarn: For a baby blanket, select a soft, washable yarn. Cotton or bamboo blends are breathable and gentle on sensitive skin, while superwash merino offers warmth and durability.
This pattern is designed to be both beautiful and achievable. The repetitive panels make it easy to memorize the pattern, and the finished result is a stunning, heirloom-quality blanket that will be cherished for years. Happy knitting!