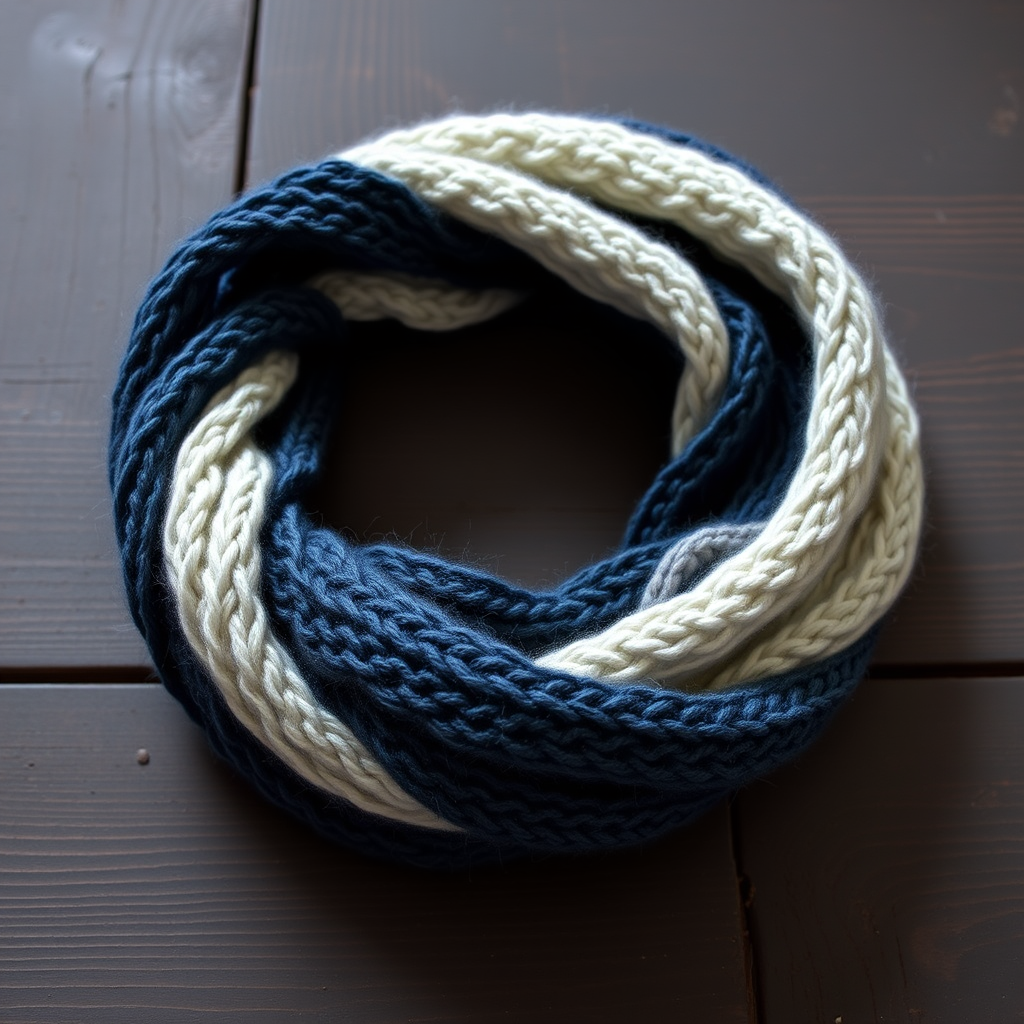
Emberstone Men's Knit Look Scarf Free Pattern – A Rugged Textured Essential

Emberstone Men's Knit Look Scarf Free Pattern – A Rugged Textured Essential
There's something deeply satisfying about wrapping yourself in a scarf you've made with your own hands—especially when it looks this good. The Emberstone Men's Knit Look Scarf is designed to be the workhorse of your winter wardrobe: substantial, warm, and unapologetically masculine. With its deep charcoal base and striking burnt orange bands, this scarf evokes the glow of embers in a dark fireplace, adding a bold pop of color to any neutral winter coat.
This free knitting pattern is perfect for intermediate beginners who want to move beyond basic garter stitch. You'll practice stockinette, ribbing, and a subtle seed stitch stripe—all while creating a rugged, textured accessory that looks store-bought but feels handmade. The pattern is written row-by-row, so you can knit it up over a weekend or two while binge-watching your favorite series. Let's get those needles clicking!
Materials Needed
Before you cast on, gather these supplies. The beauty of this pattern is its simplicity—you don't need fancy tools, just good yarn and a pair of trusty needles.
Yarn
- Worsted weight yarn in two colors:
- Color A (Charcoal Gray): Approximately 250g
- Color B (Burnt Orange): Approximately 150g
- Total yarn needed: Approximately 400g (about 800–900 yards)
Pro tip: Choose a wool or wool-blend yarn for the best stitch definition and warmth. Acrylic works too, but wool will block better and feel cozier against your neck.
Needles & Notions
- US 8 (5.0 mm) knitting needles—straight or circular, whichever you prefer
- Tapestry needle for weaving in ends
- Scissors
- Optional: Crochet hook (for fringe) and blocking mats
Gauge
18 stitches and 24 rows = 4 inches in stockinette stitch (knit one row, purl one row). Gauge isn't critical for a scarf, but matching it ensures your finished piece is the intended size. If your scarf feels too narrow or too wide, adjust your needle size accordingly.
Step-by-Step Instructions
This pattern is written in clear, row-by-row format. Read through the entire pattern once before starting, then follow along. The scarf is worked flat, back and forth, with a garter stitch border at both ends for a neat, finished look.
Cast On
With Color A (Charcoal Gray), cast on 40 stitches using your preferred method (long-tail cast on works beautifully here). This will give you a scarf approximately 8–9 inches wide—perfect for wrapping around your neck twice.
Border (Garter Stitch)
This border creates a sturdy, non-curling edge that frames the scarf nicely.
- Rows 1–6: Knit all stitches. (You'll see ridges forming—that's garter stitch!)
Main Body – Pattern Sequence
Now we begin the textured body. The pattern alternates between smooth stockinette, ribbed panels, and a subtle seed stitch stripe. Pay close attention to the color changes and stitch patterns.
Section 1: Stockinette Panels (Color A)
- Row 7 (RS): With Color A, knit all stitches.
- Row 8 (WS): With Color A, purl all stitches.
Section 2: Stockinette Panel (Color B)
- Row 9 (RS): Switch to Color B, knit all stitches.
- Row 10 (WS): With Color B, purl all stitches.
Section 3: Ribbed Panel (Color A)
- Row 11 (RS): With Color A, *k2, p2; repeat from * to end of row. (You'll end with k2.)
- Row 12 (WS): With Color A, *p2, k2; repeat from * to end of row. (You'll end with p2.)
Section 4: Ribbed Panel (Color B)
- Row 13 (RS): With Color B, *p2, k2; repeat from * to end of row. (Notice the pattern reverses!)
- Row 14 (WS): With Color B, *k2, p2; repeat from * to end of row.
Section 5: Stockinette Panels (Repeat)
- Rows 15–18: Repeat Rows 7–10. (That's knit with Color A, purl with Color A, knit with Color B, purl with Color B.)
Section 6: Seed Stitch Stripe (Color A)
- Row 19 (RS): With Color A, *k1, p1; repeat from * to end of row. (You'll end with k1.)
- Row 20 (WS): With Color A, *p1, k1; repeat from * to end of row. (This creates the seed stitch texture.)
Section 7: Seed Stitch Stripe (Color B)
- Row 21 (RS): With Color B, *k1, p1; repeat from * to end of row.
- Row 22 (WS): With Color B, *p1, k1; repeat from * to end of row.
Section 8: Stockinette Panels (Final Repeat)
- Rows 23–26: Repeat Rows 7–10. (Knit Color A, purl Color A, knit Color B, purl Color B.)
Repeating the Pattern
Now that you've completed Rows 7–26 once, you'll repeat this entire sequence until your scarf measures approximately 60 inches from the cast-on edge. That's about 5 feet—a perfect length for a man's scarf that can be wrapped or draped.
Important: Always end with a Row 10 or Row 26 (a purl row with Color B). This ensures your color blocks stay even and your borders align symmetrically at both ends.
Final Border
Once your scarf reaches 60 inches, it's time to add the finishing border.
- Rows 1–6 (repeated): With Color A, knit all stitches. (This mirrors the cast-on border.)
Bind Off
With Color A, bind off all stitches knitwise. This means you knit each stitch as you bind it off, which keeps the edge stretchy and neat. Cut your yarn, leaving a 6-inch tail, and pull it through the last loop.
Finishing Touches
Now for the satisfying part—making it look polished.
- Weave in all loose ends using your tapestry needle. Thread the tail through the wrong side of the scarf, following the path of the stitches, and trim any excess. Do this for every color change to keep the back clean.
- Block lightly. Soak the scarf in lukewarm water with a drop of wool wash, gently squeeze out excess water (don't wring!), and lay flat on a towel. Shape it to the correct dimensions and let it dry completely. This evens out your stitches and gives the scarf a professional finish.
Optional Fringe
Want to add that extra rugged touch? Fringe is easy and looks fantastic.
- Cut 12-inch strands of both Color A and Color B. You'll need about 20–24 strands total (10–12 per end).
- Fold each strand in half. Insert a crochet hook through the edge of the scarf at the short end, hook the folded loop, and pull it through.
- Thread the loose ends through the loop and pull tight. Repeat across the edge, alternating colors for a playful yet sturdy finish.
- Trim the fringe evenly with scissors.
Final Thoughts
And there you have it—the Emberstone Men's Knit Look Scarf is complete! This pattern is a fantastic way to build your knitting skills while creating a genuinely useful, handsome accessory. The combination of stockinette, ribbing, and seed stitch keeps the knitting interesting, and the color palette is timeless yet bold.
Whether you're knitting this for yourself, a husband, a father, or a friend, the recipient will appreciate the time, care, and warmth you've stitched into every row. So grab your needles, pour a cup of coffee, and let the rhythmic click of your knitting needles bring this ember-inspired scarf to life. Happy knitting!