Ember Glow Chunky Cable Scarf Free Pattern – A Knitted Winter Hearth Wrap
Ember Glow Chunky Cable Scarf Free Pattern – A Knitted Winter Hearth Wrap
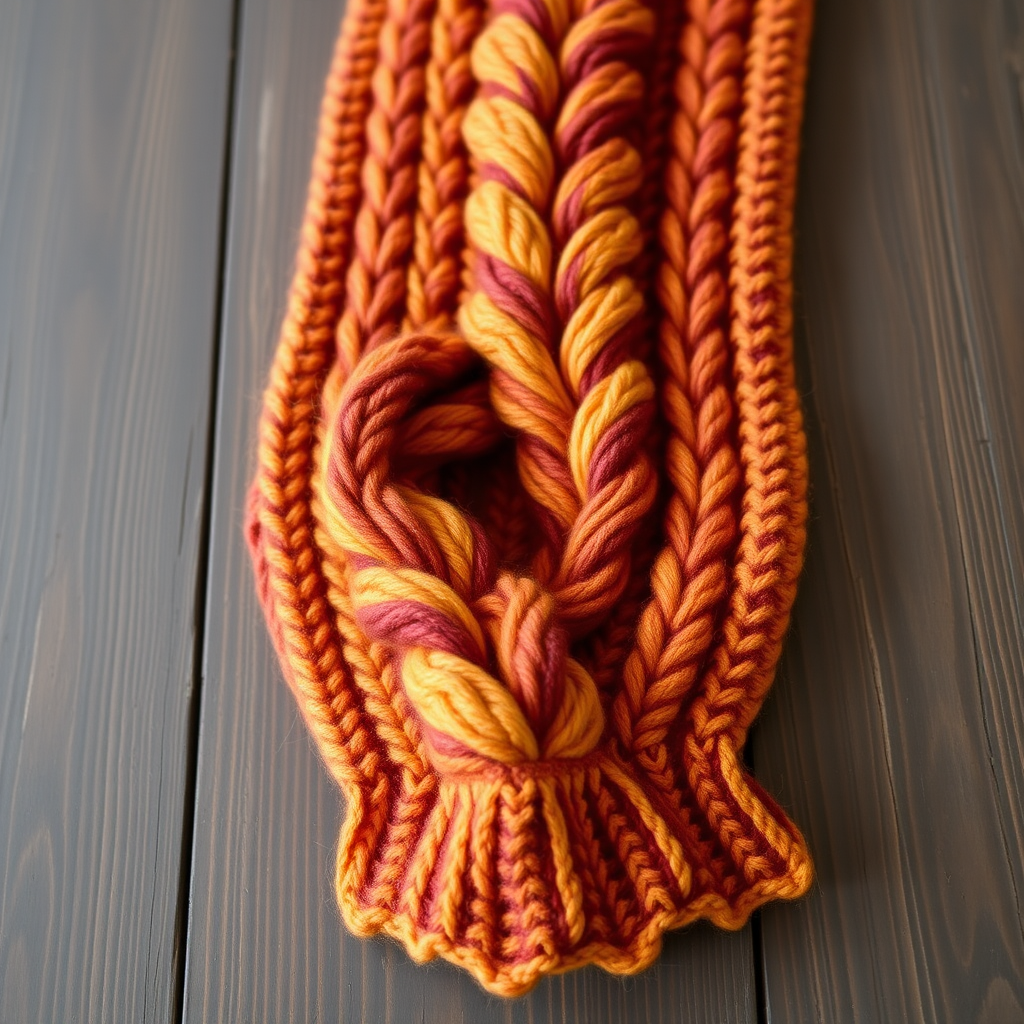
Wrap yourself in the warmth of a crackling fire with this deeply textured, chunky cable scarf. The rich gradient of burnt orange, amber, and deep crimson creates a stunning, cozy statement piece for cold days. This pattern is perfect for intermediate knitters looking to master the art of cabling while creating a truly breathtaking accessory. The thick, super bulky yarn works up quickly, making this a rewarding weekend project that will become the envy of every winter gathering.
This scarf isn't just about warmth—it's about craftsmanship. The central braided cable pattern, flanked by ribbed edges, creates a dimensional masterpiece that catches the light and draws the eye. The tapered ends add an elegant finishing touch, while the gradient color transition tells a story of autumn leaves and cozy evenings by the fire. Whether you're knitting this for yourself or as a heartfelt handmade gift, the Ember Glow Scarf is sure to become a treasured heirloom piece.
Materials Needed
Before you begin your knitting journey, gather these essential supplies:
Yarn
- Super bulky weight yarn (size 6) in three colors:
- Color A: Burnt Orange (approximately 85g)
- Color B: Amber (approximately 80g)
- Color C: Deep Crimson (approximately 85g)
- Total yarn needed: Approximately 250g
Pro tip: Choose a yarn with good stitch definition, such as a wool or wool-blend, to make the cable details really pop. The natural elasticity of wool will also help the cables maintain their beautiful shape.
Needles and Tools
- US 13 (9mm) knitting needles – straight or circular (circular needles can help manage the weight of the scarf as it grows)
- Cable needle – any size will work, but a U-shaped cable needle is often easiest for beginners
- Tapestry needle – for weaving in ends
- Scissors
- Stitch markers (optional, but helpful for keeping track of pattern repeats)
Gauge
8 stitches and 10 rows = 4 inches in stockinette stitch
Be sure to check your gauge before starting! If your gauge is off, adjust your needle size accordingly. A proper gauge ensures your scarf will have the perfect drape and dimensions.
Step-by-Step Instructions
This scarf is worked flat in one piece, using a simple cable pattern that creates a beautiful, dimensional braid. The color changes create a subtle gradient effect that flows seamlessly from one hue to the next.
Abbreviations
- CO: Cast on
- K: Knit
- P: Purl
- C4F: Slip 2 stitches to cable needle, hold to front, knit 2, knit 2 from cable needle
- C4B: Slip 2 stitches to cable needle, hold to back, knit 2, knit 2 from cable needle
- K2tog: Knit 2 stitches together (decrease)
- SSK: Slip, slip, knit (slip 2 stitches knitwise one at a time, then knit them together through the back loop – a left-leaning decrease)
Getting Started: The Setup Rows
With Color A (Burnt Orange), CO 24 stitches.
Use a long-tail cast on for a nice, stretchy edge that will complement the ribbed borders of the scarf. If you're not familiar with this technique, any stretchy cast-on method will work beautifully.
Row 1 (Right Side): K2, P2, K2, P2, K2, P2, K2, P2, K2, P2, K2, P2
Row 2 (Wrong Side): P2, K2, P2, K2, P2, K2, P2, K2, P2, K2, P2, K2
These two rows establish the 2x2 ribbing that will frame your cable pattern. The ribbing creates a neat, structured edge that prevents curling and adds a professional finish.
The Cable Pattern
Now we'll work the main body of the scarf. The cable pattern consists of 8 rows that you'll repeat throughout the project. Don't worry if it feels a bit fiddly at first—once you get into the rhythm, the pattern becomes almost meditative.
Row 3 (Right Side): K2, P2, C4F, P2, K2, P2, C4B, P2, K2
Let's break this down: Knit 2, purl 2, then work a C4F (cable front) over the next 4 stitches, purl 2, knit 2, purl 2, work a C4B (cable back) over the next 4 stitches, purl 2, knit 2.
Row 4 (Wrong Side): P2, K2, P2, K2, P2, K2, P2, K2, P2, K2, P2, K2
Row 5 (Right Side): K2, P2, K2, P2, K2, P2, K2, P2, K2, P2, K2, P2
Row 6 (Wrong Side): P2, K2, P2, K2, P2, K2, P2, K2, P2, K2, P2, K2
Row 7 (Right Side): K2, P2, C4B, P2, K2, P2, C4F, P2, K2
Note how the cables cross in opposite directions on Row 7 compared to Row 3. This creates the beautiful braided effect.
Row 8 (Wrong Side): P2, K2, P2, K2, P2, K2, P2, K2, P2, K2, P2, K2
These 8 rows form your cable pattern. The wrong-side rows are always worked in the ribbing pattern, which helps maintain the structure of the scarf.
Color Sequence
Now that you have your pattern established, it's time to create that gorgeous gradient effect. Follow this color sequence carefully:
- With Color A (Burnt Orange): Work Rows 1-8 twice (16 rows total). This includes the setup rows and one full cable repeat.
- Switch to Color B (Amber): Work Rows 1-8 four times (32 rows total). This is the longest section, creating the middle of your gradient.
- Switch to Color C (Deep Crimson): Work Rows 1-8 twice (16 rows total).
Tip for color changes: When switching colors, do so at the beginning of a right-side row for the cleanest transition. Leave a tail of about 6 inches to weave in later.
Shaping for a Tapered End
After completing the last row of Color C, you'll continue with Color C to create the elegant tapered point at the end of your scarf. This shaping creates a beautiful, refined finish that sets this scarf apart.
Row 1 (Right Side): K2, P2, K2, P2, K2, P2, K2, P2, K2, P2, K2, P2 (24 stitches)
Row 2 (Wrong Side): P2, K2, P2, K2, P2, K2, P2, K2, P2, K2, P2, K2 (24 stitches)
Row 3 (Right Side): K2, P2, K2, P2, SSK, P2, K2, P2, K2tog, P2, K2 (22 stitches)
You've just decreased 2 stitches—one on each side of the center cable section.
Row 4 (Wrong Side): P2, K2, P2, K2, P2, K2, P2, K2, P2, K2, P2 (22 stitches)
Row 5 (Right Side): K2, P2, K2, P2, SSK, P2, K2, P2, K2tog, P2 (20 stitches)
Row 6 (Wrong Side): P2, K2, P2, K2, P2, K2, P2, K2, P2 (20 stitches)
Row 7 (Right Side): K2, P2, K2, P2, SSK, P2, K2tog, P2 (18 stitches)
Row 8 (Wrong Side): P2, K2, P2, K2, P2, K2, P2, K2 (18 stitches)
Row 9 (Right Side): K2, P2, K2, P2, SSK, K2tog, P2 (16 stitches)
Row 10 (Wrong Side): P2, K2, P2, K2, P2, K2, P2 (16 stitches)
Row 11 (Right Side): K2, P2, K2, P2, K2tog, P2 (14 stitches)
Row 12 (Wrong Side): P2, K2, P2, K2, P2, K2 (14 stitches)
Row 13 (Right Side): K2, P2, K2, P2, K2tog, P2 (12 stitches)
Row 14 (Wrong Side): P2, K2, P2, K2, P2, K2 (12 stitches)
Row 15 (Right Side): K2, P2, K2, P2, K2tog, P2 (10 stitches)
Row 16 (Wrong Side): P2, K2, P2, K2, P2 (10 stitches)
Row 17 (Right Side): K2, P2, K2, P2, K2tog, P2 (8 stitches)
Row 18 (Wrong Side): P2, K2, P2, K2, P2 (8 stitches)
Row 19 (Right Side): K2, P2, K2, P2, K2tog, P2 (6 stitches)
Row 20 (Wrong Side): P2, K2, P2, K2 (6 stitches)
Row 21 (Right Side): K2, P2, K2tog, P2 (4 stitches)
Row 22 (Wrong Side): P2, K2, P2 (4 stitches)
Row 23 (Right Side): K2, P2, K2tog, P2 (2 stitches)
Row 24 (Wrong Side): P2, K2 (2 stitches)
Row 25 (Right Side): K2tog (1 stitch)
Cut yarn, leaving a 6-inch tail, and pull through the remaining stitch to secure.
Creating the Second End
To create the matching tapered end on the other side of your scarf, you'll work the entire pattern in reverse. This ensures both ends are symmetrical and equally beautiful.
Step 1: With Color C (Deep Crimson), CO 24 stitches.
Step 2: Work the shaping rows (Rows 1-25 above) to create the tapered point.
Step 3: After completing the shaping, work the cable pattern in this color sequence:
- With Color C: Work Rows 1-8 twice (16 rows total)
- Switch to Color B (Amber): Work Rows 1-8 four times (32 rows total)
- Switch to Color A (Burnt Orange): Work Rows 1-8 twice (16 rows total)
Step 4: Bind off loosely in pattern (knit the knits and purl the purls) to maintain the stretchy edge.
Important: When binding off, work the stitches as they appear—knit the knit stitches and purl the purl stitches. This maintains the ribbed pattern and ensures a professional-looking edge that won't pucker.
Finishing Touches
Your Ember Glow Scarf is almost complete! Follow these final steps for a polished, professional result:
1. Weave in all ends: Using your tapestry needle, carefully weave in all loose yarn ends along the wrong side of the work. Weave through the purl bumps for at least 2 inches to ensure they're secure. Trim any excess yarn.
2. Block your scarf: This step is crucial for evening out the cables and giving your scarf that beautiful, finished look. To block:
- Fill a basin with lukewarm water and add a drop of gentle wool wash
- Submerge your scarf and let it soak for 15-20 minutes
- Gently squeeze out excess water (never wring or twist!)
- Lay the scarf flat on a clean towel and roll it up to remove more water
- Pin the scarf to its final dimensions on a blocking mat, gently shaping the cables
- Let it dry completely before unpinning
3. Final inspection: Once dry, check that all cables are lying flat and the edges are even. If any cables look twisted, gently manipulate them while slightly damp to set them in the correct direction.
Wearing and Caring for Your Scarf
Your Ember Glow Chunky Cable Scarf is now ready to be worn and admired! The generous width and length make it perfect for wrapping around your neck multiple times or draping elegantly over your shoulders. The gradient colors will complement everything from neutral winter coats to denim jackets.
Care instructions: To keep your scarf looking its best, hand wash in cold water with a gentle wool wash and lay flat to dry. Avoid hanging, as this can stretch the cables. Store folded in a drawer or on a shelf, away from direct sunlight to prevent fading.
This scarf also makes a thoughtful, handmade gift for someone special. The rich, warm colors and luxurious texture make it feel like a high-end boutique purchase, but with the added love and care that only hand-knitted items possess.
Happy knitting, and may your winter be filled with warmth and creativity! Remember, every stitch brings you closer to a beautiful, handcrafted treasure that will be cherished for years to come.