Car Accessory Knitting Patterns
Crochet Decorative Pumpkins
Anonymous
•
July 13, 2026
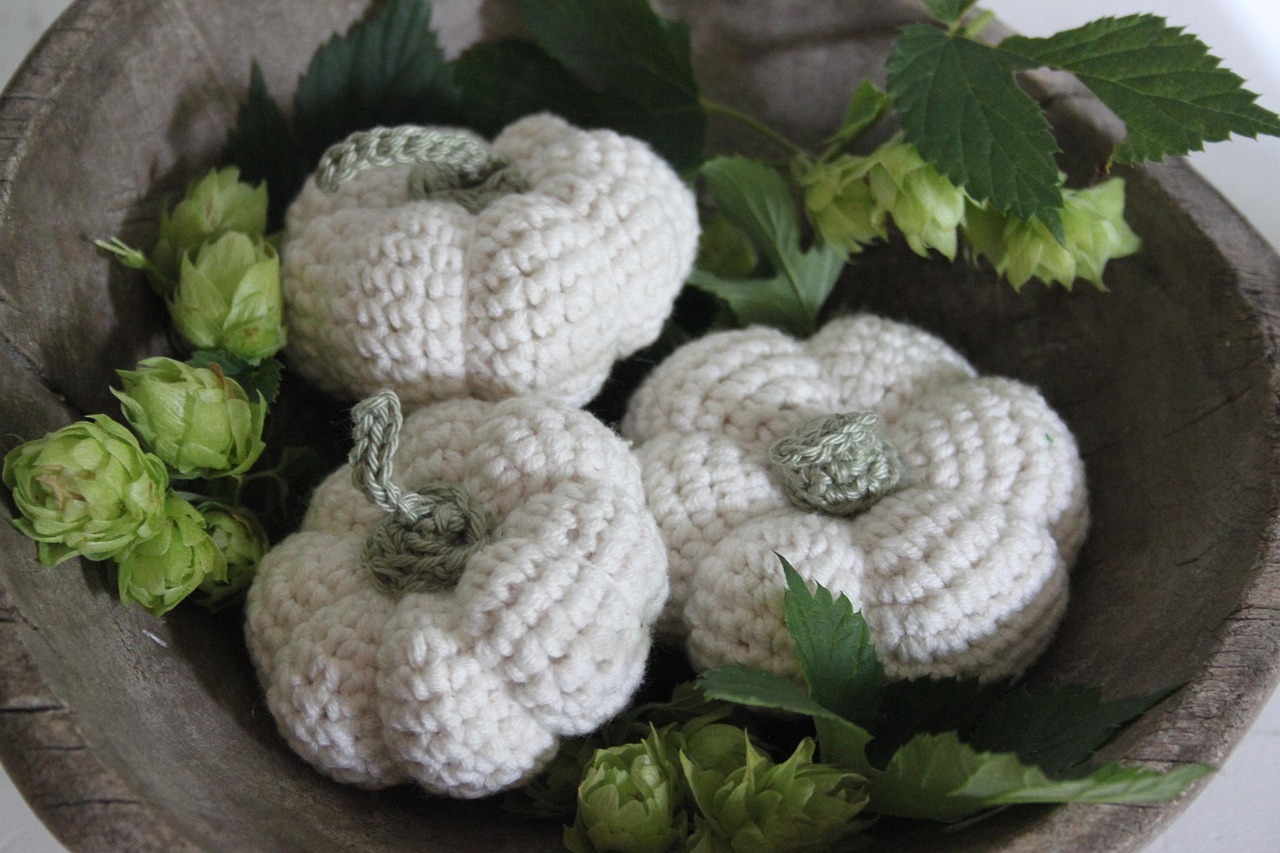
Crochet Decorative Pumpkins
These adorable crochet pumpkins are a wonderful addition to your fall decor. With their plush texture and charming stems, they are not only great for autumn but can also be used year-round as cute decorations. This project is beginner-friendly and can be completed in just a few hours.
Materials
- Worsted weight yarn in creamy white (approximately 100 yards)
- Worsted weight yarn in olive green or light green (for stems, approximately 10 yards)
- Size G (4.0 mm) crochet hook
- Fiberfill stuffing
- Yarn needle
- Scissors
Gauge
4 inches = 12 double crochets (dc) and 8 rows. However, gauge is not critical for this project.
Abbreviations
- ch - chain
- sc - single crochet
- dc - double crochet
- sl st - slip stitch
- st(s) - stitch(es)
- inc - increase (2 single crochets in one stitch)
- dec - decrease (crochet 2 stitches together)
Instructions
Body of the Pumpkin
- Start with the creamy white yarn. Make a magic ring (MR).
- Round 1: Ch 1, work 6 sc into the ring. Pull the ring tight and join with a sl st to the first sc. (6 sc)
- Round 2: Ch 1, inc in each st around. Join with a sl st. (12 sc)
- Round 3: Ch 1, (1 sc, inc) around. Join with a sl st. (18 sc)
- Round 4: Ch 1, (2 sc, inc) around. Join with a sl st. (24 sc)
- Round 5-8: Ch 1, sc in each st around. Join with a sl st. (24 sc)
- Round 9: Ch 1, (2 sc, dec) around. Join with a sl st. (18 sc)
- Round 10: Ch 1, (1 sc, dec) around. Join with a sl st. (12 sc)
- Stuff the pumpkin lightly with fiberfill.
- Round 11: Ch 1, dec around. Join with a sl st. (6 sc)
- Fasten off and leave a long tail for closing. Pull the tail through the loops left on the hook tightly to close the hole. Weave in the end.
Creating the Ribs
- Using the remaining tail, thread it through the bottom center of the pumpkin, then back up through the top, pulling tight to create a ribbed effect. Repeat 4-5 times around to create the pumpkin’s texture. Tie off and secure.
Making the Stem
- Switch to the olive green yarn. Make a magic ring (MR).
- Round 1: Ch 1, work 5 sc into the ring. Pull the ring tight and join with a sl st. (5 sc)
- Round 2: Ch 1, inc in each st around. Join with a sl st. (10 sc)
- Round 3: Ch 1, sc in each st around. (10 sc)
- Round 4: Ch 1, (dec) around. Join with a sl st. (5 sc)
- Fasten off, leaving a long tail for sewing. Stuff lightly with fiberfill.
- Sew the stem securely to the top center of the pumpkin.
Finishing Touches
Weave in any remaining yarn ends. You can create additional pumpkins in various sizes by adjusting the number of stitches and rows in the body pattern.
Your adorable crochet pumpkins are now complete! Arrange them in a bowl or display them on a shelf for a lovely seasonal touch.
Also Check Out: We think you'd love this beautiful pattern on our sister site: Elegant Tubular Bind Off Knitting Pattern