Willowmere Button-Up Headband Free Pattern – Crochet a Cozy Meadow Wrap
Willowmere Button-Up Headband Free Pattern – Crochet a Cozy Meadow Wrap
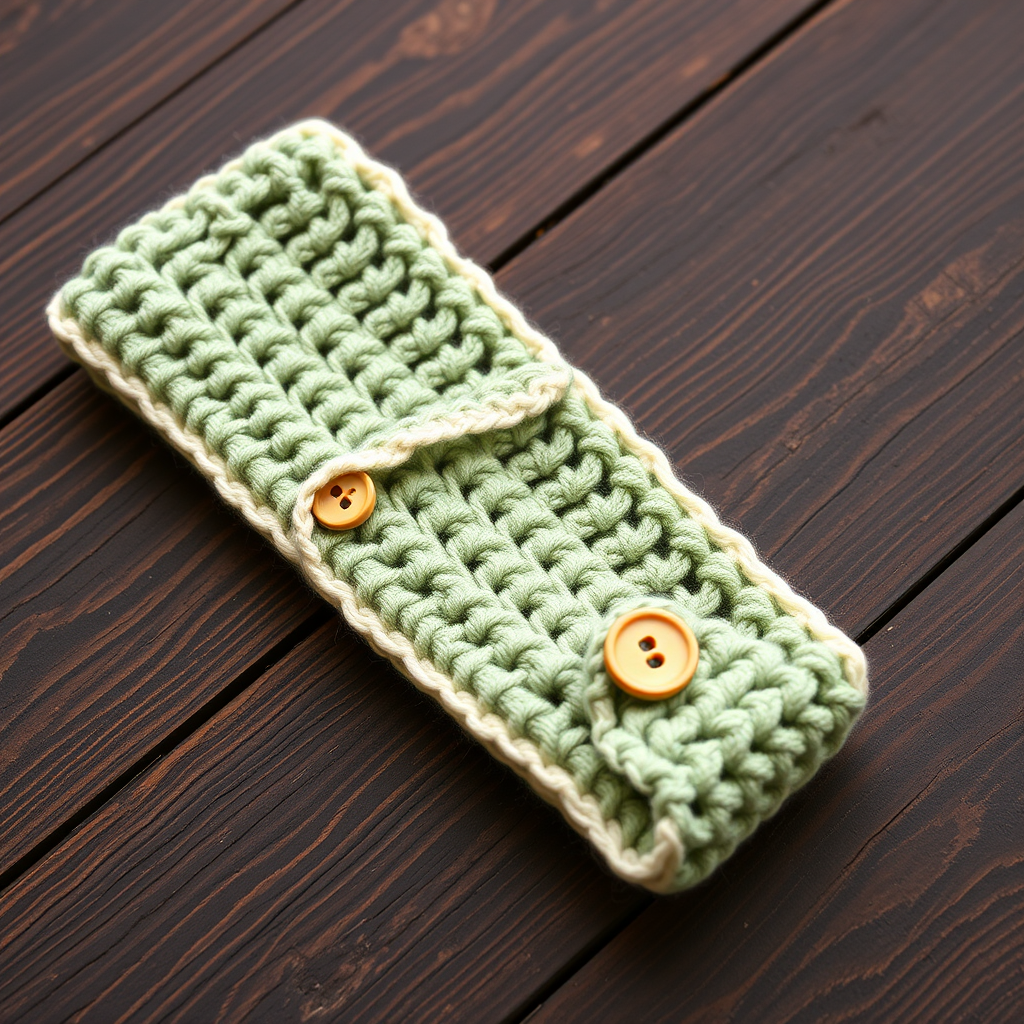
Wrap your ears in the softest embrace of the Willowmere Button-Up Headband, a crochet piece that marries rustic charm with modern comfort. This pattern guides you through creating a textured, button-fastened headband that feels like a gentle meadow breeze on a chilly day. Whether you're a seasoned crocheter or picking up a hook for the first time, this project is wonderfully approachable and yields a stunning, practical accessory.
The finished headband features a dense, ribbed texture created by simple single crochet rows, finished with a delicate contrast edging and a natural wooden button. It's the perfect handmade gift or a cozy treat for yourself. Let's dive into creating this beautiful meadow wrap!
Materials Needed
Before you begin, gather the following supplies. This project is wonderfully portable and requires minimal materials, making it perfect for on-the-go crafting.
- Yarn: Worsted weight yarn in two complementary colors (e.g., Sage Green and Cream) – approximately 100 yards of main color and 30 yards of contrast color.
- Crochet Hook: 5.0 mm (H-8) crochet hook.
- Button: One round button, approximately 1 inch (2.5 cm) in diameter. A natural wood or tan tone complements the earthy palette beautifully.
- Other: Yarn needle for weaving in ends and sewing the button, scissors.
Gauge: 14 sc x 16 rows = 4 inches (10 cm) in single crochet. While gauge is important for fit, this pattern is quite forgiving. The headband's adjustable button placement allows for flexibility.
Step-by-Step Instructions
Follow these detailed instructions to create your Willowmere Button-Up Headband. The pattern is worked in rows to create a long, rectangular strip, which is then fastened with a button.
Finished Size & Abbreviations
Finished Size: Fits average adult head (20-22 inches circumference), adjustable via button placement.
Abbreviations:
- ch = chain
- sc = single crochet
- hdc = half double crochet
- dc = double crochet
- sl st = slip stitch
- st(s) = stitch(es)
- sk = skip
- RS = right side
Creating the Headband Body
Foundation Row: With your main color (Sage Green), make a slip knot and ch 12.
Row 1: Sc in the 2nd ch from your hook and in each ch across. You will have 11 sc stitches. Turn your work.
Rows 2-60: Ch 1 (this counts as your turning chain, but does not count as a stitch), then sc in each st across. You will have 11 sc stitches. Turn your work at the end of each row.
Continue repeating Row 2 until your piece measures approximately 20 inches (50 cm) from the foundation edge. This length should wrap comfortably around your head with a slight overlap. You can adjust this length by adding or subtracting rows to achieve your perfect fit.
Creating the Buttonhole
This step creates a neat opening for your button to pass through, allowing the headband to be fastened securely.
Buttonhole Row (Row 61): Ch 1, sc in the first 4 sts. Now, ch 3, sk 3 sts (you will leave a gap of 3 stitches), then sc in the last 4 sts. You will have 8 sc stitches and 1 ch-3 space. Turn your work.
Row 62: Ch 1, sc in each of the first 4 sts. Then, sc in each of the 3 chains from the previous row. Finally, sc in each of the last 4 sts. You will have 11 sc stitches across. Turn your work.
Row 63: Ch 1, sc in each st across. You will have 11 sc stitches. Fasten off and weave in your ends securely.
Optional: Button Loop Alternative
If you prefer a loop instead of a buttonhole, here's a simple alternative. After completing Row 60, do not turn. Instead, ch 10, then sl st to the last sc you made to form a loop. Fasten off and weave in ends. You will then sew the button on the opposite end, aligning it with this loop.
Adding the Edging
This step is optional but highly recommended as it gives the headband a polished, professional finish and adds a lovely pop of contrast color.
Round 1: With your contrast color (Cream), join your yarn with a sl st to any corner of the headband. Sc evenly around the entire perimeter of the rectangle. When you reach each corner, work 2 sc in the corner stitch to help the edging turn smoothly. When you return to your starting point, join with a sl st to the first sc. Fasten off and weave in all ends.
Attaching the Button
Now for the final touch! Position the button on the end of the headband opposite the buttonhole. Wrap the headband around your head (or a friend's) to find the ideal button placement, ensuring the buttonhole aligns perfectly over the button.
Using your yarn needle and a length of your main color yarn, sew the button securely onto the headband. Pass the needle through the button's holes and the fabric several times to ensure it's firmly attached. Weave in the yarn end.
Finishing Touches
Weave in any remaining loose ends with your yarn needle. If desired, gently block your headband to even out the stitches and set the shape. To do this, lightly mist it with water and lay it flat to dry.
Your Willowmere Button-Up Headband is now complete! Slip it on and enjoy the cozy, handcrafted warmth. The adjustable button makes it a versatile and thoughtful gift for anyone on your list. Happy crocheting!


