Whispering Wheat Harvest Mice Free Pattern – Knit a Pair of Cozy Autumn Companions
Whispering Wheat Harvest Mice Free Pattern – Knit a Pair of Cozy Autumn Companions
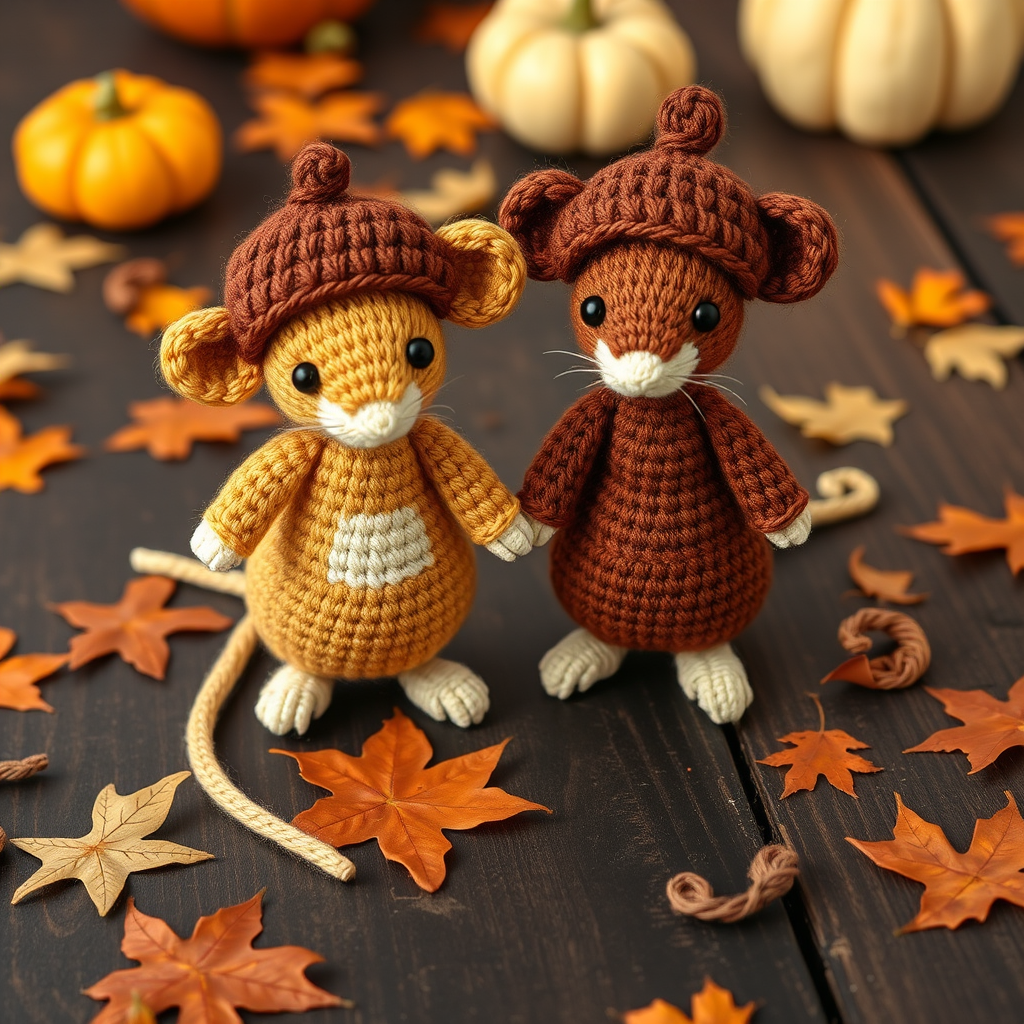
Bring the harvest home with these two adorable knitted mice, one in warm wheat gold and the other in deep russet brown. Their tiny acorn caps and curled tails make them the perfect seasonal decor or gift. Whether you're a seasoned knitter or just starting your amigurumi journey, this pattern is designed to be approachable, detailed, and incredibly rewarding. Let's create a little piece of autumn magic together!
Materials Needed
Before you begin, gather these supplies to ensure a smooth knitting experience. All materials are readily available at your local craft store or online.
- Yarn: Worsted weight yarn in the following colors:
- Wheat gold (MC1) – for the first mouse
- Russet brown (MC2) – for the second mouse
- Cream (CC1) – for the muzzle and belly details
- Dark brown (CC2) – for the acorn caps
- Needles: US 3 (3.25 mm) knitting needles or double-pointed needles (DPNs) for small circumference knitting. A set of 4 or 5 DPNs is ideal.
- Gauge: 5.5 stitches and 7 rows per inch in stockinette stitch. (Gauge is important for size, but this project is forgiving – just aim for a tight, firm fabric so the stuffing doesn't show.)
- Other Supplies: Tapestry needle for sewing and weaving in ends, fiberfill stuffing, stitch markers, black embroidery floss or thin yarn for eyes, and scissors.
Step-by-Step Instructions
This pattern is worked in the round using DPNs or the magic loop method. Both mice are knitted identically except for the main color. Follow along carefully, and you'll have a charming pair in no time.
Head and Body (worked as one piece)
We'll start from the nose and work our way down to the tail end. This creates a seamless, professional look.
- Round 1: Cast on 6 stitches with your main color (MC). Join in the round, being careful not to twist. Place a stitch marker to mark the beginning of the round.
- Round 2: Increase in every stitch (you will now have 12 stitches). To increase, knit into the front and back of the same stitch.
- Round 3: *K1, inc* repeat around (18 stitches).
- Round 4: *K2, inc* repeat around (24 stitches).
- Rounds 5-10: Knit all stitches (24 stitches). This forms the snout and upper head.
- Round 11: *K2, k2tog* repeat around (18 stitches). This begins to shape the back of the head.
- Round 12: Knit all stitches (18 stitches).
- Round 13: *K1, k2tog* repeat around (12 stitches).
- Round 14: Knit all stitches (12 stitches).
- Stuff the head firmly with fiberfill. Make sure the snout is well-filled but not stretched.
- Round 15: *K1, inc* repeat around (18 stitches). This starts the body section.
- Round 16: *K2, inc* repeat around (24 stitches).
- Rounds 17-24: Knit all stitches (24 stitches). This is the main body length.
- Round 25: *K2, k2tog* repeat around (18 stitches). Begin shaping the bottom.
- Round 26: *K1, k2tog* repeat around (12 stitches).
- Stuff the body firmly, ensuring the mouse has a nice, plump pear shape.
- Round 27: K2tog around (6 stitches).
- Cut yarn, leaving a long tail. Thread the tail through a tapestry needle, pass it through the remaining 6 stitches, and pull tight to close the hole. Weave in the end securely.
Ears (make 2 per mouse)
These are knitted flat and then sewn on. They add so much character!
- Cast on 4 stitches with MC.
- Row 1: Knit all stitches.
- Row 2: Inc, k2, inc (6 stitches).
- Row 3: Knit all stitches.
- Row 4: Inc, k4, inc (8 stitches).
- Row 5: Knit all stitches.
- Row 6: K2tog, k4, k2tog (6 stitches).
- Row 7: K2tog, k2, k2tog (4 stitches).
- Bind off all stitches. Leave a long tail for sewing.
- Fold each ear in half (the bound-off edge becomes the top of the ear) and sew the base to the head. Position them about 4 rounds down from the top of the head and 3 stitches apart. This placement gives a cute, alert expression.
Tail
A simple I-cord creates a lovely, curly tail.
- Cast on 3 stitches with MC.
- Knit an I-cord for 4 inches. To do this, knit 3 stitches, then slide them to the other end of the DPN without turning the work. Pull the yarn tightly across the back and knit again. Repeat until you reach the desired length.
- Bind off. Sew the tail to the back of the body at the bottom. You can curl it gently with your fingers to give it that whimsical shape.
Acorn Cap (make 1 per mouse)
This little hat is the perfect finishing touch for your harvest mouse.
- With CC2 (dark brown), cast on 6 stitches. Join in the round, being careful not to twist.
- Round 1: Inc in every stitch (12 stitches).
- Round 2: *K1, inc* repeat around (18 stitches).
- Rounds 3-4: Knit all stitches (18 stitches).
- Round 5: *K1, k2tog* repeat around (12 stitches).
- Round 6: K2tog around (6 stitches).
- Cut yarn, thread through remaining stitches, and pull tight to close. Sew the cap to the top of the head, slightly tilted for a jaunty, charming look.
Face
Bring your mouse to life with these simple embroidery details.
- Nose: Using CC1 (cream), embroider a small oval nose on the tip of the snout with satin stitch. This should be centered and about 2 stitches wide.
- Eyes: Use black embroidery floss or thin yarn to make two small French knots for eyes. Place them 2 stitches apart and 1 round above the nose. If French knots are tricky, a simple straight stitch or a tiny bead works beautifully too.
- Whiskers: Add three short whiskers on each side of the nose using a single strand of CC1. Keep them subtle – just a few small stitches radiating outward.
Finishing
Your mouse is almost ready to join the harvest celebration!
- Weave in all ends carefully with your tapestry needle, making sure they are secure and hidden.
- Shape the mouse: Gently pinch the body to create a slight pear shape – wider at the bottom, narrower at the top. This gives them that adorable, huggable silhouette.
- Optional: Add a tiny acorn or leaf in their paws by knitting a small oval and sewing it on. This is a lovely detail for display.
Repeat the entire process with your second main color to create the pair. Once both mice are complete, place them side by side on a rustic wooden table scattered with fallen oak leaves and small pumpkins. The soft, golden lighting of an autumn afternoon will make them look absolutely magical. These Whispering Wheat Harvest Mice are sure to become a treasured part of your seasonal decor or a heartfelt handmade gift for someone special. Happy knitting!



