Whispering Pine Moose Amigurumi Free Pattern – A Knitted Forest Guardian
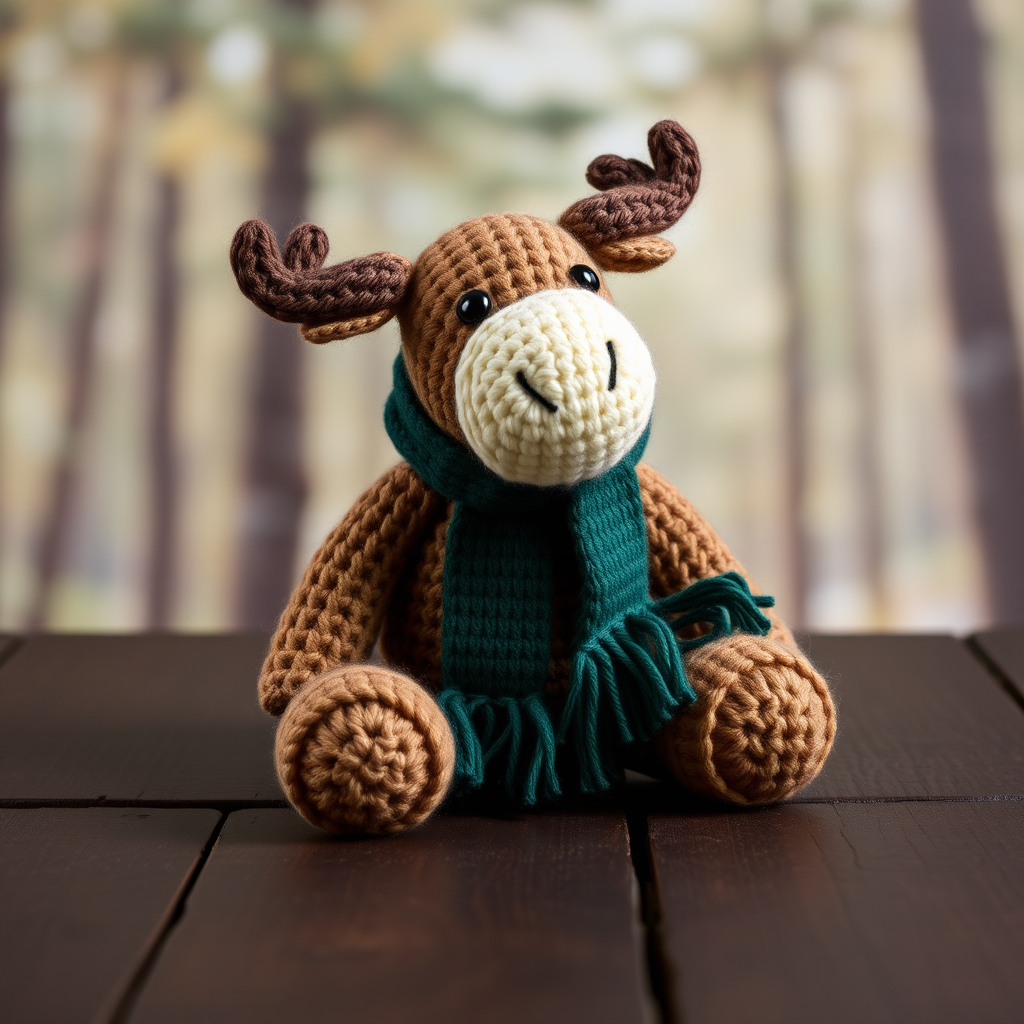
Whispering Pine Moose Amigurumi Free Pattern – A Knitted Forest Guardian
Bring the quiet magic of the northern forest into your home with this heirloom-quality knitted moose amigurumi. With its rich tapestry of earthy textures, gentle wise expression, and cozy handcrafted charm, this woodland companion makes a perfect gift for nature lovers, nursery decor, or a treasured keepsake. This free knitting pattern guides you step-by-step through creating your very own forest guardian—no prior amigurumi experience required!
Materials Needed
Before you begin, gather the following supplies to ensure a smooth and enjoyable knitting experience:
- Yarn: Worsted weight yarn in three shades:
- Warm taupe (MC) – for the body, head, ears, and legs
- Cream (CC1) – for the muzzle patch
- Deep forest green (CC2) – for the scarf
- Small amounts of dark brown – for the antlers
- Small amount of black – for embroidering the eyes
- Needles: US Size 4 (3.5mm) knitting needles (or size needed to obtain gauge)
- Notions: Tapestry needle for assembly and weaving in ends, stitch markers (optional), and polyester fiberfill for stuffing
- Gauge: 20 stitches and 26 rows = 4 inches in stockinette stitch. Gauge is not critical for amigurumi, but consistent tension ensures a firm fabric that holds its shape.
Step-by-Step Instructions
This pattern is knitted flat in pieces and seamed together. Work all pieces in stockinette stitch (knit on right side, purl on wrong side) unless otherwise noted. Use the long-tail cast-on method. Stuff firmly as you go to maintain shape.
Head (knit in MC)
- Cast on 10 stitches.
- Row 1 (RS): Knit.
- Row 2: Purl.
- Row 3 (Increase row): K1, M1, knit to last stitch, M1, K1. (12 sts)
- Row 4: Purl.
- Repeat Rows 3-4 until you have 20 stitches.
- Work even in stockinette for 10 rows.
- Next row (RS) (Decrease row): K1, K2tog, knit to last 3 stitches, K2tog, K1. (18 sts)
- Purl one row.
- Repeat decrease row. (16 sts)
- Purl one row.
- Repeat decrease row. (14 sts)
- Purl one row.
- Bind off all stitches. This creates the back of the head.
Muzzle (knit in CC1)
- Cast on 8 stitches.
- Row 1 (RS): Knit.
- Row 2: Purl.
- Row 3 (Increase row): K1, M1, knit to last stitch, M1, K1. (10 sts)
- Row 4: Purl.
- Repeat Rows 3-4 until you have 14 stitches.
- Work even for 6 rows.
- Bind off all stitches. This forms the muzzle patch.
Ears (make 2, knit in MC)
- Cast on 6 stitches.
- Row 1 (RS): Knit.
- Row 2: Purl.
- Row 3 (Decrease row): K2tog, knit to last 2 stitches, K2tog. (4 sts)
- Row 4: Purl.
- Bind off. Fold each ear in half and sew the sides together to create a small triangle.
Antlers (make 2, knit in dark brown)
- Cast on 4 stitches.
- Row 1 (RS): Knit.
- Row 2: Purl.
- Row 3 (Increase row): K1, M1, knit to last stitch, M1, K1. (6 sts)
- Row 4: Purl.
- Repeat Rows 3-4 until you have 10 stitches.
- Work even for 4 rows.
- Next row (RS) (Decrease row): K2tog, knit to last 2 stitches, K2tog. (8 sts)
- Purl one row.
- Repeat decrease row. (6 sts)
- Purl one row.
- Bind off. This creates a flat, branching shape. To add a tine, pick up 2 stitches along the side edge, knit 4 rows, then bind off. Repeat on the other side for a second tine.
Body (knit in MC)
- Cast on 12 stitches.
- Row 1 (RS): Knit.
- Row 2: Purl.
- Row 3 (Increase row): K1, M1, knit to last stitch, M1, K1. (14 sts)
- Row 4: Purl.
- Repeat Rows 3-4 until you have 24 stitches.
- Work even in stockinette for 20 rows.
- Next row (RS) (Decrease row): K1, K2tog, knit to last 3 stitches, K2tog, K1. (22 sts)
- Purl one row.
- Repeat decrease row. (20 sts)
- Purl one row.
- Repeat decrease row. (18 sts)
- Purl one row.
- Bind off. This forms the body, which will be seamed at the bottom.
Legs (make 4, knit in MC)
- Cast on 6 stitches.
- Row 1 (RS): Knit.
- Row 2: Purl.
- Row 3 (Increase row): K1, M1, knit to last stitch, M1, K1. (8 sts)
- Row 4: Purl.
- Repeat Rows 3-4 until you have 12 stitches.
- Work even for 12 rows.
- Bind off. Fold each leg in half lengthwise and sew the side seam, leaving the top open for stuffing.
Scarf (knit in CC2)
- Cast on 6 stitches.
- Knit every row in garter stitch (knit all stitches on every row) until the scarf measures 12 inches long.
- Bind off. Add fringe by cutting 4-inch lengths of CC2 and tying them into the ends.
Assembly
Now that all pieces are complete, it's time to bring your forest guardian to life. Follow these steps carefully for a polished finish:
- Attach the muzzle: Sew the muzzle patch onto the front of the head, centered. Embroider a small black triangle for the nose at the top of the muzzle.
- Add the ears: Attach the ears to the top of the head, positioning them slightly to the sides.
- Secure the antlers: Sew the antlers onto the top of the head, behind the ears.
- Stuff and attach the head: Stuff the head firmly and sew the head to the body.
- Finish the body: Stuff the body firmly and sew the bottom seam closed.
- Attach the legs: Attach the legs to the bottom of the body, spacing them evenly.
- Add the scarf: Wrap the scarf around the neck and secure it with a few stitches.
- Embroider the face: Embroider the eyes with black yarn, placing them just above the muzzle, and add a small smile with a few stitches.
- Weave in all ends: Use your tapestry needle to hide any loose yarn ends for a clean, professional finish.
Your Whispering Pine Moose is now complete! This gentle forest guardian will bring a touch of woodland serenity to any space. Whether you keep it for yourself or gift it to someone special, this handcrafted companion is sure to be cherished for years to come. Happy knitting!



