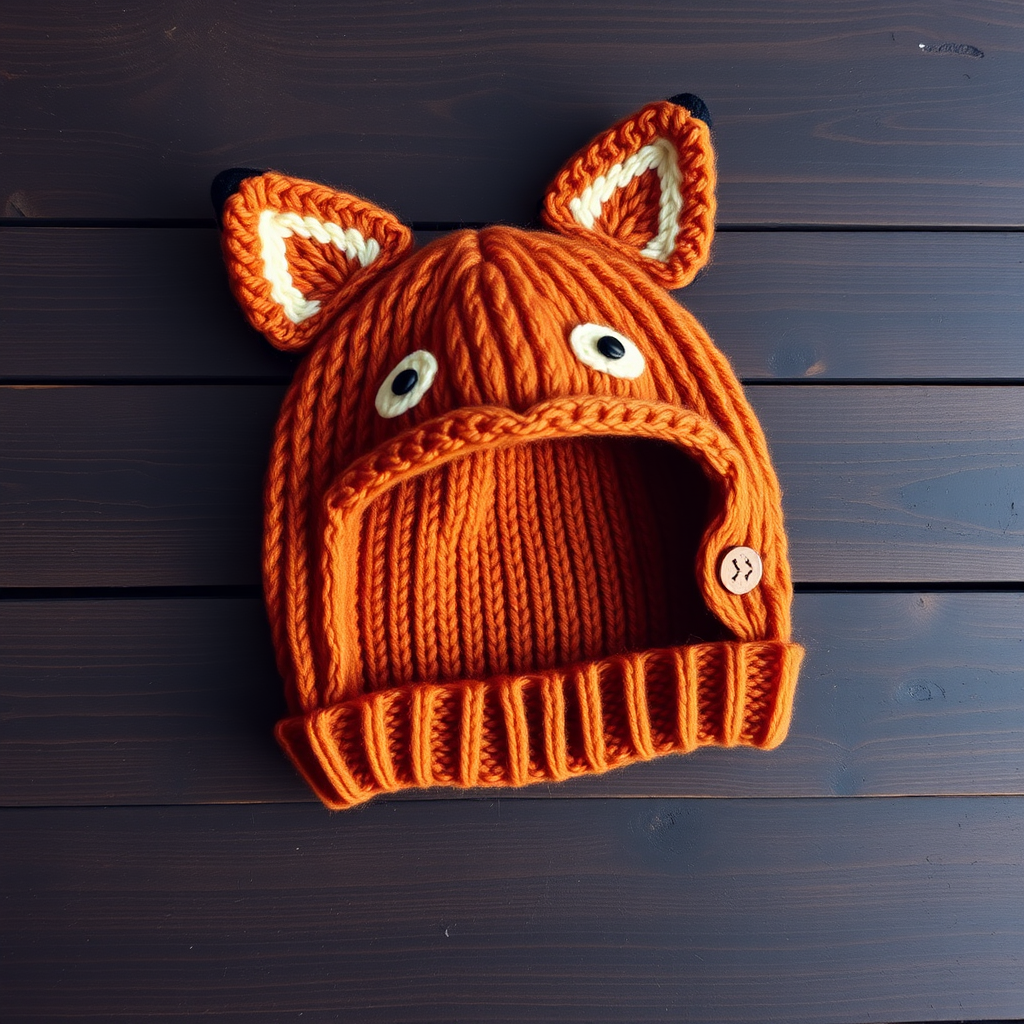
The Whiskered Willow Cat Ear Beanie Free Pattern – Knit a Cozy Feline Fantasy for Little Ones

The Whiskered Willow Cat Ear Beanie: A Cozy Feline Fantasy for Little Ones
There's something undeniably magical about dressing a baby in something handmade—especially when it features tiny cat ears. The Whiskered Willow Cat Ear Beanie is the perfect blend of whimsy and heirloom-quality craftsmanship, designed to wrap your little one in warmth while adding an irresistible dose of feline charm. Knitted in a dreamy palette of dusty rose and cream, this textured cable-and-rib beanie mimics the soft, plush fur of a kitten, making it as delightful to touch as it is to behold.
Whether you're a seasoned knitter looking for a quick, satisfying project or a beginner ready to tackle cables for the first time, this pattern is approachable, detailed, and endlessly rewarding. The result? A cozy, handmade treasure that will be passed down and cherished for years to come.
Materials Needed
Before you begin, gather the following supplies. All materials are readily available at your local yarn shop or online.
- Yarn: Worsted weight yarn (e.g., Lion Brand Wool-Ease) in Dusty Rose (MC) and Cream (CC). You'll need approximately 120 yards of MC and 30 yards of CC.
- Needles: US 7 (4.5 mm) 16-inch circular knitting needle, plus double-pointed needles (DPNs) in the same size for crown shaping.
- Notions: Stitch markers, cable needle, tapestry needle for weaving in ends, and scissors.
- Gauge: 20 stitches and 26 rows = 4 inches in stockinette stitch (knit flat, blocked). Always check your gauge to ensure the correct fit.
Step-by-Step Instructions
Sizes & Measurements
This pattern includes three sizes to fit your growing little one:
- Newborn (0-3 months): Finished circumference 12 inches, height 5.5 inches
- 3-6 months: Finished circumference 14 inches, height 6 inches
- 6-12 months: Finished circumference 16 inches, height 6.5 inches
Instructions are written for the newborn size, with larger sizes in parentheses.
Abbreviations
Familiarize yourself with these standard knitting abbreviations before starting:
- K: Knit
- P: Purl
- K2tog: Knit two stitches together (decrease)
- P2tog: Purl two stitches together (decrease)
- C4F: Slip 2 stitches to cable needle, hold to front, knit next 2 stitches, then knit stitches from cable needle
- C4B: Slip 2 stitches to cable needle, hold to back, knit next 2 stitches, then knit stitches from cable needle
- PM: Place marker
- RM: Remove marker
- st(s): Stitch(es)
- rnd(s): Round(s)
Ribbing Brim
With MC, cast on 72 (84, 96) stitches using the long-tail cast-on method. Join in the round, being extremely careful not to twist your stitches. Place a marker to indicate the beginning of the round.
Work K2, P2 ribbing for 1.5 (1.75, 2) inches. This stretchy brim will create a snug, comfortable fit around your baby's head.
Body: Cable & Rib Pattern
Now it's time to create the beautiful textured body of the beanie. Follow these rounds carefully, repeating the 6-round pattern until you reach the desired length.
- Rnd 1: *K2, P2, K4, P2, K2, P2, K4, P2* – repeat from * to * around (total 6 (7, 8) repeats).
- Rnd 2: *K2, P2, C4F, P2, K2, P2, C4B, P2* – repeat around.
- Rnd 3: *K2, P2, K4, P2, K2, P2, K4, P2* – repeat around.
- Rnd 4: *K2, P2, K4, P2, K2, P2, K4, P2* – repeat around.
- Rnd 5: *K2, P2, C4B, P2, K2, P2, C4F, P2* – repeat around.
- Rnd 6: *K2, P2, K4, P2, K2, P2, K4, P2* – repeat around.
Repeat Rounds 1-6 until the piece measures 4 (4.5, 5) inches from the cast-on edge, ending with Rnd 6. The alternating C4F and C4B cables will create a lovely, dimensional braided effect that mimics a kitten's soft fur.
Crown Shaping (Decrease Rounds)
As you begin decreasing, switch to DPNs when stitches become too few to comfortably fit on the circular needle.
- Rnd 1: *K2, P2, K2tog, K2, P2, K2, P2, K2tog, K2, P2* – repeat around (decreases 2 sts per repeat; 60 (70, 80) sts remain).
- Rnd 2: *K2, P2, K3, P2, K2, P2, K3, P2* – repeat around.
- Rnd 3: *K2, P2tog, K3, P2, K2, P2tog, K3, P2* – repeat around (48 (56, 64) sts).
- Rnd 4: *K2, P1, K3, P1, K2, P1, K3, P1* – repeat around.
- Rnd 5: *K2tog, P1, K3, P1, K2, P1, K3, P1* – repeat around (42 (49, 56) sts).
- Rnd 6: *K1, P1, K3, P1, K1, P1, K3, P1* – repeat around.
- Rnd 7: *K1, P1, K2tog, K1, P1, K1, P1, K2tog, K1, P1* – repeat around (30 (35, 40) sts).
- Rnd 8: *K1, P1, K2, P1, K1, P1, K2, P1* – repeat around.
- Rnd 9: *K2tog, P1, K2, P1, K1, P1, K2, P1* – repeat around (24 (28, 32) sts).
- Rnd 10: *K1, P1, K2, P1* – repeat around.
- Rnd 11: *K2tog, P1, K2, P1* – repeat around (18 (21, 24) sts).
- Rnd 12: *K1, P1, K2tog, P1* – repeat around (12 (14, 16) sts).
- Rnd 13: *K2tog* – repeat around (6 (7, 8) sts).
Cut the yarn, leaving a 10-inch tail. Thread the tail through the remaining stitches, pull tight to close the crown, and secure firmly.
Cat Ears (Make 2)
These adorable triangular ears are worked flat and then sewn onto the crown. With MC, cast on 10 stitches using the long-tail method.
- Row 1 (RS): K all.
- Row 2: P all.
- Row 3: K2tog, K6, K2tog (8 sts).
- Row 4: P all.
- Row 5: K2tog, K4, K2tog (6 sts).
- Row 6: P all.
- Row 7: K2tog, K2, K2tog (4 sts).
- Row 8: P all.
- Row 9: K2tog, K2tog (2 sts).
- Row 10: K2tog (1 st).
Cut the yarn and pull through the last stitch. Weave in the ends.
Finishing Touches
Now for the fun part—bringing your feline fantasy to life!
- Embroider the Face: With CC, embroider a small triangle nose at the center front of the beanie, just above the ribbing, using duplicate stitch or satin stitch. Optionally, add whiskers using backstitch with CC for extra charm.
- Attach the Ears: Sew the ears onto the top of the beanie, positioning them about 1 inch apart at the crown, angling slightly outward for that playful kitten look.
- Weave in Ends: Carefully weave in all remaining yarn ends using a tapestry needle.
- Block Gently: Block the beanie gently to shape, allowing the cables to relax and the fabric to even out.
And there you have it—a Whiskered Willow Cat Ear Beanie that's as cozy as it is cute. This pattern is perfect for baby showers, holiday gifts, or simply treating your own little one to something special. The combination of soft dusty rose, cream accents, and intricate cabling creates a timeless piece that looks store-bought but feels handmade with love.
Happy knitting, and may your little one's adventures be filled with purr-fect warmth!