The Mossy Gnome Keychain: A Free Crochet Pattern for a Textured, Woodland Charm
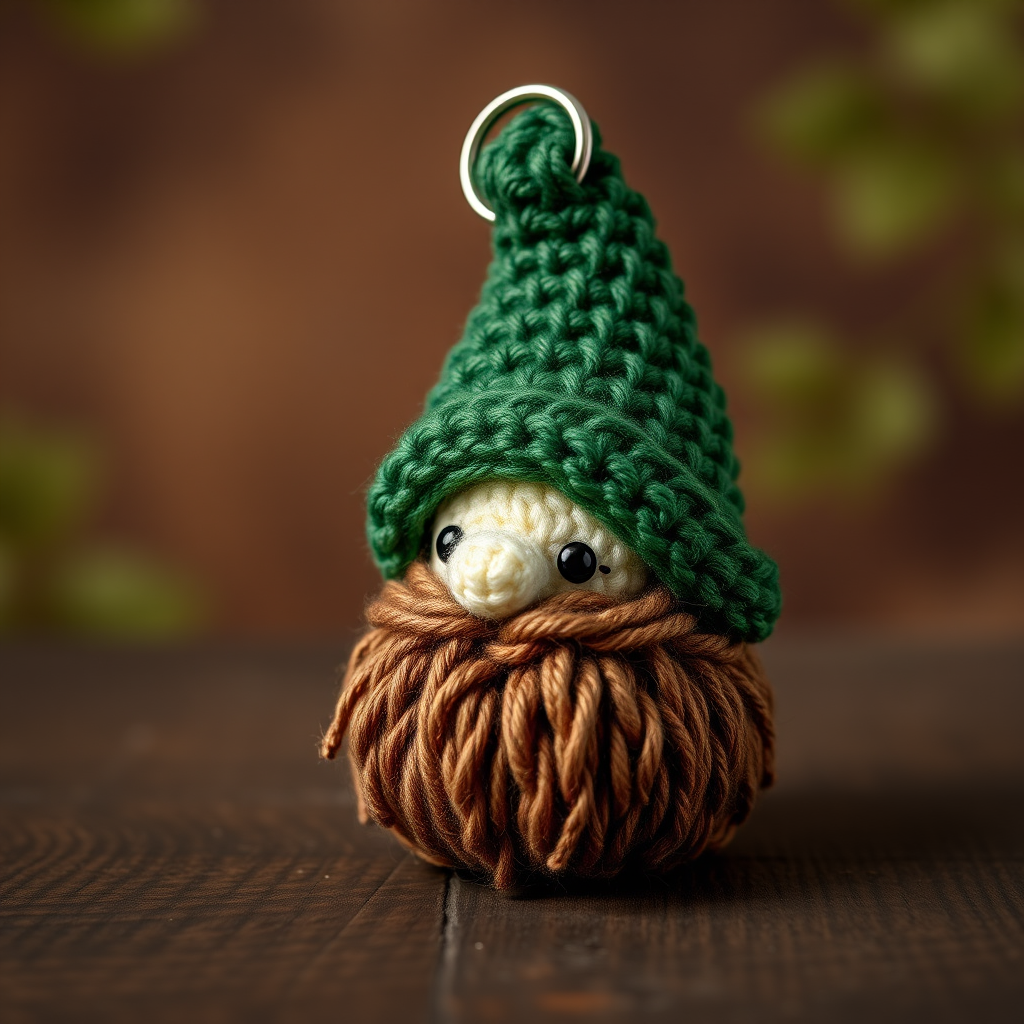
Introducing the Mossy Gnome Keychain
Bring a touch of whimsical woodland magic to your keys with this adorable Mossy Gnome Keychain! This quick and satisfying crochet project is perfect for beginners and experienced crafters alike. The pattern uses textured stitches to create a lush, moss-like beard and a pointed, slightly bent hat, resulting in a charming, nature-inspired accessory that makes a wonderful gift or a little treat for yourself. With just a few basic stitches and a small amount of yarn, you can create a tiny garden gnome that's full of personality.
Materials Needed
To create your own Mossy Gnome Keychain, gather the following materials:
- Yarn: Worsted weight (#4) cotton or acrylic yarn in three colors:
- Forest Green (for the hat)
- Cream (for the face and nose)
- Rust/Brown (for the beard)
- A small amount of black yarn for embroidering the eyes
- Crochet Hook: 3.5 mm (E) crochet hook
- Other Supplies:
- Stitch marker
- Yarn needle for sewing and weaving in ends
- Polyester fiberfill stuffing
- Keychain ring (approx. 1 inch diameter)
- Scissors
Gauge: Gauge is not critical for this project, but aim for tight stitches to prevent the stuffing from showing through. Approx. 5 single crochet stitches per inch.
Step-by-Step Instructions
Abbreviations: ch = chain, sc = single crochet, inc = increase (2 sc in same stitch), dec = decrease (sc 2 together), sl st = slip stitch, st(s) = stitch(es), rnd = round.
Note: Work in continuous rounds unless stated otherwise. Use a stitch marker to track the beginning of each round.
Head (Cream Yarn)
Begin with a magic ring.
- Rnd 1: 6 sc in magic ring. (6 sts)
- Rnd 2: Inc in each st around. (12 sts)
- Rnd 3: (Sc in next st, inc) repeat around. (18 sts)
- Rnd 4-6: Sc in each st around. (18 sts)
- Rnd 7: (Sc in next 4 sts, dec) repeat around. (15 sts)
- Rnd 8: (Sc in next 3 sts, dec) repeat around. (12 sts)
Fasten off, leaving a long tail for sewing. Stuff the head firmly with fiberfill.
Hat (Forest Green Yarn)
Begin with a magic ring.
- Rnd 1: 6 sc in magic ring. (6 sts)
- Rnd 2: Inc in each st around. (12 sts)
- Rnd 3: (Sc in next st, inc) repeat around. (18 sts)
- Rnd 4-5: Sc in each st around. (18 sts)
- Rnd 6: (Sc in next 4 sts, dec) repeat around. (15 sts)
- Rnd 7: Sc in each st around. (15 sts)
- Rnd 8: (Sc in next 3 sts, dec) repeat around. (12 sts)
- Rnd 9: Sc in each st around. (12 sts)
- Rnd 10: (Sc in next 2 sts, dec) repeat around. (9 sts)
- Rnd 11-12: Sc in each st around. (9 sts)
- Rnd 13: (Sc in next st, dec) repeat around. (6 sts)
- Rnd 14: Sc in each st around. (6 sts)
Fasten off, leaving a long tail for sewing. Do not stuff the hat. Fold the tip of the hat slightly to one side and sew a few stitches through the tip to hold the bend in place.
Beard (Rust/Brown Yarn)
The beard is worked in rows, not rounds, to create a textured, shaggy look.
- Row 1: Ch 11, sc in 2nd ch from hook and across. (10 sts)
- Row 2: Ch 1, turn, sc in each st across. (10 sts)
- Row 3: Ch 1, turn, (sc in next st, ch 3, sl st in same st) repeat across. This creates loops for a mossy texture. (10 loops)
Fasten off, leaving a long tail for sewing.
Nose (Cream Yarn)
Begin with a magic ring.
- Rnd 1: 6 sc in magic ring. (6 sts)
- Rnd 2: Sc in each st around. (6 sts)
Fasten off, leaving a tail for sewing. Stuff the nose lightly with a tiny amount of fiberfill.
Assembly
- Attach the hat: Sew the hat onto the top of the head, aligning the bottom edge of the hat with Round 6 of the head. The hat should sit slightly tilted to one side, matching the bent tip. Use the long tail from the hat to sew it securely in place.
- Attach the beard: Sew the beard onto the lower half of the face, covering from approximately Round 4 to Round 8. The looped edge (from Row 3) should point downward, creating the shaggy beard effect. Use the long tail from the beard to sew it in place.
- Attach the nose: Sew the nose onto the center of the face, just above the top edge of the beard. Use the tail from the nose to sew it securely.
- Embroider the eyes: Using the black yarn and a yarn needle, embroider two small French knots or straight stitches for eyes. Place them above the nose, about 2-3 stitches apart.
- Attach the keychain ring: To attach the keychain ring to the top of the hat, create a small loop: with the Forest Green yarn, ch 6, then sl st to the base of the chain at the top of the hat. Fasten off and weave in the ends. Alternatively, you can simply sew a small loop of yarn through the top of the hat and attach the ring.
- Weave in ends: Use a yarn needle to weave in all remaining yarn tails securely, trimming any excess.
Finishing
Your Mossy Gnome Keychain is now complete! For extra woodland charm, you can optionally add a tiny acorn or leaf motif to the hat using a small amount of contrasting yarn. This little gnome is about 3 inches tall and makes a delightful addition to your keys, bag, or backpack. Enjoy your handmade, nature-inspired accessory!



