The Aurora Borealis Double Layer Ear Warmer Free Pattern – A Knitted Ode to Arctic Skies
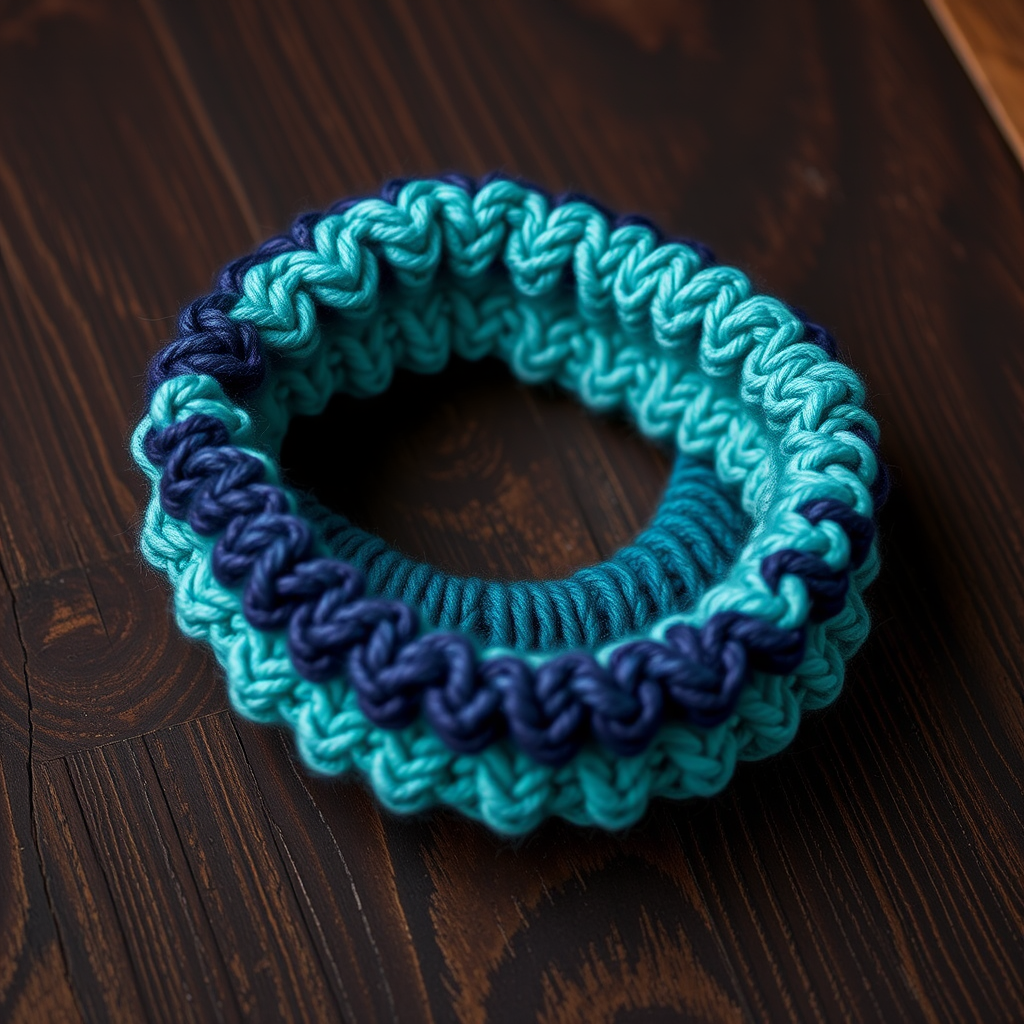
The Aurora Borealis Double Layer Ear Warmer Free Pattern – A Knitted Ode to Arctic Skies
Wrap your ears in the swirling, celestial hues of the northern lights with this plush, double-layer knitted ear warmer. Its reversible, textured bands and soft, chunky yarn make it the ultimate cozy companion for frosty adventures. Whether you're braving a winter commute or simply sipping hot cocoa by the window, this ear warmer adds a touch of arctic magic to any outfit. The pattern is beginner-friendly, uses simple knit and purl stitches, and creates a thick, luxurious band that feels as good as it looks.
Inspired by the shimmering curtains of the aurora borealis, this design features three stunning colors—deep teal, midnight purple, and soft mint—knitted into a subtle wave texture. The double-layer construction ensures maximum warmth, while the optional Mobius twist adds a modern, stylish flair. Let's dive into this enchanting project!
Materials Needed
Before you begin, gather the following supplies. All items are readily available at your local yarn shop or online.
- Yarn: Worsted weight yarn in 3 colors:
- Color A (Deep Teal) – approximately 120 yards
- Color B (Midnight Purple) – approximately 120 yards
- Color C (Soft Mint) – approximately 120 yards
- Needles: US 8 (5.0 mm) 16-inch circular knitting needle, or straight needles if preferred. (Straight needles work perfectly for this flat-knit pattern.)
- Notions: Stitch markers (optional, but helpful), tapestry needle for weaving in ends and seaming.
- Gauge: 18 stitches and 24 rows = 4 inches in stockinette stitch. Adjust needle size to achieve gauge for the perfect fit.
Step-by-Step Instructions
This ear warmer is knit flat in two layers that are joined at the ends, creating a thick, reversible band. The pattern uses a simple combination of knit, purl, and slipped stitches to create a subtle wave texture reminiscent of the aurora's dance. Follow along carefully, and you'll have a beautiful, cozy accessory in no time.
Abbreviations
- CO: Cast on
- K: Knit
- P: Purl
- Sl: Slip stitch purlwise (unless otherwise noted)
- K2tog: Knit two stitches together
- Rep: Repeat
- St(s): Stitch(es)
- BO: Bind off
- wyif: With yarn in front (yarn held to the front of the work)
- wyib: With yarn in back (yarn held to the back of the work)
Layer 1 (Outer Layer – Aurora Waves)
This layer features the stunning wave texture that mimics the dancing northern lights. The slipped stitches create a subtle, rippled effect that catches the light beautifully.
Step 1: With Color A (Deep Teal), CO 24 sts.
Step 2: Row 1 (RS): K all.
Step 3: Row 2 (WS): P all.
Step 4: Row 3: K2, *Sl 2 wyif, K2; rep from * to end. (This means: knit 2, then slip 2 stitches with the yarn held in front, then knit 2. Repeat this sequence across the row.)
Step 5: Row 4: P2, *Sl 2 wyib, P2; rep from * to end. (Purl 2, slip 2 with yarn in back, purl 2. Repeat across.)
Step 6: Row 5: K all.
Step 7: Row 6: P all.
Step 8: Row 7: Switch to Color B (Midnight Purple). K all.
Step 9: Row 8: P all.
Step 10: Row 9: K2, *Sl 2 wyif, K2; rep from * to end.
Step 11: Row 10: P2, *Sl 2 wyib, P2; rep from * to end.
Step 12: Row 11: K all.
Step 13: Row 12: P all.
Step 14: Row 13: Switch to Color C (Soft Mint). K all.
Step 15: Row 14: P all.
Step 16: Row 15: K2, *Sl 2 wyif, K2; rep from * to end.
Step 17: Row 16: P2, *Sl 2 wyib, P2; rep from * to end.
Step 18: Row 17: K all.
Step 19: Row 18: P all.
Step 20: Rep Rows 3-18 until piece measures approximately 20 inches (or desired head circumference minus 2 inches for overlap), ending with a complete color sequence (finish with Color C). BO all sts loosely.
Pro Tip: To ensure your ear warmer fits perfectly, measure the recipient's head circumference. The finished band should be about 2 inches smaller than the head measurement to allow for a snug, comfortable fit. The stretch of the knit will accommodate the rest.
Layer 2 (Inner Layer – Soft Ribbing)
This layer provides a smooth, stretchy, and comfortable surface against your skin. The ribbed pattern adds elasticity and warmth.
Step 1: With Color A (Deep Teal), CO 24 sts.
Step 2: Row 1 (RS): K1, P1; rep from * to end. (Knit 1, purl 1, repeat across the row.)
Step 3: Row 2 (WS): P1, K1; rep from * to end. (Purl 1, knit 1, repeat across. This creates a classic ribbing pattern.)
Step 4: Rep Rows 1-2 until piece measures the same length as Layer 1 (approximately 20 inches). BO all sts loosely.
Joining the Layers
Now it's time to bring the two layers together to create a thick, reversible band. This step is simple and requires only a tapestry needle and some patience.
Step 1: Place the two layers together with wrong sides facing. The outer layer's textured side should face out, and the inner ribbing should face in. Align the cast-on edges and bind-off edges carefully.
Step 2: Using a tapestry needle and Color A yarn, whip stitch the two layers together along the long edges. Leave the short ends open for now. (A whip stitch is a simple over-and-over stitch that joins the edges securely.)
Step 3: Fold the band in half so the short ends meet. Seam the short ends together to form a circle. Use the same whip stitch technique, ensuring the seam is neat and secure.
Step 4: Weave in all loose ends with the tapestry needle. Trim any excess yarn.
Optional Twist (Mobius Style)
For a stylish, modern look, try this fun variation:
Before seaming the short ends, give the band a half-twist (like a Mobius strip). This creates a beautiful crossover effect at the front of the ear warmer, adding visual interest and a touch of sophistication. Simply twist the band once, then seam the short ends together as described above. The result is a chic, twisted design that's sure to turn heads.
Beginner's Note: If you're new to knitting, don't worry! This pattern is forgiving and easy to master. The slipped stitches may seem tricky at first, but they're simply a matter of moving stitches from the left needle to the right needle without knitting them. Practice on a small swatch first if you're unsure.
Final Thoughts
Once you've completed your Aurora Borealis Ear Warmer, you'll have a stunning, handcrafted accessory that's both functional and beautiful. The double-layer design ensures your ears stay toasty warm, while the vibrant colors and textured waves evoke the magic of the northern lights. This pattern makes a wonderful gift for loved ones or a delightful treat for yourself.
We'd love to see your finished creations! Share your photos on social media with the hashtag #AuroraEarWarmer and tag us. Happy knitting, and may your days be filled with cozy, colorful warmth!


