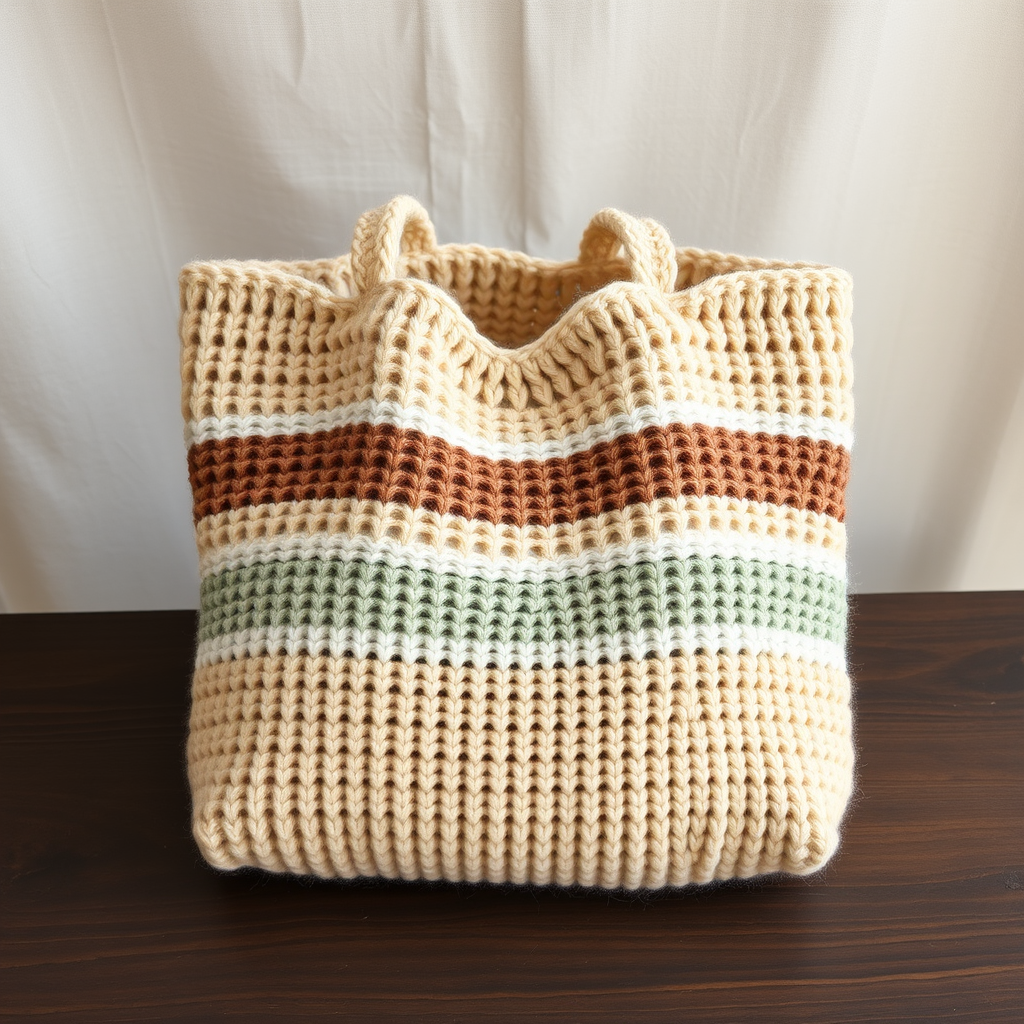
Rustic Harvest Market Tote Free Pattern – Knit a Textured Farmhouse Carryall

Knit the Rustic Harvest Market Tote: A Cozy Farmhouse Carryall
There’s something deeply satisfying about knitting a bag that’s both beautiful and useful. The Rustic Harvest Market Tote is exactly that—a textured, earthy carryall that feels like a warm hug on a crisp autumn day. With its chunky ribbed panels, smooth cream center, and sturdy double-thickness straps, this tote is perfect for farmers market hauls, library books, or everyday essentials. Best of all, it’s knitted flat in simple panels, making it an approachable project for confident beginners and a relaxing one for seasoned knitters.
In this free pattern, you’ll learn to create a classic rectangular tote with a rich, woven texture using just knit and purl stitches. The color palette—terracotta, olive green, and cream—brings a rustic, farmhouse charm that complements any season. Let’s gather your materials and get started!
Materials Needed
Before you cast on, make sure you have everything ready. This pattern calls for:
- Yarn: Worsted weight cotton or cotton-blend yarn (approx. 400–500 yards total) in three warm earthy tones:
- Terracotta (for base, straps, and bottom/top bands)
- Olive green (for middle ribbed bands)
- Cream (for the smooth central band)
- Needles: US 7 (4.5 mm) knitting needles
- Notions: Tapestry needle for seaming and weaving in ends, scissors, stitch markers (optional)
- Gauge: 20 stitches and 26 rows = 4 inches in stockinette stitch (after blocking). Always check your gauge to ensure the finished bag is the right size.
Tip: Cotton yarn has little stretch, so it’s ideal for a sturdy bag that holds its shape. Choose a soft yet durable cotton blend for comfort and longevity.
Step-by-Step Instructions
This tote is knitted flat in three main panels (front, back, and base) and then seamed together. The straps are knitted separately and attached. Follow each section carefully, and you’ll have a beautiful, functional bag in no time.
Panel 1: Front Panel
Cast on: With terracotta yarn, cast on 40 stitches.
Row 1 (Right Side): *K2, P2* repeat from * to end of row.
Row 2 (Wrong Side): *P2, K2* repeat from * to end of row.
Repeat Rows 1 and 2 for 2 inches, ending with a wrong-side row. This creates the ribbed bottom band.
Switch to olive green yarn. Continue in the same K2, P2 rib pattern for another 2 inches. This creates the first textured green band.
Switch to cream yarn. Now work in stockinette stitch (knit on the right side, purl on the wrong side) for 6 inches. This smooth central band provides a lovely contrast to the ribbed sections.
Switch back to olive green yarn. Work in the K2, P2 rib pattern for 2 inches.
Switch to terracotta yarn. Work in the K2, P2 rib pattern for the final 2 inches.
Bind off loosely in pattern (knit the knits and purl the purls as you bind off). Set this panel aside.
Panel 2: Back Panel
Work exactly as the front panel. This ensures your bag is symmetrical and balanced.
Base Panel
Cast on: With terracotta yarn, cast on 40 stitches.
Row 1: Knit all stitches.
Repeat this garter stitch row (knit every row) for 8 inches. This creates a sturdy, flat base for your tote.
Bind off all stitches.
Straps (Make 2)
Cast on: With terracotta yarn, cast on 8 stitches.
Row 1: Knit all stitches.
Row 2: Purl all stitches.
Repeat these two rows (stockinette stitch) for 24 inches, or until the straps reach your desired length. Remember, you’ll fold them in half, so they’ll be about 12 inches long when doubled—perfect for carrying over your shoulder or by hand.
Bind off all stitches. Repeat for the second strap.
Assembly: Seaming It All Together
Now comes the satisfying part—watching your tote take shape!
Step 1: Sew the side seams. Place the front and back panels with right sides together. Using a tapestry needle and matching yarn (terracotta works well), sew the side seams using a mattress stitch. This creates an invisible, sturdy seam. Leave the top and bottom edges open.
Step 2: Attach the base panel. With right sides together, pin the base panel to the bottom edges of the front and back panels. Match the cast-on and bind-off edges carefully. Sew all around the base using a whip stitch or mattress stitch, ensuring the corners are secure.
Step 3: Turn the tote right side out. Gently push the corners out to create a crisp, rectangular shape.
Step 4: Prepare the straps. Fold each strap in half lengthwise with wrong sides together. Sew the long edges together using a whip stitch to create a double-thickness strap. This makes them extra strong and comfortable.
Step 5: Attach the straps. Position each strap on the inside of the tote, about 3 inches from the side seams. Make sure the straps are evenly spaced and not twisted. Sew them securely using a whip stitch, then reinforce with an X-stitch for extra strength. This is crucial for supporting the weight of your groceries or books.
Step 6: Weave in all ends. Use your tapestry needle to hide any loose yarn ends inside the bag. Trim any excess.
Finishing Touches & Care
Your Rustic Harvest Market Tote is now complete! To give it a polished look, gently block the bag by wetting it and laying it flat to dry, shaping it as needed. This helps even out the stitches and relaxes the cotton yarn.
To care for your tote, hand wash in cold water with mild detergent and lay flat to dry. Avoid machine washing, as it can distort the shape.
Why You’ll Love This Pattern
This tote is more than just a bag—it’s a statement of cozy, sustainable living. The textured ribbing and earthy tones make it a versatile accessory that pairs beautifully with jeans, linen dresses, or your favorite fall coat. Plus, knitting it flat means you can easily customize the size by adjusting your cast-on count or the length of the panels.
Whether you’re knitting it for yourself or as a heartfelt handmade gift, the Rustic Harvest Market Tote is a project you’ll be proud to carry. So grab your yarn, settle into your favorite chair, and enjoy the rhythm of the needles. Happy knitting!