Amigurumi Patterns
Magical Mandrake Amigurumi Free Pattern
Anonymous
•
July 03, 2026
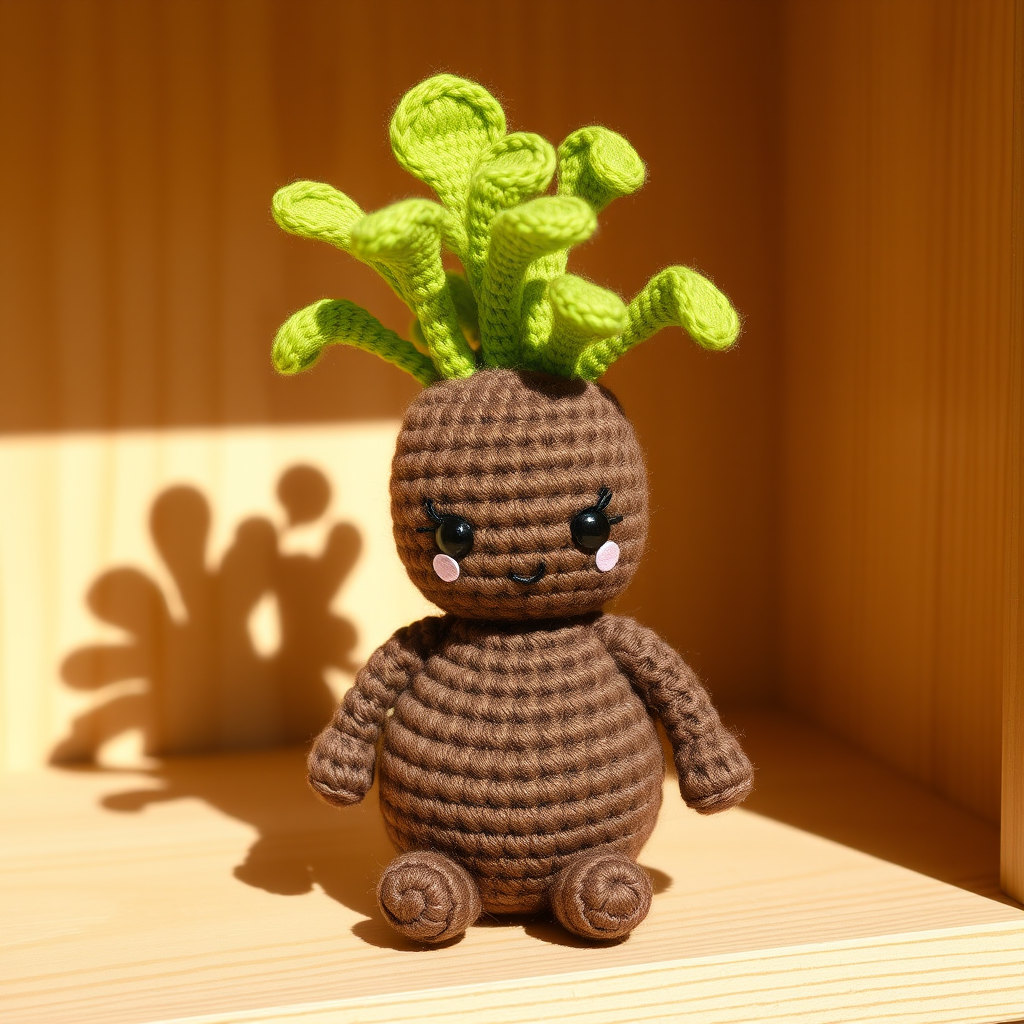
Magical Mandrake Amigurumi Free Pattern
Introduction
Bring a touch of whimsy to your crafting with this enchanting Mandrake amigurumi. Perfect for plant lovers and fantasy enthusiasts alike, this project is a delightful addition to any collection. With its charming expression and vibrant green leaves, the Magical Mandrake is sure to be a favorite among your handmade treasures!
Materials Needed
- Worsted weight cotton yarn in shades of brown and green
- 3.5mm crochet hook
- Fiberfill stuffing (for stuffing the Mandrake)
- Black yarn (for embroidery)
- Scissors
- Tapestry needle (for sewing and embroidery)
Step-by-Step Instructions
Body of the Mandrake
- Start with a magic ring: Create a magic ring and secure it with a slip knot.
- Round 1: Work 6 single crochets (sc) into the magic ring. (You should have 6 stitches total.)
- Round 2: Increase by placing 2 sc in each stitch around. (You should have 12 stitches total.)
- Round 3: *1 sc in the next stitch, 2 sc in the following stitch*; repeat from * to * around. (You should have 18 stitches total.)
- Rounds 4-6: Work 1 sc in each stitch around for 3 rounds. (You should still have 18 stitches total.)
- Round 7: *1 sc in the next stitch, sc2tog (single crochet two together)*; repeat from * to * around. (You should have 12 stitches total.)
- Round 8: Work sc2tog around. (You should have 6 stitches total.)
- Stuff the body: Lightly stuff the body with fiberfill before closing it up.
- Fasten off: Cut the yarn and pull it through the last stitch to secure it.
Leaves
- Using green yarn: Chain (ch) 6.
- Row 1: Single crochet (sc) in the 2nd chain from the hook.
- Row 2: Half double crochet (hdc) in the next chain.
- Row 3: Double crochet (dc) in the next chain.
- Row 4: Half double crochet (hdc) in the next chain.
- Row 5: Single crochet (sc) in the last chain.
- Fasten off: Cut the yarn and pull it through the last stitch to secure it.
- Repeat: Make 3-4 leaves total.
- Sew leaves: Attach the leaves to the top of the Mandrake's head using your tapestry needle.
Face
- Embroider the face: Using black yarn, embroider small eyes and a tiny mouth to give your Mandrake its charming expression.
Conclusion
Your Magical Mandrake Amigurumi is now complete! This delightful little creature stands approximately 4 inches tall and is sure to bring a smile to anyone who sees it. Enjoy your crafting journey and feel free to experiment with different colors and expressions!



